Sunday, February 27, 2011

Mango and Orange Jelly

A cool refreshing jelly dessert. Great for after meals or simply to snack, on a hot afternoon.  This will be a definite hit with the kids, and adults too! Serve this really chilled to the kids when they are back from school on a hot day, surprise them and see their smile, just like sunshine, as in the colour of the jelly! 


Perfect for a get together party or just any party. Nobody could resist taking a piece of this beautiful looking jelly! 


I'm linking this lovely dessert with :


The gelling ability of Agar-agar powder may varies, depending on the brands. Refer to the instructions as to the amount needed in proportion to the quantity of liquid used. Adjust accordingly. 

Mango and Orange Jelly
Top Layer
180gm cubed mango flesh from about 1 large ripe mango
2 cups (500ml) orange juice, unsweetened
1/2 cup caster sugar, or to taste
1-1/2 tablespoons agar-agar powder
1/2 teaspoon orange essence

Bottom Layer
1 cup (250ml) fresh cream
2 cups (375ml)  water
1-1/2 tablespoons agar-agar powder
1/2 cup caster sugar, or to taste
1/2 teaspooon pandan essence
a pinch of salt

  1. To make top layer : Place mango and half of orange juice in a blender and puree till mixture is smooth. Pour into a deep saucepan and mix in the remaining of the orange juice. Stir to evenly combined.
  2. Scatter the agar-agar powder over the mango and orange juice mixture and stir well.  Bring to a boil over medium heat, stirring constantly for about 5 minutes. Add sugar to taste, depending on the sweetness from the mango and orange juice, adjust the amount of sugar to your liking and continue to stir until completely dissolves. Add the orange essence.
  3. Remove from heat and pour  into a 9" cake pan. Leave to set. Small jelly moulds or any moulds may be used, filling only about half full.
  4. To make bottom layer : Combine fresh cream and water in a deep saucepan. Scatter the agar-agar powder on top and stir to combine. Add in sugar, pandan essence and salt. Bring to boil over medium heat for about 4-5 minutes.
  5. Remove from heat and pour mxiture over the top layer gently.  Set aside to cool and store in refrigerator, covered, until fully set. 
  6. To serve, turn Mango Agar-Agar onto serving plate. Sliced to desired size or use a jelly or a deep cookie cutter to form shapes. Serve it well chilled.  Enjoy!

Friday, February 25, 2011

Traditional "Ice Cream Malaysia"

I have some leftover Pulut Hitam (recipe from previous post) and what comes to mind? Ice cream! Yup, this is our very own traditional ice cream which is truly one of a kind. This fabulous ice cream can hardly be found in it's original packing anymore. They are now being produced commercially in modern, convenient packs. Nowadays, our children are spoilt with choices of hundreds of different flavoured ice cream complete with sauces and toppings!


This ice cream was very popular in Malaysia and I believe in Singapore too, at the time when I was young, more than three decades ago! We have always call this "Ice Cream Malaysia" ever since I can remember. Maybe to distinguish the difference between our own local ice cream and the ones adopted from the western countries. Over the years, this ice cream has been "upgraded" to what is popularly  now known as "Ais Krim Potong", directly translated as "Cut Ice Cream".  The plastic packing has been changed to a popsicle style ice cream on a stick. The closest that we can find this traditional style ice cream are the ones sold at the "pasar malam' (night market), ice cream with the local flavours such as Pulut Hitam, Red Bean, Durian, Green Bean and Corn, which are made in a large tray,  are then cut into rectangular shapes when frozen, hence it is called "Ais Krim Potong" (Cut Ice Cream) and only poked through mid-way with an ice cream stick upon buying them. 

Here's a story of a little 'entrepreneur"! When I was in my teens, and we moved from the village to an apartment, suddenly we have this new fridge which we never had before! I was very excited and did not waste time in making ice cream as my little business during the school holidays mainly because I was bored with the ones sold in the shops and I knew that the ones I made will be well received! I made various flavoured ice cream like Red Bean, Green Beans, Milo, Pineapple, Wheat Grain and a few other yummy flavours. Sold them at 10 cents each! Business was good.....better than the orange and strawberry flavoured with artificial colouring, the ones sold at the mini market downstairs! He! He! Frequent knocking at my front door for my ice cream, when my sister takes her daily afternoon nap, soon irritated her so much, and my mom has got no space to freeze her meat in the freezer that was full of my ice cream, which I replenished real fast! So that's the end of my ice cream business after a few weeks of successful business venture! It was fun actually, earning my own money through hard work! My sister still teases me now and then about my "little ice cream business"! It is fun to laugh about the good old days!

Hopefully, my kids will remember and have fond memories of this ice cream as I have. I'm going to make more of this with various flavours that I have done before, I actually miss making these, which are rather fun to make. The special plastic bag for this ice cream are still being sold, it is now used for packing chili sauce and other sweet sauce by most hawker stalls around here.  I'm really looking forward to make more of this so that my kids can share with their cousins when they visit, hopefully they too will continue on with this "old fashion but not forgotten" ice cream with their own children.

To make this delicious ice cream, you can keep your ice cream maker aside! We do it the traditional way, with just a pot and a stove, here goes :

There's no particular recipe for this, just taste as you cook it and adjust the sweetness and amount of coconut milk that you like. Here's a guide on how much of sugar and coconut milk that I used :


 The leftover "Pulut Hitam" (Black Glutinous Rice), about 2-1/2 cups. (Refer to my previous post on how to cook Pulut Hitam)


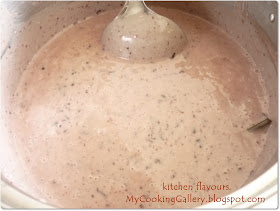
 I add about 1/4 cup sugar as the leftover Pulut Hitam was already sweetened, just a little amount of water (about 1/4 cup). Cook over a stove till sugar melts. Add about 2 cups thick coconut milk and remove from heat as soon as it starts to boil. Cool uncovered or partially covered to room temperature.


 Special plastic bags for making these ice creams


 Use a funnel to pour the ice cream into the plastic bag,  three quarters full, which is about half a cup.


Tie the other end into a knot and freeze overnight in the freezer.


 Ice Cream Malaysia, frozen, ready to be enjoyed! Just cut the top of the plastic bag with a pair if scissors (or do it the fun way, just bite the plastic off!) and enjoy it direct from the plastic by slowly nibbling and chewing the delicious taste of the "Pulut Hitam" and the creamy taste of the coconut. 


Or just, slide the whole stick of ice cream into a cup, squash lightly with a spoon and enjoy by the spoonfuls!


The texture of this ice cream is not like the ones which you will find in David Lebovitz's recipes. No! Definitely not the same. Homemade Ice Cream Malaysia has a creaminess of its own. There are basically three main ingredients, the main flavour (Pulut Hitam, Red Bean, Corn, etc...), sugar and thick coconut milk. This ice cream is like the version of creamy granitas! That's as close to the description that I can think of! Any closer to how it actually taste like, well, you just have to try them out yourself.

If using beans like Red Beans, Mung Beans or Pulut Hitam, these needed to be cooked with some water until mushy and soft. Try not to add more water than necessary as the more water it contains, the less creamier the ice cream will be. Add sugar to taste and lastly add the thick coconut milk, cook till it starts to boil and remove from heat. Do not boil it over a long period of time after adding the thick coconut milk, as  the oil from the coconut milk will start to get separated from the milk, and you would not want that! That is the reason, the coconut milk is always added in last. Instead of freezing these in  the special plastic bags, they can be frozen in the popsicle mould too. Have fun making this and enjoy!

My favourite flavours are Pulut Hitam, Mung Bean and Corn. Yummy! My kids are already asking what flavour am I making next!  Maybe in a couple of weeks time, perhaps corn, kinda miss it! Too much of coconut milk is definitely not healthy, a treat once in a while is alright!

To my fellow Malaysian blogger friends out there, when was the last time you had this?  I'm sure you would have your special memories of  "Ice Cream Malaysia"  too! Come and share with us!


Monday, February 21, 2011

Pulut Hitam

Pulut Hitam (black glutinous rice) with coconut milk is a popular dessert in Malaysia. This dessert brings back happy memories when we were little. A Chinese lady with a few big pots in her little tricycle will go round the village selling this and a few other desserts like bubur trigu (wheat grains), kacang hijau (mung bean) and kacang merah (red beans).  Sometimes we would mixed them all together in a bowl, really good! These are topped with fresh, creamy coconut milk with some salt added.


This is another bowl that was handpainted by my sister! It's beautiful and I love it!


 Get the good quality pulut hitam, they will be starchy and creamy when cooked and delicious.


Pulut Hitam (Black Glutinous Rice) is also very popular in other Asian countries.  These can be cooked directly in a pot over a stove, but you need to watch the fire and stir every now and then, as the bottom can be easily burned as they contain starch. Furthermore, additional water needed to be added in as it evaporates during the cooking process. In conclusion, you need to be very patient, especially in stirring, when cooking this over the stove. So to avoid this, I usually cook this in the slow cooker. I just need to stir only once or twice and do not have to add any water.


Fresh creamy coconut milk is a definite must! You can still have your pulut hitam without the coconut milk, but it will not be the same! My mom used to buy freshly grated coconut and she would add just a little amount of boiled cooled water, mix well and squeezed out the milk over a strainer into a bowl. A big pinch of salt is added into the milk and stir till the salt is dissolved. Keep refrigerated until needed. Now, I buy freshly squeezed coconut milk directly from the store, it is really convenient as they are easily obtainable over here.


Just top with 2-3 tablespoons of coconut milk over the top when served.


This is great for tea-time for a change.  The family would usually enjoy this together. It can be eaten either hot or cold.

Pulut Hitam (Black Glutinous Rice)
(serves 4 to 5)
1 cup pulut hitam (black glutinous rice)
8 cups boiling water (or hot water)
2/3 cup sugar (more or less, to taste)
thick coconut milk from 1 fresh grated coconut
big pinch of salt
2 pandan leaves (screwpine leaves), knoted


  1. Wash pulut hitam (black glutinous rice) until water runs clear. 
  2. Put into a slow cooker and add 8 cups boiling water. Cover and cook on high for 2 hours.
  3. Stir and add in pandan leaves and sugar to taste. Cover and continue to cook on high for another hour.
  4. Meanwhile, squeeze grated coconut over a strainer into a bowl. If you are using your hands to squeeze manually, add about 1/4 cup boiled cool water to the grated coconut, mix to combine and squeeze out milk. I bought freshly squeezed coconut milk from the shop as fresh coconut milk is easily obtained over here. I need to strain the milk as there may be some grated coconut bits in the milk. Add a big pinch of salt to the milk and stir till salt is dissolved. The milk should be slightly salty. Cover and keep refrigerated until ready to use. 
  5. To serve, scoop some pulut hitam into a bowl and top with about 2  to 3 tablespoon of coconut milk. Stir to combine and enjoy!

Friday, February 18, 2011

Baked Chicken Wing With Rosemary and Sesame Seeds

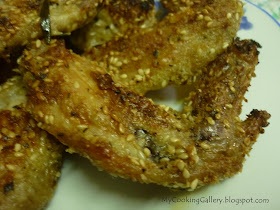
Rosemary and Sesame Seeds? It doesn't sound like they belong together do they? But they do!  The smell of rosemary fills the kitchen (and the house!) when the chicken is being baked in the oven, and the sesame seeds add the nutty  aroma and nice crispy crunch. During the last 5 minutes of baking, I turned the oven to "grill setting" and the result is really crispy wings. There's no frying, no messy greasy pan to clean, no oily greasy stove to wipe and no wastage of oil from the deep-frying! 


I'm a wing person! I really love chicken wing, be it in curry, fried, baked, roasted, steam, anything, I would usually go for the wings. But my favourite is crispy wing! Yum!


I'm linking this to
Full Plate Thursday at Miz Helen's Country Cottage
Recipe Swap Thursday at Prairie Story

Baked Chicken Wing With Rosemary and Sesame Seeds
Ingredients :
8 large wings (cut into two at joint)
1  tsp garlic salt, or to taste
1/2 tsp paprika
1/2 tsp coarse black pepper
3 tbsp white sesame seeds
2 tbsp fresh rosemary leaves, chopped
2 whole sprigs fresh rosemary
1/2 cup bread crumbs
2 tbsps cooking oil
2-3 tbsp butter

  1. Preheat the oven to 200C. Line a cookie baking sheet with aluminium foil. (it's easier to clean your baking sheet later!).  Rub all over with 2 tablespoons cooking oil.
  2. Place the two rosemary sprigs on pan in two rows horizontally. Keep aside.
  3. Clean the chicken wings, cut at joint into halves, drain and pat dry with kitchen towel.
  4. Meanwhile, in a medium sized bowl, combine garlic salt, paprika, coarse black pepper, sesame seeds, chopped rosemary leaves and bread crumbs together, mixing well to combine. Taste for saltiness. Add more salt if needed.
  5. Put half of the combined seasoning into a big plastic bag. Add half of the chicken wings, hold the opening of the bag and twist with the other hand to create a balloon pack. Shake bag and coat chicken wing completely with the seasoning. (You may use a zip-lock bag to do this, but I prefer the above 'balloon pack' bag method). Place chicken wing in one layer on top of the rosemary sprigs on baking pan. Repeat with the remaining of the seasoning and the chicken wings.
  6. Dot the wings with butter and bake for 25-30 minutes in the middle rack, turn chicken over, baste with the accumulated juices and bake for another 15 minutes.
  7. Change baking pan position to the top rack and change oven setting to 'grill'. Grill for about 4-5 minutes or until chicken is crispy and brown. Turn chicken over, grill for about 4-5 minutes or until crispy and brown, adding a little butter if necessary.
  8. Remove pan from oven, let rest 2-3 minutes and serve hot. Enjoy!


Thursday, February 17, 2011

Chicken Porridge

Nothing like home-cooked porridge. Or congee? Over here in Malaysia, this savoury rice dish is called porridge. This simple Chicken Porridge is a real favourite in my house. The garnishing of spring onions, crispy fried shallots and white pepper powder are an absolute must with this porridge, at least in my house!  I cooked this for the kids' after school lunch. They had seconds. Satisfied look on their faces showed that they have enjoyed their meal!


 This lovely bowl was handpainted by my sister back in 2004! Love this bowl!


(serves 3 to 4)
Ingredients :
half a chicken (keep the wing for other uses)
1-1/4 cup rice, washed and drain
3 litres water
2 slices ginger
3-4 nos spring onion, white part only, crushed lightly
salt to taste
1 tsp chicken stock powder
spring onions, chopped for garnishing
crispy fried onions, for garnishing
3-4 slices young ginger, cut to julienne strips, for garnishing
dash of white pepper
a few drops of sesame oil (optional)
a few drops of light soy sauce
  1. Boil water in deep stock pot, add in ginger slices, crushed spring onions and salt. When water comes to a boil, add in whole half chicken. Turn heat to medium and boil for about 35-40 minutes until chicken is cooked and tender. Remove chicken from pot and drain, let cool.
  2. Put rice in chicken stock, add the chicken stock powder and simmer over low fire for about an hour, adding hot water when it appears too thick and stirring constantly to avoid burning at the bottom of pot. 
  3. Meanwhile, separate the chicken meat from the bones. Discard the skin. You may shred the chicken meat or chop them up to small pieces. (I prefer chopped meat). Add the meat to the porridge above and continue to cook for another half an hour or so, adding hot water when necessary, stirring, until the desired consistency of the porridge is obtained. (I like the grains mushy and porridge slightly thick).
  4. Serve porridge garnished with dash of white pepper, chopped spring onions, crispy fried shallots and a few drops of light soy sauce. A few drops of sesame oil and some julienne young ginger strips may be sprinkled over if desired. Enjoy!


Tuesday, February 15, 2011

Refreshing Apple and Honey Dates Drink, the Chinese Way

An apple a day keeps the doctor away! A glass of this delicious refreshing drink will do just the opposite, it will get everyone to your table, including the doctor! LOL! I have not made this drink in ages. I used to make this very often for my daughter when she was just a toddler. She absolutely loves this drink, she still does. If you happen to have more apples than you need, or perhaps your apples has seen better days, do not let them go to waste, just turn them into this refreshing drink, serve it chilled to your kids and wait for them to ask for a second glass! 


A cup of warm apple honey dates drink is really soothing on a cold day! Just sip, relax and enjoy!


You may use any types of apples. Use any amount of apples you want, there's no exact quantity. If the apples are really big, then a few might just be enough. All you need to do is just peel, core and cut them to big chunks.


These are the dried honey dates which can be found at most Chinese stores. We use these dates for soups, in some traditional herbal chinese medicine and also in desserts. That is why I always have a packet in my pantry! As the name implies, these dates are sweet, so usually, there is no need to add any sugar to this drink. If the apples are sour, then a little sugar may be added in, it is all a matter of your personal taste. I would prefer to add in more honey dates than adding sugar later (I did not add any sugar for this). I like apples that has a slight sourish yet sweet taste to it, pefect for this drink.


The apples and the honey dates goes into the stockpot.


A cup of warm delicious Apple Honey Dates drink is ready to be enjoyed! 


Serve chilled or cold with ice. Really refreshing!


Told you that they would request for a second glass!


Apple and Honey Dates Drink
(will yield approx about 10-12 cups of delicious drink)
20 small apples (may add more if you wish)
12-15 dried honey dates
5 litres water
rock sugar or granulated sugar (to taste, optional)

  1. Put water in deep stockpot, cover and bring to boil.
  2. Meanwhile, while waiting for water to boil, peel and core apples. Cut to big chunks.
  3. When water has come to a boil, add all the apples and the dried honey dates. Cover and allow to boil over medium high heat for about 30 minutes.
  4. Lower heat to medium low and boil for another 1 hour. Mash honey dates by pressing it against the stockpot with a ladle. You may add sugar at this stage if desired. Cover and allow to boil for another 30 minutes.
  5. Strain into a serving jug and serve either warm or cold with some ice. Or when drink is no longer hot, simply place the whole jug in the refrigerator to chill and enjoy this delicious drink chilled. Really refreshing! 


Saturday, February 12, 2011

Oyster Sauce Prawns with Garden Fresh Spring Onions

Food, rich glorious food, always comes to mind whenever any festivals are mentioned! The Chinese believes that every new lunar year must be celebrated with food that are associated with prosperity, good fortune and happiness. Some food are considered taboo or bad luck if consumed within the first 15 days of Chinese New Year, such as fu gua (bitter gourd). Just as the name implies, the melon is bitter and we would not want to start off to a 'bitter' year! Mui Choy (a type of preserved salted vegetable), when translated directly, the name implies "no luck" and we wouldn't want to start off the new year with this either! 


So, every Chinese New Year, in restaurants and even at home, the food that are usually served will be the fatt choy (black moss fungus), meaning 'strike it rich', yee sang (raw fish with shredded vegetables, pomelo and other condiments) meaning prosperity, har (prawns) for liveliness and yee (fish) which must be a whole fish with head and tail intact, meaning that, a good start and a great ending of a lunar year. 


That explained, come and join me in this "liveliness" dish, which is a simple prawn dish marinated with oyster sauce and fried, and stir-fry again with spring onions.


Even tastier with the spring onions from my own garden


I'm sharing this with
Full Plate Thursday at Miz Helen's Country Cottage


Oyster Sauce Prawns with Garden Fresh Spring Onions
600gm medium or big prawns
generous bunch of spring onions, cut to 3" sections
2 tablespoon oyster sauce
pinch of white pepper powder
pinch of salt
2 tablespoon chopped garlic
2 tablespoon chopped ginger
1 tablespoon chopped spring onions, the white part only
2 tablespoon Chinese cooking wine
3 tablespoon water
about 1/3 cup cooking oil

  1. Clean prawns, remove legs and devein, but leave shells and heads intact.
  2. Cut spring onions to 3" section, reserve about 1 tablespoon of chopped white part only. Lightly crush the rest of the 3" white part using the side of the knife and put aside together with the greens.
  3. Marinate prawns with oyster sauce, pinch of white pepper powder, pinch of salt and keep aside for 30 minutes.
  4. Heat oil in  saucepan and fry prawns in a single layer on both sides about 2-3 minutes each side until brown and shell turns crispy. Remove and keep aside. Keep marinated juice from the prawn marinade to be used later.
  5. In a clean saucepan, heat 1 tablespoon oil. Saute chopped garlic, chopped ginger and chopped spring onions, until fragrant and light brown. Add in retained marinated juice, 2-3 tablespoon of water, stir till it boils and add in the prawns along with the spring onions. Stir for about a minute and add salt if necessary.
  6. Add in the Chinese cooking wine, give a quick stir, dish out to a serving plate and serve hot. Enjoy!

Thursday, February 10, 2011

Stir-Fry Chinese Leeks with Chinese Sausages

Chinese Leeks are smaller and thinner than the regular leeks. It is more pungent in flavour compared to the regular leeks. When I buy these leeks, I would prefer this over the regular ones, it has a more intense flavour and smell. Choose the small and young tender ones as the big ones can be rather tough.


The Chinese would usually stir-fry this veggie with  dried Chinese sausages. It can be stir-fried together with other vegetables such as carrots, cauliflowers, sweet peas, brocolli, mushroom and capsicums. I love it just plain with Chinese sausages. This veggie actually sweetens when cooked. Even though this veggie is available almost whole year round, they are most popular during the Chinese New Year festival. 

Leeks are a good sources of folic acid, iron and potassium. They are low in calories. They also supply magnesium, calcium, copper, vitamin C,B6 and rich in vitamin A.


I'm sharing this simple, very tasty, stir-fry dish with
Full Plate Thursday over at Miz Helen's Country Cottage
Recipe Swap Thursday at Prairie Story


Stir-Fry Chinese Leeks with Chinese Sausages
5-6 medium Chinese leeks
2 Chinese sausages
2 cloves garlic, minced
1 tablespoon oil
salt to taste
2-3 tablespoon water
1/2 teaspoon chicken powder seasoning
1 tablespooon Chinese cooking wine

  1. Remove sausage casing from Chinese sausages and slice at a diagonal into thin slices about 4-5mm thickness.  
  2. Clean the leeks and slice at at diagonal into thin slices about 6-7mm thickness.
  3. Heat oil in wok or suacepan. Over low heat, stir fry Chinese sausages for about 2 minutes and dish out. Keep aside.
  4. In same wok, turn heat to medium-high, saute minced garlic till fragrant and light brown. Add the leeks and stir for about 30 seconds. Add water, chicken powder seasoning and salt to taste. Continue stirring for about 5 minutes till leeks are soft and cooked, adding 1 tablespoon water if it appears too dry.
  5. Add in the pre-fried sausages and stir to combine, for about 30 seconds. 
  6. Add in 1 tablespoon Chinese cooking wine, give a quick stir and dish out. Serve hot. Enjoy!

Tip : The casing from some Chinese sausages may be difficult to remove. Just place the sausages on a plate, add a little water to cover and leave for about 5 minutes. It will then come off easily.

Monday, February 7, 2011

Whipping Cream Cake

Hi everyone, I'm back from my Chinese New Year celebrations, even though this festival will last for 15 days, it is more or less back to daily routine, with the kids back in school. Thank you, friends, for visiting while I was away. Thank you for all your lovely wishes, I really appreciate them!

This lovely cake was actually made before the holidays, just never got round to post it! There is no butter in this cake. You would never have guessed it, either by looking at it or even after taking a bite! No, definitely no one would have known, except by the person who baked this! No butter and no oil, the secret ingredient here, well, secret no more, is the whipping cream! The hidden fat is in the whipping cream, but seriously, keep that aside and try out this cake.


This cake has a lovely texture, it is moist, tender and delicious! It is so easy and so simple, it will be ready to be baked in just minutes!


Rose recommended to use the whipping cream with a high-butterfat content of 40 per cent. Well, the one I have does not states the percentage of the butterfat, I guess maybe it was less than that. It turned out great, whatever the percentage is! This is a lovely cake to have with a cup of plain black coffee.


Whipped Cream Cake
(adapted from "Rose's Heavenly Cakes" by Rose Levy Beranbaum)
2-1/4 cups (8 ounces/225gm) cake flour or 2 cups bleached all-purpose flour, sifted into the cup and leveled off ( I use 225gm self-raising flour)
2 teaspoons baking powder (I omit this since I use self-raising flour)
3/4 teaspoon salt
1-1/2 cups (12 fluid ounces / 348 grams) heavy cream, cold (see Notes)
3 large eggs (150gm)
1 teaspoon vanilla extract
1 cup plus 2 tablespoons (8 ounces / 225gm) superfine sugar (I use 170gm)


SPECIAL EQUIPMENT : One 10-cup fluted metal tube pan, coated with baking spray with flour.

PREHEAT THE OVEN : Twenty minutes or more before baking, set an oven rack in the lower third of the oven and preheat the oven to 375F/190C (350F / 175C if using a dark pan).

MIX THE DRY INGREDIENTS : In a medium bowl, whisk together the cake flour, baking powder, and salt and then sift them together to make the mixture easier to incorporate.

MIX THE LIQUID INGREDIENTS : In the bowl of a stand mixer fitted with the whisk beater, whip the cream, starting on low speed, gradually raising the speed to medium-high as it thickens, until stiff peaks form when the beater is raised.
In a medium bowl, whisk the eggs and vanilla just until lightly combined.
On medium-high speed, gradually beat the egg mixture into the whipped cream. The mixture will thicken into mayonnaise consistency (unless high-butterfat cream is used). Gradually beat in the sugar. It should take about 30 seconds to incorporate it.

MAKE THE BATTER : Add half the flour mixture to the cream mixture and, with a large silicone spatula, stir and fold in the flour until most of it disappears. Add the rest of the flour mixture and continue folding and mixing until all traces of flour have disappeared. Using a silicone spatula or spoon, scrape the batter into the prepared pan. Run a small metal spatula or dull knife blade through the batter to prevent large air bubbles, avoiding the bottom of the pan. Smooth the surface evenly with a small metal spatula.

BAKE THE CAKE : Bake for 25 to 35 minutes, or until a wooden toothpick inserted between the tube and the side comes out completely clean and the cake springs back when pressed lightly in the center. The cake should start to shrink from the sides of the pan only after removal from the oven.

COOL AND UNMOLD THE CAKE : Let the cake cool in the pan on a wire rack for 10 minutes. With a small metal spatula, loosen the top edges of the cake and invert the cake onto a wire rack that has been coated lightly with nonstick cooking spray. Cool completely. The cake requires no adornment, but I love to serve it with a light dusting of powdered sugar or a large dollop of lightly sweetened Whipped Cream.

NOTES :
Do not chill the bowl and beaters for the heavy cream because the eggs will not emulsify as readily if the whipped cream is too cold.
High-butterfat (40 percent) heavy cream produces a finer, more tender crumb. This cream is generally available only to bakeries and restaurants, but it is certainly worth asking your local baker to sell you a container.