Sunday, December 30, 2012

Chocolate Almond-Coconut Cake For A Birthday

My last post for 2012!  A delicious chocolaty cake!
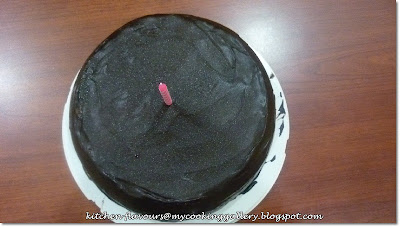
I've made this cake Chocolate Almond-Coconut Cake a couple of weeks ago for my hubby's birthday. He loves bittersweet chocolate and I've made him this cake which uses bittersweet chocolate for the glaze. Since I'm totally hopeless when it comes to cake decorating, I chose a cake with just chocolate glaze as the "decoration"! I don't have to crack my "pretty" head for decorating ideas!  


The simple birthday cake.


  1. This recipe requires almond paste, an ingredient which I have yet to find over here. So I made my own, which is really simple and easy, takes only minutes to make. Please refer to my older post here, on how to make almond paste.
  2. Break up the almond paste into 1-inch chunks and place in the bowl of an electric mixer. Add sugar and one egg, and beat mixture on low speed until smooth.
  3. Add in the rest of the ingredients as per the recipe instructions below.
  4. Scrape the cake batter into a 9-inch springform pan and proceed with the baking.


This cake uses ground almond and just a tiny amount of all-purpose flour. There is no leavening used at all for this cake, but the cake rose beautifully and just as Tish Boyle says, the cake will fall in the center slightly as it cools. Once the cake has cooled, the top is covered with an even layer of coconut flakes, here I have used lightly sweetened coconut flakes, which are processed in the food processor until finely chopped and mix with some light corn syrup to moisten. Prepare the chocolate glaze as per instructions given, and while still warm, pour glaze over the top and sides of cake. Leave to set for a while in the refrigerator.


This is one delicious cake. The texture of the cake  is really, really moist and rich, with intense chocolate flavour and dense soft crumbs. The coconut filling is yummy and moist. And using bittersweet chocolate for the glaze is just perfect. Delicious three layers, moist chocolaty cake at the bottom, delightful coconut filling in the centre and the top, delicious chocolaty glaze! Each mouthful is a pleasure! Best served this cake at room temperature. Refrigerate any leftovers and let it stand at room temperature about an hour before serving, to soften the cake.

Tish Boyle has posted this cake on her blog, you can even find a picture of this cake on her blog's header. I am a great fan of Tish Boyle, do visit her blog for more delicious bakes, if you are not already a fan, you will be very soon!


Chocolate Almond-Coconut Cake
Chocolate Almond Cake
2 tablespoons (15gm) all-purpose flour
1/2 cup plus 2 tablespoons (57gm) Dutch-processed cocoa powder
1 cup plus 3 tablepsoons (341gm) canned almond paste (made my own almond paste, here)
1-1/4 cups (250gm) granulated sugar (I use 210gm)
4 large eggs
1 cup (2 sticks/227gm) unsalted butter, softened
1 large egg yolk

Coconut Layer :
2-2/3 cups (213gm) unsweetened grated coconut
1/2 cup (120ml) light corn syrup

Chocolate Glaze :
170gm bittersweet chocolate, coarsely chopped
2/3 cup (160ml) heavy cream
1 teaspoon vanilla extract

Make The Cake :
  1. Position a rack in the center of the oven and preheat the oven to 350F. Grease the bottom and sides of a 9x3-inch springform pan. Line the bottom of the pan with a round of parchment paper and grease the paper.
  2. Sift together the flour and cocoa powder into a medium bowl. Whisk to combine, and set aside.
  3. Break the almond paste into 1-inch chunks and place it in the bowl of an electric mixer. Add the sugar and 1 of the eggs and, using the paddle attachment, beat the mixture on low speed until smooth, about  minute. Add the softened butter and beat on medium speed until light, about 3 minutes. Add the remaining 3 eggs one at a time, beating well after each addition and scraping down the sides of the bowl as necessary. Beat in the egg yolk. At low speed, add the cocoa mixture, mixing just until blended.
  4. Remove the bowl from the mixer stand and stir a few times with a rubber spatula to ensure that the batter is evenly blended. Scrape the batter into the prepared pan and smooth it into an even layer.
  5. Bake the cake for 40 to 50 minutes, until the top is firm and a toothpick inserted into the center comes out with a few moist crumbs clinging to it. Cool the cake in the pan on a wire rack for 20 minutes.
  6. Remove the side of the springform pan. Place a 9-inch cardboard cake round on top of the cake and invert. Remove the bottom of the pan and the parchment paper. Cool the cake completely on the wire rack.
Make The Coconut Layer :
Place the coconut in the bowl of a food processor and pulse until finely chopped. Add the corn syrup and pulse until the coconut is evenly moistened.

Make The Chocolate Glaze :
Place the chocolate in the bowl of a food processor and process just until finely ground. (leave the chocolate in the processor).
In a small saucepan, bring the cream to a boil. Remove from the heat and add the chocolate to the pan. Stir until the chocolate is completed melted and the glaze is smooth. Stir in the vanilla extract. Transfer the glaze to a small bowl. Cover the surface of the glaze with a piece of plastic wrap and let cool for about 10 minutes before using.
(Store in an airtight container in the refrigerator for up to 2 weeks; rewarm gently in a double boiler before using).


Assemble and Glaze The Cake :
  1. Spread the coconut mixture over the cake in an even layer. Set the cake on a wire rack, over a sheet of wax paper. Pour the warm glaze over the top of the cake and use a small offset metal spatula to smooth it evenly over the top and sides. Refrigerate the cake until the glaze is set, about 20 minutes.
  2. Place the cake on a serving platter. Cut into wedges and serve with the whipped cream.
(Store in the refrigerator, loosely covered, for up to 5 days)


I would like to wish everyone,

A Blessed and Wonderful 2013!

Happy New Year!

Friday, December 28, 2012

Green Eggs and Ham Omelette

Made this as a weekend breakfast for the family. Very simple but extremely filling breakfast. This is my last post for Cook Like A Star for this month, an event organized by my baking buddy, Zoe from Bake For Happy Kids. For this month, the chosen star is Martha Stewart, and I have enjoyed cooking from her recipes. This is the sixth recipe that I've tried and many more I've bookmarked to try!

This simple breakfast is actually a spinach omelette, which I've made weeks ago, only got round to post it today! The spinach leaves are stir-fried with a little water till wilted, drain and squeezed out the excess water. There will be lots of water!  The spinach are then chopped to pieces and added in to the eggs, beaten together gently with some seasoning of salt and black pepper. The egg mixture is then cooked over low heat and when it is set, half of it is topped with some shredded cheese and two slices of deli ham. The omelette is then folded over and the cheese will melt from the heat. Scoop out to a plate and enjoy it warm! 


Will definitely bring a smile at the breakfast table.


The cheese has melted from the heat, and very good when eaten warm while the cheese is still soft and gooey!


I'm linking this post to Cook Like A Star, where the featured chef for this month is Martha Stewart, an event organized by Zoe of Bake from Happy Kids and co-hosted together with Baby Sumo from Eat Your Heart Out and Riceball from Riceball Eats.


I'm also sharing this with :
Full Plate Thursday hosted by Miz Helen's Country Cottage


Green Eggs And Ham Omelete
(adapted from : marthasteward.com)
2 cups tightly packed curly or flat-leaf spinach, trimmed and washed (3 ounces)
2 large eggs, room temperature
coarse salt and ground pepper
1 teaspoon unsalted butter
2 tablespoons sharp cheddar, shredded
2 thin slices deli ham

  1. In a small non-stick skillet, heat 1 tablespoon water over medium-high. Add spinach and cook, tossing, until completely wilted, about 1 minute. Transfer to a colander to drain, pressing out as much water as possible. Finely chop spinach, transfer to a medium bowl along with eggs. Whisk to combine and season with salt and pepper.
  2. Return skillet to heat and melt butter, tilting to coat pan, add egg mixture. Cook, stirring with a heatproof rubber spatula, until eggs begin to thicken, 30 seconds. With spatula, pull edges of omelet in  toward center, tilting pan so uncooked eggs flow underneath. Cook until just set, 15 to 30 seconds.
  3. Arrange cheese and ham on top of omelet. With spatula, fold omelet in half. Transfer to a plate and serve immediately.


Wednesday, December 26, 2012

Tomato and Onion Cachumbar : IHCC

"Red and Green" is this week's theme at I Heart Cooking Clubs (IHCC) where we are cooking from Madhur Jaffrey's recipes. I have made this simple and delightful salad using lots of fresh coriander leaves to go with a curry dish. 


I am a raw onion and coriander lover! I totally love eating raw onions in salads, in sandwiches, burgers and just about anything that can go perfect with raw onions! I love corianders, I could eat them raw just with rice and a little soy sauce spiced with some sliced hot chillies with a squeeze of lime juice. The recipes calls for 3 tablespoons of finely chopped fresh coriander, but I've used almost a cup, coarsely chopped.  


 This is similar to our local salad which usually include slices of cucumber and sometimes pineapple too, but usually without the fresh coriander leaves. I love it even better with the addition of coriander leaves. Just mix everything together.


And serve! Here I have served with the Red Pork Curry and Plain Basmati Rice. The salad really complements well with the curry and rice. This salad is really great for any curry meal. You can never go wrong with this salad! One that I would make again, very easy and  the next time, I'll add in some chopped cucumbers as well, another one of my favourite veggie. If you do not like coriander, just omit it, the salad will be just as good. 


IHeartCookingClubsMadhurJaffrey


Please do stop by IHCC to view all the different Red And Green yummies that the others made!


Tomato and Onion Cachumbar
(adapted from "Simple Indian Cookery", Madhur Jaffrey)
100gm (4oz) onion, cut into 1cm (1/2in) dice
350gm (12oz) tomatoes, cut into 1cm (1/2in) dice
3 tablespoons finely chopped fresh coriander (I use 1 cup, coarsely chopped)
3 tablespoons lemon juice
1-1/2 teaspoons salt, or to taste
1/4-1/2 teaspoon cayenne pepper (depending how hot you like it)

Put all ingredients in a bowl and mix.


Tuesday, December 25, 2012

Double Chocolate Chip Cookies


Merry Christmas, everyone!

I'm sharing today a chocolate chip cookie, crispy on the outside and chewy in the centre. Best eaten when they are warm, with a glass of cold milk. Enjoy!


I have reduced the amount of sugar, my changes, listed in blue :
Double Chocolate Chip Cookies
(adapted from "The Williams-Sonoma Baking Book")
1 oz (30gm) unsweetened chocolate, coarsely chopped
1 cup (140gm) all-purpose (plain) flour
1-1/2 tsp baking powder
1/4 tsp salt
6 tbsp (90gm) unsalted butter, at room temperature
2 tbsp vegetable shortening
2/3 cup (165gm) firmly packed light brown sugar (1/4 cup)
1/4 cup (60gm) granulated sugar (1/8 cup)
1 large egg, at room temperature
1 tbsp pure vanilla extract
1 cup (185gm) bittersweet or semisweet (plain) chocolate chips
1/2 cup (60gm) coarsely chopped pecans or walnuts (optional)


  1. Preheat the oven to 350F (180C) and line 2 baking sheets with parchment (baking) paper.
  2. Put the chopped chocolate in the top of a double boiler and melt, stirring occasionally, over barely simmering water. Set aside to cool.
  3. In a bowl, whisk together the flour, baking powder and salt until blended.
  4. In another bowl, using an electric mixer on medium speed or a wooden spoon, beat together the butter, shortening, brown sugar, and granulated sugar until well blended and fluffy. Beat in the melted chocolate. Add the egg and vanilla and mix until blended. Add the flour mixture and stir until just blended. Add the chocolate chops and the nuts, if using, and continue stirring until just blended.
  5. Drop the dough by heaping tablespoonfuls onto the prepared baking sheets, spacing the cookies about 1-1/2 inches (4cm) apart. Bake the cookies, 1 sheet at a time, until they are puffed but still look moist on top, about 15 minutes. Let the cookies cook briefly on the pans on wire racks before transferring them to the racks to cool completely.


Saturday, December 22, 2012

Blueberry and Almond Tartlets

Ever since I bought the book, Pies & Tarts by Martha Stewart, this tart was one of the first to be bookmarked. It has my favourite baking ingredients, almonds! And sounds even better with blueberries. According to the book, use wild blueberries if you can find them, otherwise, cultivated berries will do, the smaller, the better. I use my stack of frozen blueberries which I bought a couple of weeks ago instead.


Great for an afternoon tea-time snack.


  1. The dough is mixed in the food processor, which takes only a couple of minutes. Refrigerate the dough for an hour, roll it out to about 1/8" thick, cut into rounds of about 4" and line the tartlet pans, (mine is 3" in diameter), with the cut-out dough, pressing gently all along the sides and trim off excess dough at the top. Prick the bottom of the dough all over with a fork and refrigerate for 30 minutes to firm up. Meanwhile, preheat oven to 375F.
  2. Remove tray from refrigerator, line shells with parchment. Here I have used cupcake liners, easy, peasy, no need to cut your parchment papers to fit the tartlets, cupcake liners works perfectly. Fill with some dried beans and bake for about 20 to 22 minutes until light golden brown. Remove baking beans and transfer tartlet pans to wire rack to cool completely.
  3. Cover the base of each tartlet with 1-1/2 teaspoons of blueberry jam, the recipe states that the amount of jam used is 1/4 cup plus 2 tablespoons, but I have used up about 1 cup of blueberry jam with about 1-1/2 to 2 teaspoons for each tartlet. Top with some frozen or fresh blueberries over the jam. Cover fruit in each tartlet with 2 tablespoons batter. 
  4. Sprinkle the top with some sugar, here I have used organic demerara sugar, and some flaked almonds. Bake for about 18 minutes until tops rise and are golden brown. Transfer tartlets to a wire rack to cool completely.


Three different looks! Unintentional! Haha, why? here's why....


Tarts without the frozen blueberries.
This recipe yields 13 tartlets (supposed to be 12), simply because my tartlet pans are only 3" diameter. I filled 9 of the tartlets with the blueberry jam, the batter, the almonds, and as soon as I put that tray in my oven, it suddenly hit me that I have forgotten to add in the frozen blueberries!! How could I forget!!! Took the tray out immediately, and attempt to add in the frozen blueberries gently into the batter. I only did that for 6 tarts and left the other 3 as they are. So the one above has no blueberries fruits in them. 


The one with the blueberries, added in later, pressed gently into the batter, but still visible!


As it should be! The blueberries in the batter before baking.
There are 4 unfilled tartlet shells, as the first tray was full and I baked these later. And I did it right this time! I did not forget the blueberries!


Please do follow the recipe exactly, adding the blueberries, embedded in the batter, here's why. Look at the tart, one bite, and the soft blueberries squirts out it's juices!  Can you see the stripe of blueberry juice across the top of the tart? Well, one bite did that! This is one delicious Blueberry Almond Tartlet!  The pastry is so buttery and so good. Everything comes perfectly together! Yummy!


I'm linking this post to Cook Like A Star, where the featured chef for this month is Martha Stewart, an event organized by Zoe of Bake from Happy Kids and co-hosted together with Baby Sumo from Eat Your Heart Out and Riceball from Riceball Eats.

I'm sharing this with :


Wild-Blueberry and Almond Tartlets
(adapted from "Pies&Tarts, by Martha Stewart)
For the crust :
1/3 cup blanched almonds (I use ground almonds)
1-1/2 cups all-purpose flour, plus more for dusting
1 tablespoon sugar
1/2 teaspoon salt
1/2 cup (1 stick) cold unsalted butter, cut into small pieces
1 large egg yolk
1 to 2 tablespoons ice water

For the filling :
2 large eggs
1/2 cup sugar, plus more for sprinkling
1/4 cup all-purpose flour
3 tablespoons blanched almonds, toasted and finely ground
1/4 cup sliced blanched almonds, for topping
1/4 teaspoon salt
1/4 cup plus 2 tablespoons blueberry jam (I use about 1 cup)
3 ounces (1/2 cup) fresh small blueberries, preferably wild

  1. Make the crust : Pulse almonds in a food processor until finely ground. Add flour, sugar, and salt; pulse to combine. Add butter, pulse until mixture resembles coarse meal. Add yolk and 1 tablespoon ice water; pulse until dough just comes together, adding up to 1 tablespoon more ice water, if needed.  Shape dough into a disk, and wrap in plastic. Refrigerate until firm, 1 hour or up to 3 days. (Dough can be frozen up to 1 month, thaw in refrigerator before using).
  2. Preheat oven to 375F. On a lightly floured surface, roll out dough 1/8 inch thick. Cut out twelve 4-1/2-inch rounds. Refroll scraps if necessary. Line twelve 3-or-3-1/4inch tartlet pans with dough, pressing into bottoms and up sides; trim excess dough flush with rims. Divide shells between 2 rimmed baking sheets. Pierce bottom of shells all over with a fork. Refrigerate or freeze until firm, about 30 minutes.
  3. Line shells with parchment. Add pie weights or dried beans. Bake until light golden brown, 20 to 22 minutes. Remove weights and parchment. Transfer to wire racks to cool completely.
  4. Make the filling : With an electric mixer on medium speed, beat eggs and sugar until pale and thick, about 5 minutes. Using a flexible spatula, fold in flour, ground almonds and salt.
  5. With an offset spatula, spread about 1-1/2 teaspoons jam into each shell. Top with blueberries, dividing evenly. Cover fruit in each tart shell with 2 tablespoons sugar. Sprinkle batter evenly with sugar and sliced almonds. Bake until tops rise and are golden, about 18 to 20 minutes. Transfer to a wire rack to cool completely. Tartlets can be stored in airtight container at room temperature up to 1 day.


I would like to wish everyone 

"MERRY CHRISTMAS AND A HAPPY NEW YEAR"

HAPPY HOLIDAYS!


Tuesday, December 18, 2012

Red Pork Curry : IHCC

"Foods To Warm You Up" is the theme for this week at I Heart Cooking Clubs (IHCC). Curries and spicy food has always been the comfort food for me and I especially love pork curry! So what better dish to warm me up and makes me smile at dinnertime, none other than a bowl of delicious pork curry! The original recipe is Red Beef Curry, but I have used pork stewing meat instead.


This is one delicious bowl of curry! The pork is tender, full of flavour from the spices and the thick gravy is so fragrant from the curry leaves and pandanus leaves. Yes, this curry uses both the curry leaves and pandanus leaves. I did some changes by doubling the amount of spices used, if you would like to try at making this curry, I would advise you to do the same. You may refer to the changes I've made (in blue)  from the recipe below. 


This curry uses a fair amount of coconut milk, but I do not like my curry to be overloaded with coconut milk, as I feel that any curry with lots of coconut milk, would actually covers the tastes of all the lovely spices, so I have only used a little. This curry is great too without the addition of coconut milk, I have tasted before and after adding the milk, just to see the difference. It is very tasty and delicious without the coconut milk, but I've decided to follow the recipe since this is the first time I'm trying it, so I've added in only a little of the coconut milk, and this dish turns out delicious as well. So if you've run out of coconut milk in your pantry, don't worry, this dish is equally good without it. And I have omitted the lemon juice as I feel that it is delicious as it is. Feel free to add in if you wish.


This is a very easy dish to prepare, it does not take much time, other than the slow braising. Give it a try! Definitely one dish that I will cook again! It is so good!


I served this delicious curry with plain basmati rice for dinner last week with a simple salad. 


IHeartCookingClubsMadhurJaffrey


Please drop by I Heart Cooking Clubs (IHCC) to see what my friends are making for "Foods To Warm Me Up".

I'm sharing this with :
See Ya In The Gumbo hosted by Ms. enPlace


Red Pork Curry
(adapted from "100 Essential Curries", Madhur Jaffrey)
Serves 4
450gm (1lb) stewing pork, cut into 2-1/2cm (1 in) pieces (600gm)
1 teaspoon ground coriander (2 teaspoons)
1 teaspoon ground cumin (2 teaspoons)
1 teaspoon ground fennel (2 teaspoons)
1/2 to 1 teaspoon cayenne pepper (4 teaspoons chilli powder)
2 teaspoons bright red paprika (4 teaspoons)
freshly ground black pepper (1 teaspoon)
3 tablespoons corn oil or peanut oil
1 medium stick cinnamon
4 whole cardamom pods (8 pods)
1/2 teaspoon fenugreek seeds (1 teaspoon)
4 tablespoons peeled and finely sliced shallots (10 large shallots)
2 garlic cloves (5 cloves)
2 thin slices fresh ginger (5 slices, cut to julienned strips)
5cm (2in) piece fresh or frozen pandanus leaf (1 pandanus leaf, cut to 3" sections)
10-15 fresh curry leaves, if available (2 large stalks curry leaves)
3/4 teaspoon salt (to taste)
2 teaspoon lemon juice (omit this)
175ml (6fl oz) shaken coconut milk (I only use 60ml)

  1. Put the meat in a bowl. Add ground coriander, cumin, fennel, cayenne pepper, paprika and lots of black pepper. Mix well to coat the beef (or pork) and set aside for 15-20 minutes.
  2. Peel and finely slice the shallots and garlic. Pour 3 tablespoons oil into a large, non-stick, lidded pan and set on a medium-high heat. When the oil is hot, add the cinnamon, cardamom pods, fenugreek seeds, shallots, garlic, ginger, pandanus leaf and curry leaves. Stir for 2 minutes or until the shallots have become translucent. Add the meat, and continue to stir for a further 2-3 minutes or until the meat is lightly browned. Add the salt, 350ml (12fl oz) water and the lemon juice, and bring to the boil. Cover, reduce the heat to very low, and simmer gently for 1 hour and 20 minutes or until the meat is tender. If the water dries out, just add a little bit more. Lift the lid to stir once or twice during this period.
  3. Stir in the coconut milk and bring to a simmer. Taste for salt.
** The whole spices are not meant to be eaten, remove before serving.

Sunday, December 16, 2012

Scallion Tartlets

What do you do when you have a whole pot of scallions in your garden, ready to be harvested? Other than the regular cooking with chicken, prawns, noodles, fried-rice or simply as a garnish, another way of using them up is by making Scallion Tartlets!  Now I know of another way of using the Scallions in my garden, thanks to Martha Stewart!


These Scallion Tartlets are yummy!


Scallions from my garden. The heavy rain has bended some of the leaves. Harvested two bunches to make the filling for these lovely tarts. The scallions are cut to about 2-3" lengths. The recipe calls for Kalamata olives, but I have an opened jar of black olives in my fridge, so I used that instead. Interesting ingredient is finely chopped walnuts, which I used half of the amount calls for. Minced one garlic clove and added that in. Season with salt and ground black pepper. Mix with 2 tablespoons of olive oil and the filling is ready. Note : the filling amount in the recipe seems quite a lot for 8 pieces of 4" tartlets, so I just adjusted to my own estimation. 


Picture on the left : filling without chopped ham
Picture on the right : filling with chopped ham

I used store-bought puff pastry (Kawan-ku Brand), size 4", simply place the thawed pastry on a greased baking sheet. Brush a 1/2-inch border all around the pastry with an egg yolk beaten with a little water. Place the filling on the pastry, leaving the brushed border bare,  and scatter some grated cheese, here I have used Cheddar cheese, all over the filling. I've made four tartlets with these filling and another four which I've added some leftover cooked ham, chopped to small pieces, to the filling. 


Baked for 20 minutes until pastry is puffy and golden. Cool for 2 minutes and enjoy while still warm and delightfully crispy!


Scallion Tartlets with added chopped ham.


Yummilicious! So good with a cup of tea!


I'm linking this post to Cook Like A Star, where the featured chef for this month is Martha Stewart, an event organized by Zoe of Bake from Happy Kids and co-hosted together with Baby Sumo from Eat Your Heart Out and Riceball from Riceball Eats.

I'm sharing this too with :
Food on Friday hosted by Carole's Chatter


Scallion Tartlets
(adapted from Martha Stewart's Pie & Tarts)
All-purpose flour for dusting
1 box store-bought puff pastry, preferably all butter, thawed
8 bunches scallions (2-1/4 pounds), trimmed and cut into matchsticks
1 garlic clove, minced
1 red Thai chile, ribs and seeds removed, minced (omit this)
1/2 cup walnuts, finely chopped
1/2 cup Kalamata olives, potted and coarsely chopped
2 tablespoons extra-virgin olive oil
coarse salt and freshly ground pepper
1 large egg yolk, for egg wash
1 teaspoon ice water, for egg wash
1/2 cup grated Parmesan cheese (2 ounces)

  1. Preheat oven to 400F. On a lightly floured surface, roll out and trim dough into two 9-inch squares. Cut each piece into 4 squares; place on a parchement-lined baking sheet about 2 inches apart. Refrigerate or freeze until firm, about 30 minutes.
  2. Toss togther scallions, garlic, chile, walnuts, olives, and oil in a medium bowl. Season with salt and pepper.
  3. In a small bowl, whisk together egg yolk and ice water. Brush 1/2-inch border around edges of dough squares. Divide scallion mixture among squares, leaving 1/4-inch border; sprinkle squares evenly with cheese.
  4. Bake until crust is golden brown, about 20 minutes. Transfer to a wire rack to cool. Serve warm or at room temperature.


Friday, December 14, 2012

Shiitake Fried Rice

I've made a Chinese fried rice recipe from Martha Stewart. I've used the leftover plain basmati rice which I cooked from my previous post here, well, I have cooked more rice as I've already plan to have the leftovers for this fried rice. I have been out the whole day, and came back late in the evening, since there are only the two of us, hubby and me, I've cooked this simple Shiitake Fried Rice, which is meat-free, and suitable for vegetarians. 


Very simple and easy.  At first it was a little bland, but a seasoning of salt to taste and lots of white pepper powder really makes a difference. Told my hubby that we are having vegetarian fried rice tonight, no meat! After a couple of spoonfuls, he says that it is very nice!  We like the crunch of the snow peas!


Simple and healthy!


I'm linking this post to Cook Like A Star, where the featured chef for this month is Martha Stewart, an event organized by Zoe of Bake from Happy Kids and co-hosted together with Baby Sumo from Eat Your Heart Out and Riceball from Riceball Eats.


I'm also sharing this with :
Recipe Box hosted by Bizzy Bakes
Full Plate Thursday hosted by Miz Helen's Country Cottage

Shiitake Fried Rice
(source from marthastewart.com)
1 teaspoon plus 1 tablespoon olive oil
2 large eggs, lighly beaten
1 small onion, chopped
2 carrots, halved lengthwise and thinly sliced diagonally
10 ounces shiitake mushrooms, stemmed, caps thinly sliced
1 garlic clove, minced
1 teaspoon minced fresh ginger
6 ounces snow peas, strings removed and halved crosswise
2 cups cooked basmati rice
2 to 3 tablespoons soy sauce
2 tablespoons rice vinegar
salt and pepper to taste

  1. In a large nonstick skillet over medium heat, warm 1 teaspoon oil. Add eggs; swirl to coat bottom of pan. Cook until set, 1 to 2 minutes. Transfer to a cutting board. When cool enough to handle, thinly slice.
  2. Add remaining oil and onion to pan, cook, stirring, until translucent, 2 to 4 minutes. Add carrots, cook, stirring until they begin to brown, 4 to 6 minutes.
  3. Add mushrooms, cook, stirring until tender, 2 to 5 minutes. Add garlic, ginger and snow peas, cook, stirring, until snow peas are vibrant green, 2 to 3 minutes.
  4. Add rice, soy sauce, and vinegar, toss to coat. Season with salt and pepper. Fold in sliced egg.
(I browned the garlic and the onions first)

Thursday, December 13, 2012

Rice Is Nice : IHCC

"Rice Is Nice", the theme for this week at I Heart Cooking Clubs, where we are cooking from Madhur Jaffrey's recipes. There are a few rice recipes of MJ's  that looks very good, but I wanted something simple to go with a spicy pork curry that I've planned to cook. I've bought myself a book of MJ during a book sale, with wonderful recipes that I can't wait to try, some I have already tried in my previous posts which I initially got the recipes from online. Now that I have the book and after browsing it thru, I just got to try the pork curry. And this simple rice recipe is from this book too, perfect pairing!


This rice is just plain, simple basmati rice. As usual, the rice is washed and soaked in water for 30 minutes, drained and ready for cooking. Melt some butter in a saucepan and stir in the drained rice. I have omitted the salt since I'm eating the rice with some pork curry and the salt is not necessary.  The recipe do not call for pandanus leaf, but I added in one fresh pandanus leaf from my garden, cut into 3" sections and added in together with the rice. Stir-fry both the rice and pandanus leaf in the melted butter for 2-3 minutes, it smells wonderfully fragrant at this point, scoop everything into the rice cooker pot, add some water and continue on with the cooking in the rice cooker. It smells incredibly nice while the rice is cooking, really fragrant from the pandanus leaf. 


Pandanus leaf from my garden.

Pandanus leaves are pretty common over here in Malaysia and are used frequently in rice cooking. It imparts a lovely distinct fragrance. Sometimes it is used in spicy dishes for that added aroma. It is also used in making our many varieties of local sweet desserts. The leaves can be pounded, with juice extracted for usage in making cakes and other sweet desserts, which will give a wonderful pandan taste, fragrance and lovely colour of green. 


 The main star of this meal is of course, the curry, but simple plain rice like this, which complements well with the curry, that makes a simple dinner into a delicious one! I've  made some salad to go with the rice and curry.  December is a really busy month, I'm out of the house most of the days, so I have covered my next two posts for IHCC, in one dinner meal! Recipes for the curry and salad will be for the coming posts with IHCC!


IHeartCookingClubsMadhurJaffrey


Please do stop by IHCC to view all the different rice yummies the others made!


Plain Basmati Rice
(adapted from "100 Essential Curries", Madhur Jaffrey)
Serves 6
350gm (12oz) basmati rice
3/4 teaspoon salt
1 tablespoon butter
1 fresh pandanus leave (cut to 3" sections) (my addition)

  1. Wash the rice well in cold water. Soak it in a bowl with 1.2 litres (2 pints) of water and 1/2 teaspoon salt for 30 minutes. Then drain.
  2. Melt the butter in a heavy-bottomed pot over medium heat. Pour in the drained rice (and pandanus leaf, if using) and stir for a minute. Add 500ml (18fl oz) water and 1/4 teaspoon salt. Bring to the boil, cover, lower heat to very low, and cook for 20 minutes. Lift lid. Mix rice gently with fork. Cover again and cook for another 10 minutes or until the rice is tender.
** the pandanus leaf are not meant to be eaten, simply remove the leaves before serving.

kitchen flavour's notes :
~ I use 2 cups basmati rice, cooked with 3-1/4 cups water
~ omit the salt.
~ added in 1 fresh pandanus leave, cut to 3" sections
~ In step 2, after adding in the rice and the pandanus leaf, stir for a couple of minutes, I transferred all the rice to the rice cooker pot, add in the 3-1/4 cups water and proceed with the cooking in the rice cooker until done.


Tuesday, December 11, 2012

Chocolate Eclair : Free And Easy Bake Along #37

Our last Bake-Along bake for this year! And the theme for this week is Chocolate Eclairs, chosen by Zoe, from Bake For Happy Kids. Chocolate Eclairs has been on my long list of to-do and that's one more off the list now! Thank you, Zoe!


Choux pastry is one of the easiest pastries to make (according to the book). It is made on the stovetop where the butter is melted with water, brought to a boil and add in the flour. This mixture is then cooked over low heat and lightly beaten eggs are then added in a little at a time to make a thick glossy paste. You don't have to use all of the eggs, just until the pastry is very thick and can hold its shape when piped. Pipe the pastry to about 4" long, and bake the piped pastry till golden brown, then make a neat slit along the side and bake again for another 5 minutes. Transfer to  a wire rack to cool.


The whipped cream filling is sweetened with a tiny amount of icing sugar and flavoured with a little vanilla extract. This filling is piped into the cooled pastry and the top of the pastry is dipped into melted chocolate. Leave to set and enjoy. I have four eager kids hovering over me as I made this and the chocolate is barely set when they are enjoying it. I have "overstuffed" the eclairs with whipped cream as I find that I have more than the recipe calls for, and since I do not want it to go to waste, I have piped another layer over it, oops...it does not look pretty! 


This recipes makes only ten instead of twelve as the recipes states. All ten pieces of chocolate eclairs are gone in minutes!


I would like to thank all you lovely ladies who has baked along with us in 2012! A year has passed and we have baked all kinds of bakes that has been on our list of to try and never got round to it, well, at least until Bake-Along! I hope that Bake-Along has made that list of yours shorter! It certainly has to mine, but there's more addition to it as well! Looking forward to our bakes together in 2013! 


Please visit my baking buddies, Lena from Frozen Wings and Zoe from Bake For Happy Kids, and all our friends who has baked along with us in the linky below :

For the next bake, it is Cold Oven Cream Cheese Pound Cake, from Cake Keeper Cakes by Lauren Chattman or here. The linky will start on 14th January right up to 23rd January. Do join us, everyone's welcome.


Photobucket


A friendly reminder when linking to our blog hop :
1. Please mention Bake-Along event in your own post linking direct to any of the hosts' post (JoyceLena or Zoe)
2. Please link only new and current post, related to the current bake or theme provided by us. Unrelated post will be deleted.
3. Feel free to display our Bake-Along badge in your post.


Chocolate Eclairs
(adapted from "Pastry Cook" by Catherine Atkinson)
Makes twelve
300ml/1-1/4 cups double (heavy cream)
10ml/2 tsp icing sugar, sifted
1/4 tsp vanilla essence
115gm/4oz plain semi-sweet chocolate
2 tbsp water
2 tbsp butter

For the pastry
65gm/9 tbsp plain (all-purpose) flour
pinch of salt
50gm/1/4 cup butter, diced
150ml/2/3 cup water
2 eggs, lightly beaten

  1. Preheat the oven to 200C/400F/Gas 6. Grease a large baking sheet and line with baking parchment. To make the pastry, sift the flour and salt on to a small sheet of baking parchment. Heat the butter and water in a pan very gently until the butter melts.
  2. Increase the heat and bring to a rolling boil. Remove the pan from the heat and immediately tip in all the flour. Beat vigorously with a wooden spoon until the flour is mixed into the liquid.
  3. Return the pan to a low heat, then beat the mixture until it leaves the sides of the pan and forms a ball. Set the pan aside and allow to cool for 2-3 minutes.
  4. Add the beaten eggs, a little at a time, beating well after each addition, until you have a smooth, shiny paste, which is thick enough to hold its shape.
  5. Spoon the choux pastry into a piping (pastry) bag fitted with a 2.5cm/1in plain nozzle. Pipe 10cm/4in lengths on to the prepared baking sheet. Use a wet knife to cut off the pastry at the nozzle.
  6. Bake for 25-30 minutes, or until the pastries are well risen and golden brown. Remove from the oven and make a neat slit along the side of each to release the steam. Lower the oven temperature to 180C/350F/Gas 4 and bake for a further 5 minutes. Cool on a wire rack.
  7. To make the filling, whip the cream with the icing sugar and vanilla essence until it just holds its shape. Spoon into a piping bag fitted with a 1cm/1/2in plain nozzle and use to fill the eclairs.
  8. Place the chocolate and water in a small bowl set over a pan of hot water. Melt, stirring until smooth. Remove from the heat and gradually stir in the butter.
  9. Carefully dip the top of each eclair in the melted chocolate, then place on a wire rack. Leave in a cool place until the chocolate is set. The eclairs are best served within 2 hours of being made, but they can be stored in the refrigerator for up to 24 hours.


Join our blog hop, click on the link:
get the InLinkz code

Saturday, December 8, 2012

Apple, Ham and Cheddar Melt : Cook Like A Star

Made this quick and simple brunch. This was supposed to be our breakfast!  But being the school holidays at this time of the year, (for my western friends, we are having the annual year end school holiday from second week of November right up to early January when the new term starts)  my nieces came to stay for a few days, all of them slept in, and woke up very late, so breakfast became brunch. At least I do not have to think about preparing lunch! Phew, what a relief!  Lazy mommy! Sometimes I'm at wits end thinking about the next meal!


This is a simple and satisfying sandwich. 


That's all the ingredients needed : yellow mustard, slices of ham, cheese slices, apple rings and wholemeal bread. And some butter. The bread looks like white bread, but these are actually store-bought wholemeal bread.


This is very easy to make and so good to eat. We love the thick slice of apple in the centre. One piece of bread is spread with some yellow mustard, layered with a slice of cheese, a slice of ham, a slice of apple ring and another slice of cheese, top with the second piece of bread. Both the top of the bread and the bottom are spread with a little butter and toast on a hot saucepan or skillet until light brown, turn over and brown the other side. The bread are then placed on a baking tray and pop into the preheated oven for a couple of minutes until the cheese melts.


Cut into triangles and serve while the bread is crispy and warm. The sweet-sour apple, and the salty ham and cheese makes a very delicious combo with the crispy toasted bread. I would never have thought of using apples as an ingredient in toasted bread sandwiches!


Review from the four kids : Thumbs up! They really enjoyed it! I did too, with a cup of warm tea.


I'm linking this post to Cook Like A Star, where the featured chef for this month is Martha Stewart, an event organized by Zoe of Bake from Happy Kids and co-hosted together with Baby Sumo from Eat Your Heart Out and Riceball from Riceball Eats.


I'm also sharing this with :
Recipe Box hosted by Bizzy Bakes
Full Plate Thursday hosted by Miz Helen's Country Cottage


Apple, Ham and Cheddar Melt
(source from : marthastewart.com)
8 slices whole-wheat sandwich bread
1 tablespoon plus 1 teaspoon yellow mustard
1/2 pound sharp cheddar cheese, thinly sliced
1/2 pound Fuji apple, cored and cut into 1/4-inch-thick rings
2 tablespoons unsalted butter, softened

  1. Preheat oven to 375 degrees. Spread half the bread slices with mustard. Layer with cheddar, ham, apple, and more cheddar, dividing evenly. Top with remaining bread slices. Lightly butter both sides of sandwiches.
  2. Heat a large nonstick skillet over medium heat. Working in batches, cook sandwiches, turning once, until bread is golden, about 4 minutes per side. Transfer sandwiches to a rimmed baking sheet. Bake in oven until cheddar is melted, about 5 minutes. Cut each sandwich in half on the diagonal, and serve warm.