Friday, September 30, 2016

Sardine Spread

Cook The Book Fridays is cooking through David Lebovitz's cookbook, My Paris Kitchen, and the selection for this week is Sardine Spread. We love sardine as a filling for sandwiches and I was really looking forward to make this. 


I use two cans of sardine packed in extra virgin olive oil.  Drain the sardines and discard the oil.


Remove the bones from each piece of sardine. Mix the cream cheese and butter in a bowl and add the sardine, mashing them to combine. Cream cheese is an interesting ingredient here. Add some chopped scallions, capers, lime juice, salt, black pepper, cayenne powder to taste. Mix everything together. That's it! This has got to be the most simplest recipe from this book, so far! Simple and delicious!


We had the Sardine Spread with my homemade Olive Oil Focaccia, made into a sandwich, with lettuce leaves and slices of cheese, for dinner. The family loved it. 


I have always used canned tuna for making similar sandwich spread like this, but instead of using cream cheese and butter, I have always used mayo. Now, this Sardine Spread, has a place along with my favourite tuna spread. I will definitely be making this again. 


Do stop by CtBF to view everyone's take on this delicious Sardine Spread. If you have the book or thought of getting one, please do, and join us! Full details here.


Wednesday, September 28, 2016

Olive Oil Focaccia

Cookbook Countdown Specials : Bake is a baking event, which I'm co-hosting with Emily's Cooking (Makan2) Foray.  This is a "spin-off" from our on-going monthly Cookbook Countdown. Cookbook Countdown Specials : Bake is for baking desserts ; pastries, cakes, cookies, pies, tarts, breads. While the monthly Cookbook Countdown is to use from one selected cookbook each month, for CC Specials : Bake, you may use any baking cookbooks of your choice, either from one single cookbook or from numerous books. The link is open from July to end September. You may link your post here. Do join us, everyone is welcome!


To link to Cookbook Countdown Specials : BAKE, click here
To link to Cookbook Countdown #9, click here


*************************************

I've recently added to my cookbook collection, this fabulous book, The Hot Bread Kitchen Cookbook, which I have been eyeing ever since it was published. This book is fast becoming one of my favourite books on breads. There are many recipes which I could not wait to try, but first I must try one of my favourites flatbreads, foccaccia, which looks absolutely fabulous from the photo in the book. 

The recipe makes quite a large flatbread, so I have made only half a recipe, using a 13x9-inch pan. There are some variations given for the topping, but I've decided to make it plain as it is, as I wanted to use it for a sandwich later on.


The dough is pretty easy to work with. I did not use all of the water indicated, remaining a few tablespoons behind. This is due to the high temperature and humidity in our weather. The final dough however refused to fill the entire pan, so I have left it to rest for 10 minutes at 3 intervals before the whole pan was filled with the dough.  


This is a fabulous facaccia! The bread is soft, moist and good to eat on its own. I've made it twice already. The first time I've made it, my nephew came for a visit, ate a few pieces and took home the rest, except for one piece, as I wanted to see if it stays just as soft on the next day. It still remains soft on the next day! On the next day, I baked this bread again. We had it as a sandwich bread (will share that in next post), and between the four of us, we finished this whole tray of this Olive Oil Focaccia. No leftovers! I will be trying out the different topping variation the next time. This is a keeper recipe.


Olive Oil Focaccia
(adapted from "The Hot Bread Kitchen Cookbook", by Jessaymn Waldon Rodriguez)
(makes one 13x18inch focaccia)
1 teaspoon active dry yeast
2-3/4 cup (630gm) water
700gm bread flour
4 tbsp (55gm) extra-virgin olive oil, plus more for shaping and drizzling
1 tbsp kosher salt, plus more for sprinkling
3/4 tsp sugar

  1. Stir together the yeast and water in the bowl of a stand mixer fitted with a dough hook. Add the flour and mix on low speed until the ingredients are well combined. Mix on medium speed until the dough looks like thick muffin batter, about 2 minutes. Turn the mixer off and allow the mixture to sit for 10 minutes to allow the flour to hydrate.
  2. Add 2 tablespoon of the olive oil and the salt and sugar and mix on low speed until combined, about 1 minute. Turn the speed up just a notch and mix until the dough is quite thick and starting to pull away slightly from the sides of the bowl, about 3 minutes. It will be very sticky at this point. Increase the speed to high and let the dough mix until it comes together, makes slapping noises as it turns, the bowl is clean, and there's a slight sheen to the dough, about 6 minutes. Do a windowpane test to ensure that the gluten is fully developed.
  3. Coat the inside of a  large bowl with olive oil and transfer the dough to it. Fold the dough over itself a couple of times, cover the bowl with plastic wrap (or put the entire thing into a large plastic bag), and let it rise at room temperature until it is 1-1/2 times its original volume, about 2 hours.
  4. Generously oil a 13x18-inch rimmed baking sheet. Remove the dough form the container with oiled hands and press the dough into the pan with your fingers so it evenly covers the pan. If the dough resists, simply let it rest for 10 minutes and then stretch it a bit more. Repeat this process as many times as needed until the dough willingly stretches to cover the entire surface of the pan. Loosely cover the focaccia with plastic wrap and let it rest for 30 minutes.
  5. Preheat the oven to 400F/205C.
  6. Uncover the dough, use your fingers to firmly dimple the surface. Press down until you feel the hard surface below, being careful not to tear your dough. Use a pastry brush to paint the focaccia with 2 tablespoons olive oil and then sprinkle it evenly with 1 teaspoon salt. 
  7. Bake the focaccia until it's nicely browned and the underside is crisp, about 30 minutes. Remove to a wire rack and let cool for at least 10 minutes before slicing and serving. Store leftovers in an airtight plastic bag at room temperature for up to 2 days. Reheat in a 300F/150C oven for a few minutes.


Cookbook Countdown


Tuesday, September 27, 2016

Hot Chilli Chicken

Cookbook Countdown is a monthly cooking/baking event, which I'm co-hosting with Emily's Cooking (Makan2) Foray.  Everyone is welcome to join us. How does it work? To summarize, you may select a cookbook from your own cookbook collection, to cook or bake from each month. That selected book shall be your cookbook of the month. You may cook any recipes and as many recipes as you want from your selected book of the month. This is a fabulous way of using your cookbooks at least once! For more information on how to join Cookbook Countdown, please click here. 

To link to Cookbook Countdown Specials : BAKE, click here
To link to Cookbook Countdown #9, click here

************************

My selected cookbook for this month at Cookbook Countdown #9 is 500 Curries, by Mridula Baljekar.

I absolutely love spicy food, and when I've read that this dish, as described in the book, "not for the faint-hearted, this delicious fiery, hot curry is made with a spicy chilli masala paste", of course I must cook this!

Upon going through the ingredients list, I must say that it does not really sound that spicy after all. I have therefore increased the chilli powder and the dried chillies to double the amount.


This is not a fiery dish for me, it is only mildly spicy. But it is quite tasty. We had this with plain fluffy white rice for dinner along with some turmeric cabbage stir-fry, Indian-style. 


Hot Chilli Chicken
(adapted from "500 Curries", Mridula Baljekar)
Serves 4
2 tbsp tomato puree (paste)
2 garlic cloves, roughly chopped
2 green chillies, roughly chopped
5 dried red chillies
1/2 tsp salt
1/4 tsp sugar
1 tsp chilli powder
1/2 tsp paprika
1 tbsp curry paste
2 tbsp vegetable oil
1/2 tsp cumin seeds
1 onion, finely chopped
2 bay leaves
1 tsp ground coriander
1 tsp ground cumin
1/4 tsp ground turmeric
400gm can chopped tomatoes
2/3 cup water
8 chicken thighs, skinned
1 tsp garam masala
fresh green chillies, seeded and sliced, to garnish
chapatis and natural (plain) yoghurt, to serve

  1. Put the tomato puree, garlic, green and dried red chillies, salt, sugar, chilli powder, paprika and curry paste into a food processor or blender and process to a smooth paste. Alternatively, grind all the ingredients together to a paste using a mortar and pestle.
  2. Heat the oil in a large heavy pan or wok and fry the cumin seeds for about 2 minutes. Add the onion and bay leaves to the pan and fry for a further 5 minutes.
  3. Add the spice paste to the pan and fry for 2-3 minutes until it releases a fragrant aroma. Add the remaining ground spices and cook, stirring constantly, for 2 minutes.
  4. Add the chopped tomatoes and the measured water to the pan. Bring the mixture to the boil, reduce the heat and simmer for 5 minutes until the sauce thickens.
  5. Add the chicken and garam masala to the sauce. Cover the pan with a lid and simmer for about 25-30 minutes until the chicken is tender. Serve with chapatis and natural yoghurt, garnished with sliced green chillies.


I'm linking this post with Cookbook Countdown #9 hosted by 


Monday, September 26, 2016

Aromatic Vegetable Curry

Cookbook Countdown is a monthly cooking/baking event, which I'm co-hosting with Emily's Cooking (Makan2) Foray.  Everyone is welcome to join us. How does it work? To summarize, you may select a cookbook from your own cookbook collection, to cook or bake from each month. That selected book shall be your cookbook of the month. You may cook any recipes and as many recipes as you want from your selected book of the month. This is a fabulous way of using your cookbooks at least once! For more information on how to join Cookbook Countdown, please click here. 

To link to Cookbook Countdown Specials : BAKE, click here
To link to Cookbook Countdown #9, click here

************************

My selected cookbook for this month at Cookbook Countdown #9 is 500 Curries, by Mridula Baljekar.

I've made Aromatic Vegetable Curry with Mushrooms and Beans. I have made a few changes to the recipe. This is pretty much a basic vegetable curry, and you can use whatever veggies you have in your fridge. I did not have any mushrooms, but I have a quarter of a cabbage left, so I've used that instead. Instead of using butter to saute the spices, I've replaced with canola oil. And have substitute the heavy cream with coconut milk.

Also the recipe indicated that after the veggies are cooked, they are removed to a plate, then the curry liquid is heated until it has reduced a little. At this point, season with salt and pepper, stir in the yoghurt, cream and garam masala. Pour the sauce over the vegetables and serve immediately with rice. I have, however, did it differently. I did not remove the veggies from the curry gravy, but added the yoghurt, coconut milk and garam masala along with the salt and pepper during the last ten minutes or so of cooking the curry. And I have increased the amount of spices, using 1-1/2 times more than indicated in the recipe.


This is a very mild curry (even though with the increased amount of spices). And according to the author "here the aim is to produce a subtle curry rather than an assault on the senses".  Seeing how mild this curry is, it would be great as a side dish along with some spicy dry meat curry served with rice.


Aromatic Vegetable Curry 
(adapted from "500 Curries", Mridula Baljekar)
Serves 4
50gm (1/4 cup) butter (I use canola oil)
2 onions, sliced
2 garlic cloves, crushed
1 in piece fresh root ginger, grated
1 tsp ground cumin
1 tbsp ground coriander
6 cardamom pods
2 in piece of cinnamon stick
1 tsp ground turmeric
1 fresh red chilli, seeded and finely chopped
1 potato, peeled and cut into 1 in cubes
1 small aubergine (eggplant), chopped
115gm (1-1/2 cups) mushrooms, thickly sliced (I use cabbages, shred to chunky pieces)
3/4 cup water
115gm green beans, cut into 1 in lengths
4 tbsp natural plain yoghurt
2/3 cup double (heavy) cream (I use coconut milk)
1 tsp garam masala
salt and ground black pepper
fresh coriander sprigs, to garnish
plain boiled rice, to serve

  1. Melt the butter in a heavy pan. Add the onions and cook for 5 minutes until soft. Add the garlic and ginger and cook for 2 minutes, then stir in the cumin, coriander, cardamom pods, cinnamom stick, turmeric and finely chopped chilli. Cook, stirring constantly for 30 seconds.
  2. Add the potato cubes, aubergine and mushrooms and the water. Cover the pan, bring to the boil, then lower the heat and simmer for 15 minutes.
  3. Add the beans to the pan and cook, uncovered, for about 5 minutes. With a slotted spoon, remove the vegetables to a warmed serving, dish and keep hot.
  4. Allow the cooking liquid to bubble up until it has reduced a little. Season with salt and pepper to taste, then stir in the yoghurt, double cream and garam masala. Pour the sauce over the vegetables and garnish with fresh coriander. Serve the curry immediately with plain boiled rice.

I'm linking this post with Cookbook Countdown #9 hosted by 


Saturday, September 24, 2016

Fish Steaks in Chraimeh Sauce

It's Potluck Week at I Heart Cooking Clubs (IHCC). For this week, I've cooked with Yotam Ottolenghi, a fish dish taken from his cookbook "Jerusalem". 

According to Ottolenghi, Chraimeh is the "queen" of all dishes, just as famous as gefilte fish (another fish dish) for Tripolitan (Libyan) Jews. Families pride themselves on their particular chraimeh. This dish certainly looks delicious from the photo in the book. At a glance it looks like fish cooked in sambal sauce, but upon reading the ingredients list, it is entirely different. 

He has advised to use any type of white fish meat, the best would be large sea bass. In the recipe, he has used salmon because they are the most widely available as steaks. I have used snapper steaks. He has suggested to double the sauce since it is so tasty, so that there is more to dip with bread, or serve with couscous or rice. I have made one and a half times more of the sauce.


To prepare the sauce, first dry-toasted some caraways seeds, then ground. Caraway seeds has a lovely minty fragrant, but once they are dry-toasted, they smell incredibly nice. The ground caraway is then mixed in a food processor or blender with the rest of the sauce ingredients ; garlic, sweep paprika, ground cumin, cayenne, ground cinnamon, green chilli and oil, to a thick paste.

The fish steaks are coated with some seasoned flour, heat some oil in a skillet and sear on high heat on both sides until golden, about 2 minutes. Remove and put aside. Heat some oil in the skillet, fry the spice paste for just 30 seconds, then add some water and tomato puree. Bring to a simmer, add some sugar, lemon juice, salt and pepper. Put the fish in the sauce, bring to a gentle simmer, cover the pan and cook until the fish is just done, depending on the size of the fish, about 7-11 minutes. I turned the fish halfway during cooking. Remove from the heat, take the cover off the pan and leave to cool down. Serve just warm or at room temperature, with some chopped coriander and a wedge of lemon.


This is quite delicious! We had it at room temperature and it tastes even better when I tasted it right after cooking. I did not squeeze the lemon juice over because the sauce is good as it is. But be sure to add lots of chopped coriander, it makes the dish taste even better! 


Salmon Steaks In Chraimeh Sauce
(adapted from "Jerusalem", by Yotam Ottolenghi and Sami Tamimi)
110ml sunflower oil
3 tbsp plain flour
4 salmon steaks, on the bone, about 950gm (I use snapper)
6 garlic cloves, roughly chopped
2 tsp sweet paprika
1 tbsp caraway seeds, dry-toasted and freshly ground
1-1/2 tsp ground cumin
1/3 tsp cayenne
1/3 tsp ground cinnamon
1 green chilli, roughly chopped
150ml water
3 tbsp tomato puree
2 tsp caster sugar
1 lemon, cut into four wedges, plus 2 tbsp lemon juice (1 tablespoon lemon juice)
2 tbsp roughly chopped coriander
salt and black pepper

Heat 2 tablespoons of the sunflower oil in a large frying pan for which you have a lid. Place the flour in a shallow bowl, season generously with salt and pepper then toss the fish in it. Shake off the excess flour and sear on a high heat for a minute or two on each side, until golden. Remove the fish and wipe the pan clean.
Place the garlic, spices, chilli and 2 tablespoons of sunflower oil in a food processor and blitz to form a thick paste. You might need to add a little bit more of the oil to bring everything together.
Pour the remaining oil into the fyring pan, heat well and add the spice paste. Stir and fry it for just 30 seconds, so that the spices don't burn. Quickly but carefully (it may spot!), add the water and tomato puree to stop the spices cooking. Bring to a simmer and add the sugar, lemon juice, 3/4 of a teaspoon of salt and some pepper. Taste for seasoning.
Put the fish in the sauce, bring to a gentle simmer, cover the pan and cook for 7-11 minutes, depending on the size of the fish, until it is just done. Remove the pan from the heat, take off the lid and leave to cool down. Serve the fish just warm or at room temperature, garnished with coriander and a wedge of lemon.


I'm linking this post with I Heart Cooking Clubs (IHCC), theme for this week
IHCC September Potluck!


Thursday, September 22, 2016

Pepperoni and Egg Breakfast Tart

Cookbook Countdown Specials : Bake is a baking event, which I'm co-hosting with Emily's Cooking (Makan2) Foray.  This is a "spin-off" from our on-going monthly Cookbook Countdown. Cookbook Countdown Specials : Bake is for baking desserts ; pastries, cakes, cookies, pies, tarts, breads. While the monthly Cookbook Countdown is to use from one selected cookbook each month, for CC Specials : Bake, you may use any baking cookbooks of your choice, either from one single cookbook or from numerous books. The link is open from July to end September. You may link your post here. Do join us, everyone is welcome!


To link to Cookbook Countdown Specials : BAKE, click here
To link to Cookbook Countdown #9, click here


*************************************

A savoury bake that is perfect for brunch or as a light lunch. It is quick, easy and delicious. If you have a pack of frozen puff pasty in the freezer, thaw it overnight in the refrigerator, and by breakfast or lunch time the next day, you will be able to serve this savoury tart in less than half an hour.

The actual recipe is named Bacon-And-Egg Breakfast Tarts, but I do not have any bacon. However, I do have a pack of pepperoni which I wanted to use up. The pepperoni makes a delicious substitute. Or even slices of ham will be good too.


I've made this tart before with bacon, when I first purchased this book. And we really enjoyed it at that time. Definite worth a repeat! I've used a 4 inch square of puff pastry sheet bought from the supermarket, makes it so much easier, as there's really no need to measure and cut to size. Perfect size for individual serving.

The puff pastry is scored on all sides to make a border, then spread in the centre of the pastry to the cut lines,  with a mixture of cheddar cheese and sour cream. Bacon or pepperoni slices are pan-fried just until barely crisped. Place a few pieces on the cheese mixture and bake the tart in a preheated oven until the pastry is puffed, crispy and golden, takes about 15-18 minutes. Meanwhile fry the eggs to your liking.

When the pastry is ready, place a fried egg on top of each one, sprinkle some black pepper and chopped chives over, and serve immediately. With a cup of warm tea, would be very nice.


I drizzled some hot sauce over my eggs. Yums! Enjoy!

In the author's own words "Make these for a special brunch, especially if you want to impress your friends or in-laws."  


Pepperoni-And-Egg Breakfast Tarts
(adapted from Home Baked Comforts, by Kim Laidlaw)
makes 6 tarts
1 sheet purchased frozen puff pastry, about 10 x 14 inches (25x35cm), thawed
3/4 cup (3oz/90gm) shredded white Cheddar or Gruyere cheese
1/3 cup (2-1/2 oz/75gm) creme fraiche or sour cream
12 thick slices applewood-smoked bacon
1 tbsp olive oil
6 large eggs
Kosher salt and freshly ground pepper
1 tbsp roughly chopped fresh chives

Position a rack in the middle of the oven and preheat to 400F (200C). Line a baking sheet with parchment paper.
On a lightly floured work surface, roll out the pastry into a rectangle about 12x15 inches (30x38cm). Trim the edges (I like to use a pizza wheel and a ruler to cut puff pastry). Cut the rectangle into 6 equal rectangles, each about 5x6 inches (13x15cm). Using a small, sharp knife, cut a line around each rectangle about 1/2 inch (12mm) from the edge. Do not cut all the way through; you just want to create a ridge when the pastry is baked. Using a fork, prick the pastry inside the line all over. Lay the rectangle on the prepared baking sheet. Refrigerate while you prepare the toppings.
In a small bowl, stir together the shredded cheese and creme fraiche. In a large frying pan (it's best to choose a nonstick pan with a lid, so you only have to clean one pan), fry the bacon over medium-low heat until just barely crisped, about 5 minutes. Drain on paper towels. Discard the fat in the pan.
Dollop a spoonful of the cheese mixture in the center of each pastry rectangle and spread it out to the cut line. Roughly chop the bacon and sprinkle it over the cheese mixture. Bake until the pastry is puffed, crisp and golden, about 15 minutes.
While the pastry is baking, fry the eggs. In the large frying pan, warm the olive oil over medium-low heat. Crack the eggs into the pan. Sprinkle with salt and a few grinds of pepper. Cover the pan (this is a handy trick for making beautiful over-easy eggs) and cook until the whites are cooked through and the yolks are still a bit runny.
Place the tarts on warmed plates and top each with a fried egg. Sprinkle with chives and serve.


Cookbook Countdown


Monday, September 19, 2016

Basic Hearth Bread

September's selected bread recipe at Rose's Bread Bible Bakers, is Basic Hearth Bread. Rose's Bread Bible Bakers is a group of bloggers who are currently baking from Rose Levy Beranbaum's book, The Bread Bible. 

This is a rustic bread with golden crust containing only bread flour, some whole wheat flour, water, yeast, salt and small amount of honey. This bread starts with the sponge starter which is left to ferment for 1 to 4 hours. The dough is very easy to work with, it is just slightly sticky. With a light dusting of flour on your hands, it is easily handled without any fuss. One thing to note is to plan in advance, and start making this bread in the morning if you want to enjoy it for dinner, as it takes 3 risings, and needs some time to cool off before slicing. 

It can be shaped either as a free-form round loaf, or shaped into a rectangular and baked in a loaf pan. I chose to make mine as a free-form round loaf. When the dough has done it's final proofing, the top is slashed with several 1/2-inch deep slashes. This is one area where I need more practise! 


The first pic above, is taken when the risen dough is placed in the preheated oven at 475F.
The second pic is taken 10 minutes later, when the temperature of the oven is reduced to 425F for the rest of the baking time. It has very nice oven spring during the first 10 minutes! Makes me smile just looking at it! 


Golden brown crust 


slice beautifully


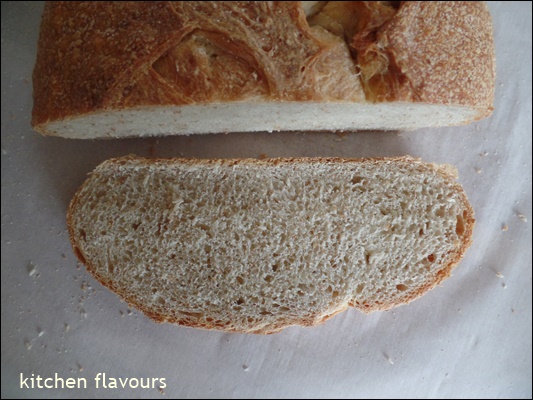
and soft chewy crumb


I was planning to have this bread for dinner, with some stew, but could not make it on time. But we did enjoy it the next day for brunch instead. Made into garlic bread, dipped in mushroom soup.


Mix some softened salted butter, garlic powder and chopped chives. I love using garlic powder to make garlic toast. Spread a generous amount on each slice of bread, cut horizontally to get two long pieces, and toast in the oven until golden and crispy.


Toasted garlic bread, crispy and smells garlicky nice.


Serve with mushroom soup. Yums! Makes a very good brunch!


Up next in October, we will be baking Irish Soda Bread, page 148.

I'm also linking this post with Cookbook Countdown Specials : Bake


Saturday, September 17, 2016

Green Fish Curry

Cookbook Countdown is a monthly cooking/baking event, which I'm co-hosting with Emily's Cooking (Makan2) Foray.  Everyone is welcome to join us. How does it work? To summarize, you may select a cookbook from your own cookbook collection, to cook or bake from each month. That selected book shall be your cookbook of the month. You may cook any recipes and as many recipes as you want from your selected book of the month. This is a fabulous way of using your cookbooks at least once! For more information on how to join Cookbook Countdown, please click here. 

To link to Cookbook Countdown Specials : BAKE, click here
To link to Cookbook Countdown #9, click here

************************

This month I'm cooking from my selected cookbook for Cookbook Countdown #9, 
500 Curries by Mridula Baljekar


The next recipe I've made is Green Fish Curry, which is really a dish of fried fish, marinated first and coated with spices and green cilantro leaves before frying. It is a dry dish, with no curry gravy at all.

Any fillet of firm white fish can be used. I have used snapper fillet, which is cut to 2 in cubes.


This is the marinating mixture ; shallots, ginger, chillies, coriander, tamarind or lemon juice and salt are processed in a food processor to a paste. This paste is then mixed with the fish pieces and leave to marinate in the fridge, covered for at least 30 minutes. Just before frying gram flour is mixed with a little water and coat the marinated fish evenly. I could not find gram flour and have replaced with a mixture of cornflour and rice flour, equal amount.

Heat up some oil and fry the pieces of fish cubes over medium heat until golden brown on both sides and cooked through. Drain and serve immediately.


This is the Green Fish Curry!

Very nice dish. Aromatic from the fresh coriander leaves. We ate this with plain white rice along with some vegetable curry with gravy. The family likes it.


Green Fish Curry
(adapted from "500 Curries", Mridula Baljekar)
Serves 4
675gm fillet of cod, haddock or other white fish (I use snapper)
2 shallots, roughly chopped
2 tbsp fresh root ginger, roughly chopped
2-4 fresh green chillies, roughly chopped and seeded
1/4 cup coriander leaves and stalks, roughly chopped
1 tsp tamarind mixed with 2 tsp water and strained or 2 tbsp lemon juice
1 tsp salt, or to taste
2/3 cup gram flour, sifted (I use 1/3 cup cornflour plus 1/3 cup rice flour)
vegetable oil or sunflower oil, for deep-frying
plain boiled rice, to serve

  1. Wash the fish gently under running water and pat dry with absorbent kitchen paper. Cut into 2 in pieces. Place the fish pieces in a large mixing bowl.
  2. Process the shallots, ginger, chillies, coriander, tamarind or lemon juice and salt in a food processor or blender. Add the blended ingredients to the fish, and using a metal spoon, mix gently, but thoroughly. Set aside for about 30 minutes.
  3. Add the sifted gram flour and 2-3 tbsp water ; if necessary, and mix thoroughly until the fish is coated with the paste. You can add a little more water if the paste is not wet enough, to ensure the fish is coated thoroughly.
  4. Heat the oil in a wok or other suitable pan for deep-frying over medium to high heat, then fry the fish in batches for about 2-1/2 minutes on each side until it is a golden brown colour, Drain the fried fish on absorbent kitchen paper and serve with any vegetable or lentil dish, accompanied by plain boiled rice.

I'm linking this post with Cookbook Countdown #9 hosted by 


Friday, September 16, 2016

Gazpacho

This week at Cook the Book Fridays (CtBF), the selected recipe is Gazpacho with Herbed Goat Cheese Toasts. I have however only made the Gazpacho and have skipped the Herbed Goat Cheese Toasts. I have never made gazpacho before and was looking forward to try this cold soup.

A healthy raw soup, where ripe tomatoes are blanched in boiling water, remove the skins, cut into half, squeezed the seeds out and strain the seed over a strainer into a bowl to collect the juices. Discard the seeds. A piece of bread soaked in water for a minute or two, squeeze out the extra water. The tomatoes, the collected juices  and the bread are then processed in a food processor until almost liquefied, with some bits of tomato visible. Pour into a large bowl, mix in finely chopped cucumbers, finely chopped red pepper, finely chopped garlic, red wine vinegar, olive oil, smoked paprika salt and ground black pepper to taste. Add the vodka. Mix well and chill thoroughly before serving.


There are mixed reviews when I served this to the family. I thought that this soup was just OK for me. My daughter does not like this soup. But both my husband and son thought that, in their words, "quite nice". 

Do stop by CtBF to view everyone's take on this soup. If you have the book or thought of getting one, please do, and join us! Full details here.


Wednesday, September 14, 2016

Chicken Jardinieri

This week at I Heart Cooking Clubs (IHCC), the monthly featured chef is Jacques Pepin. I wanted to make a chicken stew for dinner and found a recipe of his which looks really delicious, Chicken Jardinieri. And intended to serve the stew with a bread that I intend to make on that same day. But that did not happen! I did cook the stew and made the bread, but did not serve them together, because my bread was not quite ready yet at dinner time! I started my bread baking quite late that afternoon, OK, so I did not read the instructions properly and it calls for three risings, instead of the usual two! So I've cooked some plain white rice instead and had it with the stew.


This stew is pretty easy to make. And there's bacon in the stew, which is sauteed over high heat for one or two minutes, then the chicken pieces are added in, cooked until both sides are lightly browned. Sprinkle some flour, seasoning, stir to combine, then pour in white wine and water. Potatoes, onions, carrots, mushrooms and thyme are added in. Here, I have used dried thyme, since I do not have any fresh ones. For the mushrooms, I have used fresh small shiitake mushrooms. Bring to boil, reduce heat to low, simmer until the veggies are tender. Add the green peas and cook for a further 2 minutes, then serve immediately.


This chicken stew is delicious. We love it. The chicken is tender and tasty, the veggies are soft and the soup slurpingly good. Great with white rice, but I've got to plan my bread baking earlier the next time (and read the instructions properly!), so that we could enjoy the crusty bread in time, with this stew!


Chicken Jardiniere
(adapted from here, recipe by Jacques Pepin)
Serves 4
2-1/2 ounces lean pancetta, cut into lardons (strips about 1 inch long and 1/2-inch thick)
1-1/2 tablespoons peanut oil
4 chicken legs (about 2-3/4 pounds), left whole or cut into 2 pieces each, ends of the drumsticks and skin removed (about 2-1/2 pounds trimmed)
1-1/2 tablespoons all-purpose flour
1 teaspoon salt
1 teaspoon freshly ground black pepper
3/4 cup fruity dry white wine
3/4 cup water
12 small red potatoes (about 8 ounces), peeled
8 small baby bella or cremini mushrooms (about 5 ounces), washed
12 small pearl onions (about 4 ounces)
1-1/4 cups diced (1-inch) carrots
1-1/2 tablespoons coarsely chopped garlic
1 fresh thyme branch
1 cup frozen baby peas
2 tablespoons chopped fresh parsley

Saute the lardons in the oil in a large saucepan or a Dutch oven (the pan should be wide enough to hold the chicken in a single layer) over high heat for 2 minutes. Add the chicken pieces and saute them, turning once, for about 8 minutes, until lightly browned. Sprinkle with the flour, salt, and pepper and move the chicken around to distribute the flour evenly. Cook for 1 minute, then add the wine and water and mix well.
Add the potatoes, mushrooms, onions, carrots, garlic, and thyme and mix well. Bring to a full boil, making sure that the stew is boiling throughout, then cover, reduce the heat to low, and cook for 45 minutes (The stew can be prepared ahead to this point and reheated to serve).
At serving time, add the peas to the stew, bring to a boil, and boil for 2 minutes.
Transfer the stew to individual plates or a large platter, sprinkle with the parsley, and serve.


I'm linking this post with I Heart Cooking Clubs (IHCC), theme for this week,
Monthly Featured Chef : Jacques Pepin

and


Monday, September 12, 2016

S'mores Brownies

Cookbook Countdown Specials : Bake is a baking event, which I'm co-hosting with Emily's Cooking (Makan2) Foray.  This is a "spin-off" from our on-going monthly Cookbook Countdown. Cookbook Countdown Specials : Bake is for baking desserts ; pastries, cakes, cookies, pies, tarts, breads. While the monthly Cookbook Countdown is to use from one selected cookbook each month, for CC Specials : Bake, you may use any baking cookbooks of your choice, either from one single cookbook or from numerous books. The link is open from July to end September. You may link your post here. Do join us, everyone is welcome!


To link to Cookbook Countdown Specials : BAKE, click here
To link to Cookbook Countdown #9, click here


*************************************

I am not a fan of marshmallows but both my son and daughter likes it. I wanted to make this S'mores Brownies, and was looking for a particular brand of marshmallows which I sometimes buy, and great in bakes, but could not find it in the few supermarkets that I went to. So I grabbed a pack of those available, and use them to bake these brownies. 


The marshmallows barely melt and it was quite disappointing as they are looking forward to melting gooey marshmallows on top of the brownie. From now on, I'll just stick to the usual brand of marshmallows that I always buy.


Recipe calls for graham crackers which are lightly crushed to be added to the brownie batter, but I have omitted that and replaced with dried cranberries instead. And I have also reduced the amount of both the white and brown sugars.


The brownies are moist, very chocolaty and even though the marshmallows barely melt, they are quite soft, so that is not so bad after all!  I like the dried cranberries in the brownies. These brownies are best enjoyed with a glass of cold milk.


S'mores Brownies
(adapted from "Home Baked Comfort", by Kim Laidlaw)
makes 12 brownies
1 cup (8 oz/250gm) unsalted butter
10 oz (315gm) bittersweet chocolate, finely chopped
1 cup (8oz/250gm) granulated sugar (1/2 cup)
3/4 cup (6oz/185gm) firmly packed light brown sugar (scant 1/3 cup)
4 large eggs
2 tsp pure vanilla extract
1 tsp kosher salt
1-1/3 cups (5-1/2oz/170gm) cake flour
3 tbsp natural cocoa powder
about 6 graham crackers, roughly crushed with your hands (omitted)
about 12 jumbo marshmallows

Position a rack in the middle of the oven and preheat to 350F (180C). Generously butter a 9-by-13-inch (23-by-33-cm) baking dish.
In a saucepan, melt the butter and chocolate over low heat, stirring often, about 4 minutes. Remove from the heat and whisk in the sugars. Whisk in the eggs one at a time, beating well after each addition. Whisk in the vanilla and salt.
Sift the flour and cocoa over the chocolate mixture and, using a rubber spatula, stir in until just blended. Stir in the graham crackers. Pour into the prepared dish and spread evenly. Top evenly with the marshmallows.
Bake until a toothpick inserted into the centre comes out almost completely clean, 30-35 minutes. Let cool in the dish on a wire rack, then cut into big, gooey squares.

Cookbook Countdown

Friday, September 9, 2016

Basmati Rice and Peas And Cucumber Raita

Cookbook Countdown is a monthly cooking/baking event, which I'm co-hosting with Emily's Cooking (Makan2) Foray.  Everyone is welcome to join us. How does it work? To summarize, you may select a cookbook from your own cookbook collection, to cook or bake from each month. That selected book shall be your cookbook of the month. You may cook any recipes and as many recipes as you want from your selected book of the month. This is a fabulous way of using your cookbooks at least once! For more information on how to join Cookbook Countdown, please click here. 

To link to Cookbook Countdown Specials : BAKE, click here
To link to Cookbook Countdown #9, click here

************************

My selected cookbook for this month at Cookbook Countdown #9 is 500 Curries, by Mridula Baljekar.

I've made Cucumber Raita and Basmati Rice and Peas along with two other dishes for an Indian weeknight meal.


I've used my homemade yoghurt to make the Cucumber Raita, and homegrown jalapeno chilli. Lightly perfumed with the ground cumin, very nice raita.


I've cooked the basmati rice in the rice cooker. At step 4 after adding the rice, peas and water to the sauteed ingredients, transfer everything to the rice cooker. We had this Basmati Rice and Peas served with Madras Meat Curry, Karahi Potatoes with Whole Spices and Mixed Chillies, along with the Cucumber Raita. Very delicious meal! 


Basmati Rice and Peas
(adapted from "500 Curries", Mridula Baljekar)
Serves 4
300gm (1-1/2 cups) basmati rice
1 tbsp vegetable oil
6-8 curry leaves
1/4 tsp mustard seeds
1/4 tsp onion seeds
2 tbsp fresh fenugreek leaves (I've used 1 tbsp dried fenugreek leaves)
1 tsp crushed garlic
1 tsp grated fresh root ginger
1 tsp salt
1 cup frozen peas
475ml (2 cups) water

  1. Wash the rice well under cold running water and leave it to soak in a bowl of water for 30 minutes.
  2. Heat the oil in a heavy pan and add the curry leaves, mustard seeds, onion seeds, fenugreek leaves, garlic, ginger and salt and stir-fry for 2-3 minutes.
  3. Drain the rice thoroughly, and add it to the pan with the other ingredients. Stir gently to combine.
  4. Add the frozen peas and water and bring to the boil. Lower the heat, cover with a lid and cook for 15-20 minutes. Remove from the heat and leave to stand, still covered, for 10 minutes.
  5. When ready to serve, fluff up the rice with a fork. Spoon the mixture on to serving plates and serve immediately.


Cucumber Raita
Makes about 2-1/2 cups
1/2 cucumber
1 fresh green chilli, seeded and chopped
1-1/4 cups natural (plain) yoghurt
1/4 tsp salt
1/4 tsp ground cumin

  1. Dice the cucumber finely and place in a large mixing bowl. Sprinkle over the chopped green chilli and mix well to combine it with the cucumber.
  2. Place the natural yoghurt in a bowl and bear it with a fork until it becomes smooth, then stir it into the cucumber and chilli mixture in the large bowl.
  3. Stir the salt and ground cumin into the yoghurt mixture. Cover the bowl with clear film (plastic wrap) and chill in the refrigerator for at least 30 minutes before serving.


I'm linking this post with Cookbook Countdown #9 hosted by 


Wednesday, September 7, 2016

Rum Sultana Pound Cake with Lemon Glaze

This week's theme at I Heart Cooking Clubs (IHCC) is "Finishing Touches!".  We are to "Make any Curtis Stone dish featuring or including some special finishing touches such as: a sprinkle of this, a dusting of that, sauces, dressings, croutons, condiments, or any other extras that finish your dish with flair!"

I've made Curtis Stone's Rum Sultana Pound Cake and the finishing touch is the Lemon Glaze. I love sultanas in bakes and I love using rum too, so I was looking forward to bake this!

The sultanas are heated over a low heat with some rum, just to a simmer, then left to cool. I love the aroma of the rum! As with the usual way of making a pound cake, the butter and sugar are creamed together, followed by the eggs, then the flour is mixed in, alternating with the buttermilk. The cooled sultanas with the rum is then added into the batter. Stir to combine and bake as directed in the recipe. I did reduce the sugar for the batter to only 3/4 cup and the sweetness works out great for me. I've increased the baking powder to 1/2 tsp. And since I've used salted butter, I have omitted the salt in the recipe.


Rum Sultana Pound Cake waiting for the Finishing Touch, the Lemon Glaze

Originally, the recipe uses lime for the glaze, but I already have some lemons, so I've used lemons instead.


Rum Sultana Pound Cake with Lemon Glaze

My lemon glaze is a little thin, as I have used only about 3/4 cup or icing sugar instead of the full amount of 1-3/4 cups. as I do not like to eat very sweet cakes. I did not measure the lemon juice and the rum. I just squeezed some lemon juice over the icing sugar and added a little rum. Mix and adjust accordingly to the consistency of the preferred glaze.


I usually like my cakes without any glaze or frosting, but there's always an exception! This cake is quite good. As with pound cakes, it has a dense texture, but soft and moist. The plump juicy sultanas are a pleasure to bite into, and the taste and aroma of the rum is wonderful. Two slices (one slice is not enough!) is lovely with a cup of warm tea. This cake tasted even better the next day!


Rum Sultana Pound Cake with Lemon Glaze
(recipe by Curtis Stone via taste.com.au)
Non-stick Cooking Spray
1 cup sultanas
1/2 cup plus 3 tsp Golden or Light Rum
1-1/3 cups plain flour
1/4 tsp baking powder (1/2 tsp)
170gm unsalted butter, at room temperature (salted butter)
1-1/4 cups caster sugar
3/4 tsp vanilla extract
1/2 tsp salt (omitted)
3 large free-range eggs
1/3 cup buttermilk
1-3/4 cups sifted pure icing sugar
5 tsp lime zest
7 tsp lime juice

  1. Position the rack in the center of the oven and preheat the oven to 175C or 155C fan. Spray an 8 cup bundt pan with cooking spray.
  2. Bring sultanas and 1/2 cup rum just to a simmer in a saucepan over medium heat. Set aside, stirring occasionally, until plump. Cool. Whisk flour and baking powder in a medium bowl to blend. In the bowl of an electric stand mixer with the paddle attachment on medium speed, beat butter, caster sugar, vanilla, and salt for 10 minutes, our until light and fluffy. Add eggs, one at a time, beating well after each addition. Reduce speed to low. Add flour mixture and buttermilk alternately in batches, beating just until blended. Stir in sultana mixture.
  3. Transfer to prepared pan. Bake for 1 hour or until a toothpick inserted near the centre comes out with moist crumbs attached. Cool on a rack for 10 mins. Invert onto a plate or platter and remove the pan. Cool for about 30 minutes.
  4. In a medium bowl, whisk icing sugar, lime zest and juice, and remaining 3 tsp rum to form a smooth glaze. Spoon over the warm cake. Serve warm or at room temperature.


I'm linking this post with I Heart Cooking Clubs (IHCC), theme for this week,
Finishing Touches


Monday, September 5, 2016

Karahi Potatoes with Whole Spices and Mixed Chillies

Cookbook Countdown is a monthly cooking/baking event, which I'm co-hosting with Emily's Cooking (Makan2) Foray.  Everyone is welcome to join us. How does it work? To summarize, you may select a cookbook from your own cookbook collection, to cook or bake from each month. That selected book shall be your cookbook of the month. You may cook any recipes and as many recipes as you want from your selected book of the month. This is a fabulous way of using your cookbooks at least once! For more information on how to join Cookbook Countdown, please click here. 

To link to Cookbook Countdown Specials : BAKE, click here
To link to Cookbook Countdown #9, click here

************************

My selected cookbook for this month at Cookbook Countdown #9 is 500 Curries, by Mridula Baljekar.


This potato dish is delicious, it's flavours are from the whole spices and curry leaves, that the sliced potatoes are stir-fried with. The only thing that I need to change when I make this again, is to pre-fried the sliced potatoes until almost cooked before they are stir-fried with the spices.

The recipe does not contain any added water, it is a dry dish. And it says to cook the potato covered, for 7 minutes or so over a low heat until the potatoes are tender. I find that the spices and the other ingredients are starting to burn before the potatoes are done. So I have frequently stir the potatoes very often and it takes about 20 minutes or so until they are tender. But this is a delicious potato dish, and I would make this again, but will pre-fried the potatoes separately until they are almost done before frying them with the spices and ingredients, to avoid the spices from being burnt which will spoil a dish! Overall, this is a very nice potato dish, great as a side dish, especially eaten with some curries and rice. 


Karahi Potatoes with Whole Spices and Mixed Chillies
(adapted from "Curries 500", by Mridula Baljekar)
Serves 4
1 tbsp vegetable oil
1 tsp cumin seeds
3 curry leaves
1 tsp crushed dried red chillies
1/2 tsp mixed onion, mustard and fenugreek seeds
1/2 tsp fennel seeds
3 garlic cloves, sliced
1 in piece fresh ginger root, grated
2 onions, sliced
6 new potatoes, thinly sliced
1 tbsp chopped fresh cilantro
1 fresh red chilli, seeded and sliced
1 fresh green chilli, seeded and sliced

  1. Heat the oil in a karahi, wok or heavy pan. Lower the heat slightly and add the cumin seeds, curry leaves, dried red chillies, mixed onion, mustard and fenugreek seeds, fennel seeds, garlic slices and ginger. Fry for 1 minute.
  2. Add the onions to the pan and fry for a further 5 minutes, or until the onions are golden brown.
  3. Add the potatoes, fresh coriander and red and green chillies and mix well. Cover the pan tightly with a lid or foil; if using foil, make sure that it does not touch the food. Cook over a very low heat for about 7 minutes or until the potatoes are tender.
  4. Remove the pan from the heat, and take off the lid or foil cover. Serve hot straight from the pan.

I'm linking this post with Cookbook Countdown #9 hosted by