Showing posts with label Catherine Atkinson. Show all posts

Tuesday, December 11, 2012

Chocolate Eclair : Free And Easy Bake Along #37

Our last Bake-Along bake for this year! And the theme for this week is Chocolate Eclairs, chosen by Zoe, from Bake For Happy Kids. Chocolate Eclairs has been on my long list of to-do and that's one more off the list now! Thank you, Zoe!


Choux pastry is one of the easiest pastries to make (according to the book). It is made on the stovetop where the butter is melted with water, brought to a boil and add in the flour. This mixture is then cooked over low heat and lightly beaten eggs are then added in a little at a time to make a thick glossy paste. You don't have to use all of the eggs, just until the pastry is very thick and can hold its shape when piped. Pipe the pastry to about 4" long, and bake the piped pastry till golden brown, then make a neat slit along the side and bake again for another 5 minutes. Transfer to  a wire rack to cool.
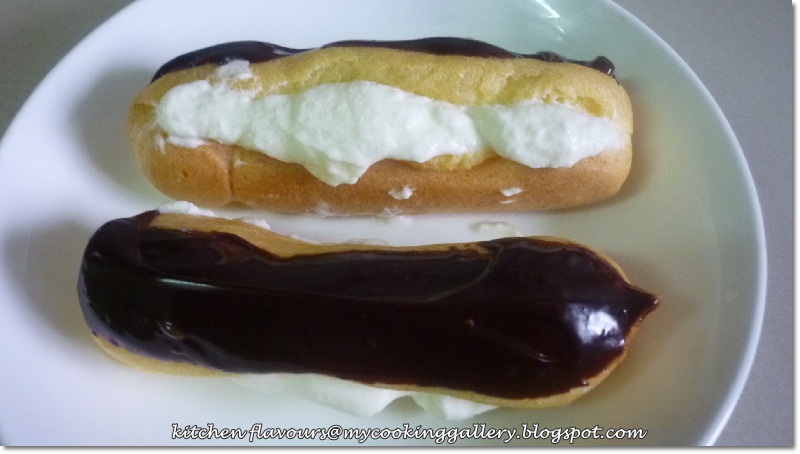


The whipped cream filling is sweetened with a tiny amount of icing sugar and flavoured with a little vanilla extract. This filling is piped into the cooled pastry and the top of the pastry is dipped into melted chocolate. Leave to set and enjoy. I have four eager kids hovering over me as I made this and the chocolate is barely set when they are enjoying it. I have "overstuffed" the eclairs with whipped cream as I find that I have more than the recipe calls for, and since I do not want it to go to waste, I have piped another layer over it, oops...it does not look pretty! 


This recipes makes only ten instead of twelve as the recipes states. All ten pieces of chocolate eclairs are gone in minutes!


I would like to thank all you lovely ladies who has baked along with us in 2012! A year has passed and we have baked all kinds of bakes that has been on our list of to try and never got round to it, well, at least until Bake-Along! I hope that Bake-Along has made that list of yours shorter! It certainly has to mine, but there's more addition to it as well! Looking forward to our bakes together in 2013! 


Please visit my baking buddies, Lena from Frozen Wings and Zoe from Bake For Happy Kids, and all our friends who has baked along with us in the linky below :

For the next bake, it is Cold Oven Cream Cheese Pound Cake, from Cake Keeper Cakes by Lauren Chattman or here. The linky will start on 14th January right up to 23rd January. Do join us, everyone's welcome.


Photobucket


A friendly reminder when linking to our blog hop :
1. Please mention Bake-Along event in your own post linking direct to any of the hosts' post (JoyceLena or Zoe)
2. Please link only new and current post, related to the current bake or theme provided by us. Unrelated post will be deleted.
3. Feel free to display our Bake-Along badge in your post.


Chocolate Eclairs
(adapted from "Pastry Cook" by Catherine Atkinson)
Makes twelve
300ml/1-1/4 cups double (heavy cream)
10ml/2 tsp icing sugar, sifted
1/4 tsp vanilla essence
115gm/4oz plain semi-sweet chocolate
2 tbsp water
2 tbsp butter

For the pastry
65gm/9 tbsp plain (all-purpose) flour
pinch of salt
50gm/1/4 cup butter, diced
150ml/2/3 cup water
2 eggs, lightly beaten

  1. Preheat the oven to 200C/400F/Gas 6. Grease a large baking sheet and line with baking parchment. To make the pastry, sift the flour and salt on to a small sheet of baking parchment. Heat the butter and water in a pan very gently until the butter melts.
  2. Increase the heat and bring to a rolling boil. Remove the pan from the heat and immediately tip in all the flour. Beat vigorously with a wooden spoon until the flour is mixed into the liquid.
  3. Return the pan to a low heat, then beat the mixture until it leaves the sides of the pan and forms a ball. Set the pan aside and allow to cool for 2-3 minutes.
  4. Add the beaten eggs, a little at a time, beating well after each addition, until you have a smooth, shiny paste, which is thick enough to hold its shape.
  5. Spoon the choux pastry into a piping (pastry) bag fitted with a 2.5cm/1in plain nozzle. Pipe 10cm/4in lengths on to the prepared baking sheet. Use a wet knife to cut off the pastry at the nozzle.
  6. Bake for 25-30 minutes, or until the pastries are well risen and golden brown. Remove from the oven and make a neat slit along the side of each to release the steam. Lower the oven temperature to 180C/350F/Gas 4 and bake for a further 5 minutes. Cool on a wire rack.
  7. To make the filling, whip the cream with the icing sugar and vanilla essence until it just holds its shape. Spoon into a piping bag fitted with a 1cm/1/2in plain nozzle and use to fill the eclairs.
  8. Place the chocolate and water in a small bowl set over a pan of hot water. Melt, stirring until smooth. Remove from the heat and gradually stir in the butter.
  9. Carefully dip the top of each eclair in the melted chocolate, then place on a wire rack. Leave in a cool place until the chocolate is set. The eclairs are best served within 2 hours of being made, but they can be stored in the refrigerator for up to 24 hours.


Join our blog hop, click on the link:
get the InLinkz code

Thursday, September 27, 2012

Almond Cream Puffs : Free And Easy Bake-Along #33 - Theme : Cream Puffs

It's time again for our Bake-Along! For this week's theme bake, my baking buddy, Lena from Frozen Wings has chosen "Cream Puffs"! I was really glad that this theme was chosen, which really 'pushed' me into trying out this yummilicious recipe that I intended to make for ages. There's a sticker sticking out from this very page which I have bookmarked  for more than a year! Ah-ha! I bet I'm not the only one who has recipes bookmarked for ages! Don't we all!


These are downright yummy!


I made half a recipe, and got only 5. Used the store-bought frozen puff pastry, they really do make life easier! The pastry are cut into two sizes of rounds (3" and 2-1/2"), for the base and for the top. The filling is made up of eggs, flour, ground almonds, sugar and whipped cream. To assemble, simply place the 3" cut pastry onto the bottom of the muffin pan, scoop two tablespoons of the filling on top of the pastry and cover the top with the 2-1/2" piece, seal the two pastries together, brush with milk and bake. Easy, peasy! The only thing is I did not seal the two pieces together because when I placed the filling onto the bottom pastry, it covers the pastry, so I am unable to seal the bottom pastry with the top one. But that is not a problem, it turns out just fine!


Eat it while still warm, nice and crispy! Scatter some icing sugar over the top before serving, yumssss! 


A definite hit with the kids and myself! The puff pastry, is of course, very light and crispy, I would not expect otherwise! And the filling is an absolute delight, not too sweet and very good! So if you would like to give this a try, make the full recipe! It is really good eaten warm, about 10 minutes right after baking, but be careful, the filling is hot! Reheat the ones that has gone cold, just before serving. 


Let's visit my baking buddies, Lena from Frozen Wings and Zoe from Bake For Happy Kids and all our baking friends who has baked along with us in the linky below.  For our next bake, we will be baking World's Quickest Yeasted Coffee Cake from Cake Keeper Cakes by Lauren Chattman, page 39 or you may get the recipe here. The linky will start on 8th October right up to 14th October. Do join us, everyone's welcome.


Photobucket


A friendly reminder when linking to our blog hop :
1. Please mention Bake-Along event in your own post linking direct to any of the hosts' post (JoyceLena or Zoe)
2. Please link only new and current post, related to the current bake or theme provided by us. Unrelated post will be deleted.
3. Feel free to display our Bake-Along badge in your post.


Almond Cream Puffs
(Pastry Cook by Catherine Atkinson)
Makes 10
275gm puff pastry
2 egg yolks
1 tbsp plain (all-purpose) flour
2 tbsp ground almonds
2 tbsp caster sugar
a few drops of vanilla or almond extract
150ml (2/3 cup) double (heavy) cream, whipped
milk, to glaze
icing (confectioners' sugar)

  1. Roll out the pastry thinly on a lightly floured surface, and cut out ten 7.5cm/3in plain rounds and ten 6.5cm/2-1/2in fluted rounds. Keep the smaller rounds for the tops, and use the larger ones to line a patty or cupcake tin. Chill for about 10 minutes. Preheat the oven to 200C/400F/Gas 6.
  2. Whisk the egg yolks with the flour, almonds, sugar and vanilla essence. Fold in the cream and spoon into the pastry cases. Brush the rims with milk, add the tops and seal the edges. Glaze with milk. Bake for 20-25 minutes until golden. Cool slightly. Dust with icing sugar before serving.
**These are best served warm, reheat any that become cold before eating.


Join our blog hop, get the InLinkz code

Sunday, September 25, 2011

Tomato and Black Olive Tart

Last weekend was my brother-in-law's birthday, and together with my other sisters and their family, went over to my sister's house to celebrate with them. It was a fun family gathering with delicious food and reminiscence of childhood stories that brings out smiles and laughter, no matter how many times they are repeated and retold all over again, we never get tired of hearing them again and again! :o)


The Birthday Cake
This beautiful Birthday Cake was baked by my youngest sister. It is beautiful and delicious, a lovely butter pound cake with scatters of dried cranberries.


I baked this Cheese and Onion Quiche, a hit with everyone. Everyone loved this, but since I baked only one, everyone got a small piece! Promised to bake more the next time round! I have posted this recipe before, click here. Well, I did bake another quiche, Tomato and Black Olive Tart, but the Cheese and Onion Quiche takes the limelight, it has bacon in it, what's not to love?  :) Seriously, this is a delicious quiche, even one of my nephews who doesn't like onions, asked for more, but alas, there's no more!  I promised to bake one for him! :)


The other quiche that I baked, is Tomato and Black Olive Tart. Now, this is vegetarian and would be more suitable for adults. If you love tomatoes and olive,  then I'm sure you will like this. I love the look of this tart, it looks simply lovely with the tomatoes and olives scattered all over. 


This would make a great lunch with a plate of fresh green salad.


As described by Catherine Atkinson, "This delicious tart has a fresh, rich Mediterranean flavour and is perfect for picnics. If you are taking this tart on a picnic, keep in the tin for easy transporting".


Tomato and Black Olive Tart
(adapted from "Pastry Cook" by Catherine Atkinson)
Serves 8
Ingredients
6 firm plum tomatoes
75gm/3oz ripe Brie cheese (I use grated cheddar cheese)
about 16 pitted black olives
3 eggs, beaten
300ml/1/2 pint/1-1/4 cups milk
300ml/2 tbsp chopped fresh herbs (I use fresh basil and coriander from my garden)
salt and ground black pepper


For The Pastry :
225gm/8oz/2 cups plain (all-purpose) flour
115gmoz/1/2 cup butter, diced
45-60ml/3-4 tbsp chilled water
pinch of salt (my addition)


  1. To make the pastry, sift the flour into a mixing bowl and rub or cut in the butter until the mixture resembles fine breadcrumbs. Sprinkle over the water and mix to a dough. Knead lightly on a floured surface for a few seconds until smooth. Wrap and chill for 30 minutes.
  2. Preheat the oven to 190C/375F/Gas 5. Roll out the pastry thinly and use to line a greased 28x18cm/11x7in loose-based rectangular flan tin (quiche pan). Trim the edges.
  3. Line the pastry case with some foil and baking beans, and bake blind for 15 minutes. Remove the foil and beans and bake for a further 5 minutes until the base is crisp.
  4. Slice the tomatoes, cube the cheese and finely slice the olives. Place the flan case on a baking sheet and arrange the tomatoes, cheese and olives in it. Mix together the eggs, milk, seasoning and chopped herbs.
  5. Pour the egg mixture into the case. Bake for about 40 minutes until just firm and turning golden. Slice hot or cool in the tin, then serve.
(my notes : to check whether the filling is well seasoned, I just pour a tablespoon of the egg and milk mixture into a corner of the frying pan (hold frying pan and tilt it) and cook until set, then taste it, add more salt and pepper if necessary before pouring it all on the filling. You would not enjoy a quiche which is not well seasoned! 
You could however try it without cooking it, but I do not like to do that when there are raw eggs!)


Saturday, August 20, 2011

Lemon Curd Tart

I have a quarter jar of homemade lemon curd left and was looking for recipes to use it for, instead of licking it off the spoon! :) Found this perfect recipe but I did make some changes to it. Firstly this recipe calls for curd cheese, I'm not even sure I've seen it before, so I just substitute with cream cheese. 


These are originally made in small mini mufiins pan or cupcake tins. I used the tart tins with daimeter of 3", and got about 15 tarts instead of 24 mini small tarts. According to the author, "These tasty little tarts are a popular tea-time treat in the North of England. They have a curd cheese and currant filling on a tangy layer of lemon curd."


The pastry is on the crunchy side and not as buttery soft as I expect it to be. But overall, this is a nice tart to have as a tea-time snack with a cup of tea. The lemon curd is so tangy and the sourness really pairs well with the cream cheese.


The tangy lemon curd!


The raisins add a lovely touch to the tangy tart.


I'm submitting this to :


LEMON CURD TARTS
(adapted from "Pastry Cook" by Catherine Atkinson)
Makes twenty-four
Ingredients
225gm/8oz/1 cup curd (farmer's cheese) (I use cream cheese)
2 eggs, beaten
75gm/3oz/6 tbsp caster (superfine) sugar
5ml/1tsp finely grated lemon rind
50gm/2oz/1/4 cup currants
60ml/4 tbsp lemon curd
thick cream, to serve


For the pastry
275gm/10oz/2-1/2 cups plain (all-purpose) flour
pinch of salt
75gm/3oz/6 tbsp butter, diced
50gm/2oz/1/4 cup lard or white vegetable fat
60ml/4 tbsp chilled water (I use abt 5-6 tablespoons)

  1. To make the pastry, sift the flour and salt into a mixing bowl. Rub or cut in the fat until the mixture resembles fine breadcrumbs. Sprinkle the water over the dry ingredients and mix to a dough. Knead on a lightly floured surface for a few seconds until smooth. Chill.
  2. Preheat the oven to 180C/350F/Gas 4. Roll our the pastry thinly, stamp out 24 rounds using a 7.5cm/3in plain pastry cutter and use to line a mini muffin or cupcake tins. Chill until required.
  3. Cream the curd cheese with the eggs, sugar and lemon rind in a bowl. (I beat the cream cheese until smooth and add in eggs, sugar and lemon rind, continue creaming till smooth). Stir in the currant. Place 2.5ml/1/2 tsp of the lemon curd in the base of each tartlet case. Spoon on the filling, flatten the tops and bake for 35-40 minutes until just turning golden. Serve warm or cold, topped with thick cream.


Wednesday, August 3, 2011

Red Onion Tart With A Cornmeal Crust

Made this Tart for lunch. Perfect for vegetarians as this is absolutely meat free. If you love onions as much as we do, then you will like this. The cornmeal gives the pastry a crumbly texture. The recipe calls for Fontina Cheese, which I do not have,  and have not even seen it before nor heard of this cheese, so I googled for info on this cheese, and found out that Fontina Cheese is a semi-soft  cheese which comes from Italy. It makes a good table cheese and is mild and smooth when melted. Since I only have Cheddar Cheese, I just used that instead.  From the picture in the book, the Fontina Cheese seems to melt beautifully into the onions. But not the Cheddar Cheese, it melts but the tart looks like the top of a pizza. :) I should have grated the Cheddar Cheese instead, then it would be easier to spread it evenly over the tart. I am imagining the flavours of the melted Fontina Cheese, should be really good! Use Fontina, instead of Cheddar!


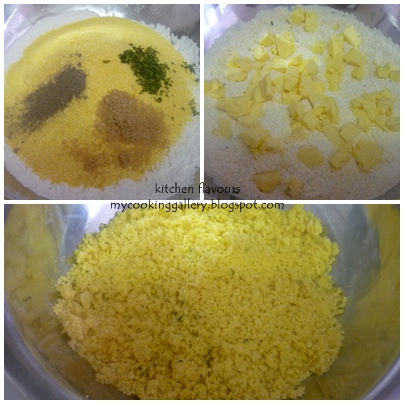
  1. Mix flour, cornmeal, sugar, fresh thymes (from my garden :) ) and black pepper powder in a large bowl, stir to combine.
  2. Add in butter and rub or cut in.
  3. Rub till mixture resembles fine breadcrumbs.


  1. Bind pastry to a soft dough. Shape into a ball.
  2. Flatten slightly, wrap with plastic wrap, refrigerate for 30 minutes.
  3. Roll out and line a tart pan, prick base all over with a fork, cover sides with strips of foil, bake for about 12-15 minutes till lightly browned.


  1. Sliced onions thinly, heat some oil and cook over low heat, covered for 20-30 minutes. Add in thymes and garlic and continue to cook for another 10 minutes, stirring occasionally.
  2. Add in sugar, vinegar, salt and pepper to taste. Increase heat slightly and cook for a further 5-10 minutes, stirring occasionally. Let cool.


  1. Remove foil, fill pastry base with onion filling and place cheese on top, drizzle with a little oil.
  2. Bake for another 15-20 minutes until filling is hot.


 Fresh from the oven! Garnish with some chopped fresh thyme.


Serve hot! It tastes better while it is still hot. Don't forget to make a pot of tea to go with this!


I'm submitting this to :


And also sharing this post with :
Hearth and Soul Hop at Mom's Sunday Cafe
Bake With Bizzy at Bizzy B. Bakes


Red Onion Tart With A Cornmeal Crust
(adapted from "Pastry Cook" by Catherine Atkinson)
Serves 5 to 6
For The Filling
60ml (4tbsp) olive oil
1 kg (2-1/4lb) red onion, thinly sliced
2-3 garlic cloves, thinly sliced
5ml (1tsp) chopped fresh thyme, plus a few whole sprigs
5ml (1tsp) soft dark brown sugar
10ml (2tsp) sherry vinegar (I use balsamic vinegar)
225gm (8oz) Fontina cheese, thinly sliced
salt and ground black pepper


For The Pastry
115gm (4oz / 1 cup) plain flour (all-purpose)
75gm (3oz / 3/4 cup) fine yellow cornmeal
5ml (1tsp) soft dark brown sugar
5ml (1tsp) chopped fresh thyme
90gm (3-1/2oz / 7 tbsp) butter, diced
1 egg yolk
30-45ml / 2-3 tbsp chilled water

  1. To make the pastry, sift the flour and cornmeal with 5ml/1tsp salt in a bowl. (I used salted butter, so I only add in a pinch of salt). Add plenty of black pepper and stir in the sugar and thyme. Rub or cut in the butter until the mixture resembles fine breadcrumbs. Beat the egg yolk with 30ml/2tbsp water and use to bind the pastry, adding more water if necessary. Gather into a ball, wrap in clear film (plastic wrap) and chill for 30 minutes.
  2. To make the filling, heat 45ml/3tbsp of the oil in a large, deep frying pan and add the onions. Cover and cook slowly, stirring occasionally, for 20-30 minutes.
  3. Add the garlic and chopped thyme and cook, stirring occasionally, for about 10 minutes. Increase the heat slightly, then add the sugar and sherry vinegar. Cook, uncovered, for another 5 minutes until the onions start to caramelize slightly. Season and cool.
  4. Preheat the oven to 190C/375F/Gas 5. Roll out the pastry thinly and use to line a 25cm/10 in loose-based flan tin (quiche pan). Prick the pastry all over with a fork and support the sides with foil. Bake for 12-15 minutes until the pastry is just lightly coloured.
  5. Remove the foil and spread the onions in the base of the pastry case. Add the Fontina and season to taste. Drizzle over the remaining oil, then bake for 15-20 minutes until the filling is hot. Garnish with  a few thyme sprigs and serve immediately.

Friday, June 24, 2011

Cheese and Onion Quiche

This is so delicious! Downright yummy!  I bought this book "Pastry Cook" by Catherine Atkinson more than a year ago and have constantly going through this book, with "delicious plans in my head" of making this and that each time I opened this book, but have never tried anything from it, that is, until now! This is a beautiful, gorgeous book to own, the colourful pictures are stunning and there are a few pictures for every recipe! My favourite kind of cookbook! Don't you just love cookbook full of pictures? 


One of the reasons that I've hardly tried any pastry from this book or any other pastry book, is simply because I'm just lazy. The thought of mixing the pastry, chill it, bake blind, bake again, and preparation of the filling always makes me putting it off again and again. And I'm not very good at rolling the pastry to line it over the pan, there's always holes and tears and the size does not always fit! Finally, out of self-guilt, I decided to give this a try and made this for our lunch, and I am so glad I did! I think I did a pretty good job in rolling and lining the pastry pan. There's a little crack, but I patched it up, and it can't be seen! Hehe! Not perfect, but not too bad either! :)

This Cheese and Onion Quiche is so delicious, my kids have asked me to make this again. I even have to quickly reserve a slice for my hubby to try when he comes home from work before it all disappears! The recipe says this serves 6 to 8, but if you have hungry kids around, it will only serves 4! 


According to the recipe, bacon is an option, well in my house, this does not apply! :)  It is so tasty with the bacon, though I think that without it, it will be delicious too. And I use milk instead of cream.


There will definitely be a repetition of this delicious quiche very soon in my kitchen!


Delicious!

I'm linking this to
Full Plate Thursday over at Miz Helen's Country Cottage
Recipe Swap Thursday over at Prairie Story
Weekend Roundup at 21st Century Housewife
Cookbook Sunday at Mom's Sunday Cafe

Cheese and Onion Quiche
(adapted from "Pastry Cook" by Catherine Atkinson)
Serves 6 to 8
Ingredients
25gm / 1oz / 2 tbsp butter
1 large onion, thinly sliced
4 rindless streaky (fatty) bacon rashers (strips), roughly chopped (optional)
3 eggs
300ml / 1/2 pint / 1-1/4 cups single (light) cream or milk
1.5ml / 1/4 tsp freshly grated nutmeg
90gm / 3-1/2 oz hard cheese, such as Cheddar or Gruyere, grated
salt and ground black pepper


For The Pastry :
200gm / 7oz / 1-3/4 cups plain (all-purpose) flour
2.5ml / 1/2 tsp salt
90gm / 3-1/2 oz / scant 1/2 cup butter, diced
about 60ml / 4 tbsp chilled water

  1. To make the pastry, sift the flour and salt into a small bowl. Rub or cut in the butter until the mixture resembles fine breadcrumbs. Add 45ml/3 tbsp of the water and mix to a firm dough, adding more water if required. Knead until smooth, wrap in clear film (plastic wrap) and chill for 20 minutes.
  2. Roll out the dough on a clean, lightly floured work surface and use to line a 23cm/9in loose-based flan tin (quiche pan). Press the pastry firmly into the sides and base of the tin and let it rise above the rim by about 1cm/1/2 in to allow for a little shrinkage during cooking. Prick the pastry base all over with a fork.
  3. Line the pastry case with foil and baking beans and chill again for about 15 minutes. Preheat the oven to 200C/400F/gas mark 6 with a baking sheet placed in it. Stand the flan tin on the baking sheet and bake blind for 15 minutes.
  4. Remove the foil and beans from the pastry case and return it to the oven for a further 5 minutes. Remove the pastry case from the oven and lower the oven temperature to 180C/350F/Gas 4.
  5. To make the filling, melt the butter in a large, heavy frying pan. Add the onion and chopped bacon, is using, and saute for about 10 minutes until the onion is soft and golden. Beat the eggs and the cream or milk together in a bowl. Add the grated nutmeg and seasoning to taste.
  6. Spoon the onion mixture into the cooked pastry case and evenly sprinkle over the cheese. Pour the egg and cream mixture slowly over the filling. Bake the quiche for 35-40 minute, or until the filling has just set. Remove from the oven, leave to cool, then gently ease the quiche out of the tin and transfer to a serving plate.
(my notes : to check whether the filling is well seasoned, I just put a tablespoon of the egg and milk mixture into a corner of the frying pan (hold frying pan and tilt it) and cook until set, then taste it, add more salt and pepper if necessary before pouring it all on the filling. You would not enjoy a quiche which is not well seasoned! 
You could however try it without cooking it, but I do not like to do that when there are raw eggs!)


yum! yum!