Showing posts with label Kim Laidlaw. Show all posts

Sunday, February 12, 2017

Cinnamon Rolls

I'm back after a few weeks of blogging rest. It was an unplanned rest, came about when I hurt my back while cleaning my kitchen. I tried to lift the microwave oven. And hurt my back. Spend the first few days lying down (ouch!). If you have experienced with back pain before (this is not my first either!), you would know that it takes weeks for the pain to subside. So I have not been baking for the past few weeks or do anything much except to finish reading three novels. And no, I will not be lifting the microwave oven again (or any other heavy stuffs!) on my own anytime in the future! 

I made these Cinnamon Rolls as I was itching to bake some sweet bread. The original recipe is called Gooey Cinnamon Rolls with Cream Cheese frosting. I did not have any cream cheese so I omitted the frosting. 

The dough is enriched with milk, butter and eggs, similar to a brioche, soft and smooth, and easy to work with. The recipe makes 16 rolls, all of which are supposed fit in a 13x9-inch pan. I could not fit all of the rolls in the pan, so 12 rolls goes into the 13x9-inch pan, and the balance  4 rolls are placed in a 6" round cake pan. 


I mixed the ingredients for the filling ; ground cinnamon, brown sugar, orange zest in a bowl. The dough is divided into two halves, and each half is rolled out to 9 by 14 inch rectangle. Spread the rolled dough with some softened butter and spread half the filling on each, roll up the dough, Swiss roll style. Slice into 8 even slices and place in the greased pan, cut side up. I have spread one dough half with some raisins over the filling, and leaving the other half only with the cinnamon filling.


The rolls smells wonderful while baking. 


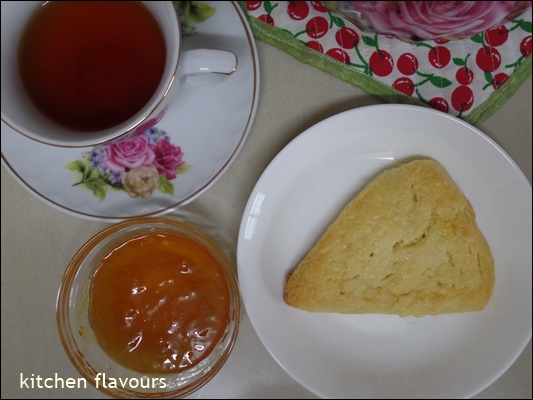
Very nice when eaten while still warm. Soft moist crumbs with sweet cinnamony taste and the fragrant orange zest,  and fruity bite of the raisins. Lovely with a cup of tea. The rolls are not as soft on the next day, but can be reheated wrapped in foil, about ten minutes in the oven. 


Cinnamon Rolls
(Williams-Sonoma : Home Baked Comfort by Kim Laidlaw)
makes 16 buns
for the dough :
1 package (2-1/4 tsp) active dry yeast
3/4 cup (6 fl oz/180ml) whole milk, warmed (110F/43C)
1/4 cup (4 oz/125gm) granulated sugar
4 large eggs
4-1/2 cups (22-1/2 oz/705gm) all-purpose flour, plus more as needed
1-1/2 tsp kosher salt
6 tbsp (3 oz/90gm) unsalted butter, at room temperature, cut into chunks

for the filling :
4 tbsp (2 oz/60gm) unsalted butter, at room temperature, cut into chunks
2/3 cup (5 oz/155gm) firmly packed light brown sugar
2 tsp ground cinnamon
finely grated zest of 1 large orange
1 egg, lightly beaten with 1 tsp water

To make the dough, in the bowl of a stand mixer, dissolve the yeast in the warm milk and let stand until foamy, about 10 minutes. (I used instant yeast, so I've skipped the foaming step, simply whisk together with the milk and continue on with the next step). Add the granulated sugar, eggs, 4-1/2 cups flour, and salt. Attach the dough hook and knead on low speed, adding a little more flour if needed, until the ingredients come together. Toss in the butter and continue to knead until the dough is smooth and springy, about 7 minutes. Lightly oil a large bowl. Form the dough into a ball, put it in the oiled bowl, and cover the bowl with plastic wrap. Let the dough rise at room temperature until it doubles, 1-1/2 - 2 hours.
Butter a 9-by-13-inch (23-by-33-cm) baking dish. Punch down the dough and turn out onto a lightly floured surface. Cut it in half.
Roll out 1 dough half into a rectangle about 9 by 14 inches (23 by 35cm). Spread with half of the butter, then sprinkle evenly with half of the brown sugar, half of the cinnamon, and half of the grated zest. (I mixed the ground cinnamon, brown sugar and orange zest in a bowl, divide into two portions) Starting at the long side closest to you, roll the rectangle away from you, forming a log. Cut the log crosswise into 8 equal slices. Arrange the slices, cut side down, in half of the prepared pan. Repeat with the remaining dough and filling ingredients, and arrange the slices in the other half of the pan. Cover the pan loosely with plastic wrap and let stand in a warm, draft-free spot until puffy, about 1 hour, or refrigerate overnight, then let stand at room temperature for 30-60 minutes before baking.
Position a rack in the middle of the oven and preheat to 400F (200C). Brush the buns lightly with the beaten egg. Bake until the rolls are golden brown and a toothpick inserted into the centre of a roll comes out clean, 20-25 minutes. Let the rolls cool slightly in the pan on a wire rack, then spread with the frosting while they are still warm. Pull the rolls apart and enjoy while they're warm.


I'm linking this post with Cookbook Countdown #14 hosted by 


Wednesday, November 23, 2016

Whoopie Pies With Salted Dulce De Leche

I've made some Dulce De Leche for a tart recipe, and still have more than a jar left. So I'll be using it for various recipes using dulce de leche, which I have bookmarked to try for ages. One of it is, Whoopie Pies with Salted Dulce de Leche.

Even though Whoopie Pies are listed as under Cookies, they are really cake-like, and to me, are really little mini cakes. Sandwiched with some filling, they make nice little snacks. The dough for these cookies are really very thick batter, which needs to be refrigerated for 2 hours to firm up before shaping into small balls.


You will need to wet your hands when shaping tablespoons of the thick batter into little rounds and place on a parchment lined baking sheet, spacing them slightly apart, and pressing them down a little. These cookies are baked for just 8-10 minutes until puffed and slightly firm. Leave to cool on pans for 5 minutes, then tranfer to the wire racks to cool completely.

The filling is made of ; butter, confectioners' sugar, a little heavy cream, salt and dulce de leche. I have reduced the amount of the confectioners' sugar to half. I like this filling, as it is not too sweet, even with the dulce de leche, very nice actually.


Spread some filling on the flat side of one cookie and top with another cookie, with flat side on filling. The recipe indicate to refrigerate the whoopie pies for at least 1 hour until the filling is set. But there's really no need for that, the filling is firm enough that it holds very well. Plus we could not wait to taste it right away!


I was expecting these cookies to be on the sweet side, but surprisingly the sweetness is just right. Maybe because I reduced the brown sugar for the batter slightly, by using about 3 tablespoons less than the amount stated in the recipe. The cookies are a little chocolaty bitter and goes perfectly well with the not-so-sweet filling. Very nice! For those who love a sweeter cookie, use the full amount of brown sugar as per the recipe.

I keep the leftovers in the refrigerator and they are as good on the next day.


The Whoopie Pies cookie is soft, chocolaty, moist and perfect with the salted Dulce de Leche filling.


Whoopie Pies With Salted Dulce De Leche
(Home Baked Comfort by Kim Laidlaw)
makes 10 whoopie pies
for the cookies :
6 tbsp (90gm) unsalted butter, at room temperature
1/2 cup (105gm) firmly packed light brown sugar
1 large egg
1 tsp pure vanilla extract
3/4 cup (125gm) all-purpose flour
1/2 cup (45gm) natural cocoa powder
1/2 tsp baking powder
1/4 tsp kosher salt

for the filling :
4 tbsp (60gm) unsalted butter, at room temperature
3/4 cup (90gm) confectioners' sugar
2 tbsp heavy cream
1/4-1/2 tsp kosher salt
1/3 cup (80ml) dulce de leche

To make the cookies, in the bowl of a mixer fitted with the paddle attachment, beat the butter and sugar on medium-high speed until combined. Add the egg and vanilla and beat until blended. Sift the flour, cocoa, baking soda, and salt into the bowl and beat just until blended. Cover the bowl and refrigerate the dough until firm, about 2 hours.
Space 2 racks evenly in the oven and preheat to 350F (180C). Line 2 baking sheets with parchment.
With dampened hands, shape tablespoonfuls of the dough into balls. Place them firmly on the prepared pans, spacking them slightly apart and squishing them a little. You should have about 20 balls. Bake until the cookies are puffed and slightly firm, 8-10 minutes, rotating the pans about halfway through. Let the cookies cool on the pans for 5 minutes, then transfer to wire racks to cool completely.
While the cookies are cooling, make the filling : In the bowl of a mixer fitted with the paddle attachment, beat the butter and confectioners' sugar on medium-high speed until lightened. Stir in the cream and salt, to taste, on low speed, then stir in the dulce de leche until the filling is smooth.
Spread the flat side of half of the cookies with a big dollop of the filling. Top each with a second cookie, placing the flat side on the filling. Refrigerate until the filling is set, at least 1 hour. Whoopie!


********************************

I'm linking this post with Cookbook Countdown Special : BAKE! hosted by 


Cookbook Countdown is a monthly cooking/baking event, which I'm co-hosting with Emily's Cooking (Makan2) Foray.  Everyone is welcome to join us. How does it work? To summarize, you may select a cookbook from your own cookbook collection, to cook or bake from each month. That selected book shall be your cookbook of the month. You may cook any recipes and as many recipes as you want from your selected book of the month. This is a fabulous way of using your cookbooks at least once! For more information on how to join Cookbook Countdown, please click here. 


Grab a cookbook and join us!

To link to Cookbook Countdown #11, click here
To link to Cookbook Countdown Specials : BAKE, click here


Sunday, November 13, 2016

Peach Butter Shortbread

This recipe for Peach-Brown Butter Shortbread is a Smitten Kitchen's recipe, and it is one of the recipes featured in "Home Baked Comfort" by Kim Laidlaw.

One of the ingredient used in Peach-Brown Butter Shortbread squares is brown butter. Butter is melted over medium-low heat and is heated and boiled until it turns brown and starts to smell nutty, stir frequently to avoid burnt. Then it is transfered to a heatproof bowl and freeze for 30 minutes just until solid but not completely frozen. Well, I made the brown butter but did not use it! Simply because at the end of 30 minutes, the butter is still in liquid state, and did not seem to harden at all. Since I was in a rush, I did not want to wait, so I've used a new block of cold butter instead, cut to cubes before adding to the rest of the ingredients for the shortbread. 


The handy food processor is great in mixing the shortbread dough, and it was done in just seconds. Two thirds of it (recipes says 3/4) is used as the base, pressing them firmly on the bottom of a greased baking tray, which I lined with parchment paper. I've used canned peaches, drain, sliced them thinly, about 1/4-inch thick. Arrange the sliced peaches over the shortbread dough in the pan. Scatter the remaining shortbread dough over the top of the peaches.


Bake until golden brown. Leave to cool and cut into squares to serve.


I brought the whole tray to my sister's house that evening, and we've enjoyed it with scoops of ice cream. 

Peach-Brown Butter Shortbread
(Home Baked Comfort, Kim Laidlaw)
makes about 2 dozen squares
1 cup (8oz/250gm) cold unsalted butter
1 cup (8oz/250gm) granulated sugar
1 tsp baking powder
2-3/4 cups (14 oz/440gm) all-purpose flour
1/4 tsp ground cinnamon
1/8 tsp freshly grated nutmeg
1/4 tsp kosher salt
1 large egg
2 juicy, ripe but slightly firm peaches, pitted and thinly sliced

In a saucepan, melt the butter over medium-low heat. The melted butter will foam, then become clear golden, and finally start to turn brown and smell nutty. Stir frequently, scraping up any bits from the bottom. Watch the butter carefully at the end, as it turns brown quickly. Chill in the freezeer until solid but not completely frozen, about 30 minutes.
Position a rack in the middle of the oven and preheat to 375F (190C). Butter a 9-by-13-inch (23-by-33-cm) baking pan.
In a bowl, whisk together the sugar, baking powder, flour, cinnamon, nutmeg, and salt. Using a pastry blender or 2 table knives, blend the solidified brown butter and the egg into the dry ingredients. The brown butter mixture will be crumbly. Pat three-fourths of the mixture into the bottom of the prepared pan, pressing firmly. Arrange the peach slices on top in a single layer. Crumble the remaining brown butter mixture evenly over the peaches.
Bake until the top is slightly brown and you can see a little colour around the edges, about 30 minutes. Let cool completely in the pan, then cut into squares.


********************************

I'm linking this post with Cookbook Countdown Special : BAKE! hosted by 


Cookbook Countdown is a monthly cooking/baking event, which I'm co-hosting with Emily's Cooking (Makan2) Foray.  Everyone is welcome to join us. How does it work? To summarize, you may select a cookbook from your own cookbook collection, to cook or bake from each month. That selected book shall be your cookbook of the month. You may cook any recipes and as many recipes as you want from your selected book of the month. This is a fabulous way of using your cookbooks at least once! For more information on how to join Cookbook Countdown, please click here. 


Grab a cookbook and join us!

To link to Cookbook Countdown #11, click here
To link to Cookbook Countdown Specials : BAKE, click here


Thursday, November 3, 2016

Apple-Cinnamon Hand Pies

I bought some Fuji apples a few weeks ago, and maybe I bought too many! Got to use them up and what better and delicious way than an apple pie? In this case, it's hand pies! Recipe is from Home Baked Comfort by Kim Laidlaw, and so far I have had success with all the recipes I've tried.


I started by making the flaky pie dough in the morning, and by late afternoon, we have warm fragrant apple pie for tea time treat. Fuji apples, it's one of my favourite apples to use for baking. The apples are peeled, cored and cut into small cubes, then mixed with some brown sugar, ground cinnamon, lemon juice and a tablespoon of flour. Once the dough is done, it is rolled out and cut out into 6 or 7 inches rounds, using a bowl as a guide. Brush some egg mixture along the border of half of each rounds. Scoop some filling and place in the centre of the round, bring the sides of the dough together and press to seal. Use a fork to press the borders. Brush the top of the dough with more egg mixture. The recipe did not say anything about slashing the top, but I made a couple of slashes, to allow steam to escape during baking. I've used a 5-1/2 inch bowl as a guide to cut out the rounds and the dough yields 9 rounds for 9 pies.

Bake until golden brown, and the juices are bubbling and oozing from the slashes.


Freshly baked, still warm, about to be served!


Yum! The pie crust is flaky, buttery and crisp tender. Juicy soft apple filling and fragrant from the cinnamon. There's a vanilla glaze which is drizzled over the baked pies, (given in the recipe), but I have omitted the glaze. I let the baked pie rest for 10 to 15 minutes before eating. So good when eating the still warm pie, but be careful when biting into the filling, it's hot! We did not miss the glaze at all, the pie is very good even without it. With a mug of warm tea, this is the perfect afternoon snack.


Apple-Cinnamon Hand Pies
(adapted from "Home Baked Comfort", Kim Laidlaw)
makes 8 hand pies
Flaky pie dough for double crust * refer below
4 baking apples, peeled, cored, and cut into small chunks (scant 3 cups/12 oz/375gm)
juice of 1/4 lemon
1/3 cup (2-1/2oz/75gm) light brown sugar
1/4 tsp ground cinnamon
1 tbsp all-purpose flour
1 large egg, beaten with 1 tsp milk

for the glaze (optional)
1/2 cup (2 oz/60 gm) confectioners' sugar, sifted
1/4 tsp pure vanilla extract

Prepare the flaky pie dough and chill as directed.
Position a rack in the middle of the oven and preheat to 375F (190C). Line a rimmed baking sheet with parchment paper.
On a lightly floured work surface, roll out the dough into a large circle about 1/8 inch (3mm) thick. Using an inverted bowl, cut out eight 6 or 7-inch (15 or 18-cm) circles of dough. You'll have to gather the scraps and reroll the dough a few times. Alternatively, you can divide the dough into 3 equal pieces and roll each piece into a circle. Place the circles on the prepared sheet and refrigerate for about 10 minutes.
In a bowl, toss together the apple chunks, lemon juice, brown sugar, cinnamon, and flour. Remove the dough circles from the refrigerator and place in an even layer on your work surface. Brush a thin layer of the egg wash around the border of half of each circle. Divide the filling among the dough circles, placing it in the middle of each circle. Fold the dough over the filling to make a half moon and press the edges with a fork to seal. Brush the tops with the remaining egg wash.
Bake until the hand pies are puffed and golden brown and oozing juice, 25-30 minutes. Set aside to cool on a wire rack.
To make the glaze, in a small bowl, whisk together the confectioners' sugar, vanilla and 1 tablespoon water. Brush the glaze over the pies as soon as they come out of the oven while they are hot.
Serve the pies warm or at room temperature.

Flaky Pie Dough
2 cups (10 oz/315gm) all-purpose flour
1/2 tsp kosher salt
1 tsp sugar
3/4 cup (6 oz/185 gm) very cold unsalted butter, cut into cubes
8 tbsp (4 fl oz/125 ml) ice water, plus more if needed

In the bowl of a food processor, stir together the flour, salt, and sugar. Sprinkle the butter over the top and pulse for a few seconds, or just until the butter is slightly broken up into the flour but still in visible pieces. Evenly sprinkle the water over the flour mixture, then process just until the mixture starts to come together. Dump the dough onto a work surface, press it together, then divide it in half. Press each half into a disk, then place the disks in a large lock-up plastic bag. Refrigerate the dough for 30 minutes or up to 1 day, or freeze for up to 1 month.


********************************

I'm linking this post with Cookbook Countdown Special : BAKE! hosted by 


Cookbook Countdown is a monthly cooking/baking event, which I'm co-hosting with Emily's Cooking (Makan2) Foray.  Everyone is welcome to join us. How does it work? To summarize, you may select a cookbook from your own cookbook collection, to cook or bake from each month. That selected book shall be your cookbook of the month. You may cook any recipes and as many recipes as you want from your selected book of the month. This is a fabulous way of using your cookbooks at least once! For more information on how to join Cookbook Countdown, please click here. 


Grab a cookbook and join us!

To link to Cookbook Countdown #11, click here
To link to Cookbook Countdown Specials : BAKE, click here


Wednesday, October 19, 2016

Nutty Mulberry Financiers

Cookbook Countdown Specials : Bake is a baking event, which I'm co-hosting with Emily's Cooking (Makan2) Foray.  This is a "spin-off" from our on-going monthly Cookbook Countdown. Cookbook Countdown Specials : Bake is for baking desserts ; pastries, cakes, cookies, pies, tarts, breads. While the monthly Cookbook Countdown is to use from one selected cookbook each month, for CC Specials : Bake, you may use any baking cookbooks of your choice, either from one single cookbook or from numerous books. The link is open from October to end December. You may link your post here. Do join us, everyone is welcome!


To link to Cookbook Countdown Specials : BAKE, click here
To link to Cookbook Countdown #10, click here


*************************************

The next recipe I've made from Williams-Sonoma : Home Baked Comfort by Kim Laidlaw is Nutty Raspberry Financiers, a recipe, courtesy from La Tartine Gourmande

Raspberry is very expensive and it is not always available. So I've used some frozen mulberries, of which I've collected and kept frozen, from my one and only small little mulberry plant in a pot. Since financiers uses only egg whites instead of whole eggs, this is a great way of using up the frozen egg whites accumulating in my freezer!


These financiers are gluten-free, using almond meal, hazelnut flour and rice flour. I have reduced the sugar to 80gm and the sweetness was just right. A vanilla bean is split, seeds scraped out and both the seeds with it's pod, and butter is placed in a small saucepan, over medium heat until the butter melts, starts to brown lightly and smells nutty. I have however omitted the vanilla bean, and have used vanilla extract which is added to the batter later. Let the butter cool slightly.

Beat the egg whites to the dry ingredients, add the butter in three batches, mixing well after each addition. I've added the vanilla extract at this stage. Divide the batter between the muffin cups and bake for 18-20 minutes. This recipe yields 6 muffins instead of  8. 


Just before serving, dust with confectioners' sugar.


Moist, soft with nutty aroma. The mulberries works out great. These little gluten-free mini cakes, as the author says, "They are the perfect afternoon snack served alongside a hot cup of tea".


Nutty Raspberry Financiers
(adapted from "Home Baked Comfort", Kim Laidlaw)
makes 8 financiers
1/2 cup (2 oz/60gm) almond meal
1/3 cup (1 oz/30gm) hazelnut flour
1/4 cup (1 oz/30gm) amaranth flour or white rice flour
1/2 cup (4 oz/125gm) granulated sugar (I use 80gm)
1/4 tsp kosher salt
1 vanilla bean (replaced with 1/2 tsp vanilla extract, to be added into the batter later)
7 tbsp (3-1/2 oz/105gm) unsalted butter
4 large egg whites
24 raspberries (I use frozen mulberries)
confectioners' sugar for serving

Position a rack in the middle of the oven and preheat to 350F (180C). Line 8 standard muffin cups with paper liners or grease with butter. Line a baking sheet with parchment paper. Spread the almond meal and hazelnut flour on the prepared sheet and bake until fragrant, about 5 minutes. Let cool.
In a bowl, using a whisk, combine the toasted almond meal and hazelnut flour, amaranth flour, granulated sugar, and salt. Split the vanilla bean and scrape out the seeds with the back of a paring knife. In a small saucepan, combine the vanilla bean and seeds with the butter. Cook over medium heat until the butter melts, starts to brown lightly, and has a nutty aroma. Let cool for 3-4 minutes.
Beat the egg whites into the dry ingredients. Add the melted butter mixture in 3 additions, mixing well after each. Stir in the vanilla extract.
Divide the batter between the muffin cups and top with the raspberries, pressing them gently into the batter. Bake until the financiers are lightly golden brown, 18-20 minutes. Remove from the pan and let cool on a wire rack. Dust with confectioners' sugar before serving.


Grab a cookbook and join us!

Cookbook Countdown


Saturday, October 8, 2016

Super Banana Bread

Cookbook Countdown Specials : Bake is a baking event, which I'm co-hosting with Emily's Cooking (Makan2) Foray.  This is a "spin-off" from our on-going monthly Cookbook Countdown. Cookbook Countdown Specials : Bake is for baking desserts ; pastries, cakes, cookies, pies, tarts, breads. While the monthly Cookbook Countdown is to use from one selected cookbook each month, for CC Specials : Bake, you may use any baking cookbooks of your choice, either from one single cookbook or from numerous books. The link is open from October to end December. You may link your post here. Do join us, everyone is welcome!


To link to Cookbook Countdown Specials : BAKE, click here
To link to Cookbook Countdown #10, click here


*************************************

I'm baking through Home Baked Comfort by Kim Laidlaw as a personal project of mine, and the next recipe I've made is Super Banana Bread. Another keeper recipe. If you have some leftover bananas that are begging to be used, make this quick bread!


A lovely bread. I've made half a recipe for one loaf, so have used only half the amount of the ingredients listed in the recipe, with a further reduction in the amount of brown sugar used ; for half a recipe, I've used only 1/4 cup, and it is sweet enough. The bananas are very sweet to begin with!


I like the crumb texture of this quick bread. It is moist, soft and light, not as dense and heavy as some bananas bread tend to be. I will be making this again when I have leftover bananas.  

I've made half a recipe for one loaf, using half amount of the ingredients listed, with some changes to the following :
use nutmeg powder instead of freshly grated
use 1/4 cup light brown sugar
omitted the sprinkling of the turbinado sugar


Super Banana Bread
(adapted from "Home Baked Comfort", Kim Laidlaw)
makes 2 loaves
2 cups (10oz/315gm) all-purpose flour
2 tsp baking powder
1/2 tsp baking soda
1/2 tsp kosher salt
1/2 tsp ground cinnamon
1/8 tsp freshly grated nutmeg
3 very ripe, large bananas, mashed
2 large eggs
1 cup (7oz/220gm) firmly packed dark brown sugar (I use 1/4 cup for one loaf)
1/2 cup (4oz/125gm) sour cream
1 tsp pure vanilla extract\
4 tbsp (2oz/60gm) unsalted butter, melted
Turbinado sugar for sprinkling

Position a rack in the middle of the oven and preheat to 350F (180C). Generously butter two 9-by-5-inch (23-by-13-cm) loaf pans.
In a bowl, sift together the flour, baking powder, baking soda, salt, cinnamon, and nutmeg. In a large bowl, whisk together the bananas, eggs, brown sugar, sour cream, vanilla, and butter. Add the dry ingredients and stir to combine.
Divide the batter between the prepared pans and sprinkle with turbinado sugar. Bake until a toothpick inserted into the centre of a loaf comes out clean, about 35 minutes. Let cool slightly in the pans, then turn the laoves out onto a wire rack to cool.


Cookbook Countdown


Thursday, September 22, 2016

Pepperoni and Egg Breakfast Tart

Cookbook Countdown Specials : Bake is a baking event, which I'm co-hosting with Emily's Cooking (Makan2) Foray.  This is a "spin-off" from our on-going monthly Cookbook Countdown. Cookbook Countdown Specials : Bake is for baking desserts ; pastries, cakes, cookies, pies, tarts, breads. While the monthly Cookbook Countdown is to use from one selected cookbook each month, for CC Specials : Bake, you may use any baking cookbooks of your choice, either from one single cookbook or from numerous books. The link is open from July to end September. You may link your post here. Do join us, everyone is welcome!


To link to Cookbook Countdown Specials : BAKE, click here
To link to Cookbook Countdown #9, click here


*************************************

A savoury bake that is perfect for brunch or as a light lunch. It is quick, easy and delicious. If you have a pack of frozen puff pasty in the freezer, thaw it overnight in the refrigerator, and by breakfast or lunch time the next day, you will be able to serve this savoury tart in less than half an hour.

The actual recipe is named Bacon-And-Egg Breakfast Tarts, but I do not have any bacon. However, I do have a pack of pepperoni which I wanted to use up. The pepperoni makes a delicious substitute. Or even slices of ham will be good too.


I've made this tart before with bacon, when I first purchased this book. And we really enjoyed it at that time. Definite worth a repeat! I've used a 4 inch square of puff pastry sheet bought from the supermarket, makes it so much easier, as there's really no need to measure and cut to size. Perfect size for individual serving.

The puff pastry is scored on all sides to make a border, then spread in the centre of the pastry to the cut lines,  with a mixture of cheddar cheese and sour cream. Bacon or pepperoni slices are pan-fried just until barely crisped. Place a few pieces on the cheese mixture and bake the tart in a preheated oven until the pastry is puffed, crispy and golden, takes about 15-18 minutes. Meanwhile fry the eggs to your liking.

When the pastry is ready, place a fried egg on top of each one, sprinkle some black pepper and chopped chives over, and serve immediately. With a cup of warm tea, would be very nice.


I drizzled some hot sauce over my eggs. Yums! Enjoy!

In the author's own words "Make these for a special brunch, especially if you want to impress your friends or in-laws."  


Pepperoni-And-Egg Breakfast Tarts
(adapted from Home Baked Comforts, by Kim Laidlaw)
makes 6 tarts
1 sheet purchased frozen puff pastry, about 10 x 14 inches (25x35cm), thawed
3/4 cup (3oz/90gm) shredded white Cheddar or Gruyere cheese
1/3 cup (2-1/2 oz/75gm) creme fraiche or sour cream
12 thick slices applewood-smoked bacon
1 tbsp olive oil
6 large eggs
Kosher salt and freshly ground pepper
1 tbsp roughly chopped fresh chives

Position a rack in the middle of the oven and preheat to 400F (200C). Line a baking sheet with parchment paper.
On a lightly floured work surface, roll out the pastry into a rectangle about 12x15 inches (30x38cm). Trim the edges (I like to use a pizza wheel and a ruler to cut puff pastry). Cut the rectangle into 6 equal rectangles, each about 5x6 inches (13x15cm). Using a small, sharp knife, cut a line around each rectangle about 1/2 inch (12mm) from the edge. Do not cut all the way through; you just want to create a ridge when the pastry is baked. Using a fork, prick the pastry inside the line all over. Lay the rectangle on the prepared baking sheet. Refrigerate while you prepare the toppings.
In a small bowl, stir together the shredded cheese and creme fraiche. In a large frying pan (it's best to choose a nonstick pan with a lid, so you only have to clean one pan), fry the bacon over medium-low heat until just barely crisped, about 5 minutes. Drain on paper towels. Discard the fat in the pan.
Dollop a spoonful of the cheese mixture in the center of each pastry rectangle and spread it out to the cut line. Roughly chop the bacon and sprinkle it over the cheese mixture. Bake until the pastry is puffed, crisp and golden, about 15 minutes.
While the pastry is baking, fry the eggs. In the large frying pan, warm the olive oil over medium-low heat. Crack the eggs into the pan. Sprinkle with salt and a few grinds of pepper. Cover the pan (this is a handy trick for making beautiful over-easy eggs) and cook until the whites are cooked through and the yolks are still a bit runny.
Place the tarts on warmed plates and top each with a fried egg. Sprinkle with chives and serve.


Cookbook Countdown


Monday, September 12, 2016

S'mores Brownies

Cookbook Countdown Specials : Bake is a baking event, which I'm co-hosting with Emily's Cooking (Makan2) Foray.  This is a "spin-off" from our on-going monthly Cookbook Countdown. Cookbook Countdown Specials : Bake is for baking desserts ; pastries, cakes, cookies, pies, tarts, breads. While the monthly Cookbook Countdown is to use from one selected cookbook each month, for CC Specials : Bake, you may use any baking cookbooks of your choice, either from one single cookbook or from numerous books. The link is open from July to end September. You may link your post here. Do join us, everyone is welcome!


To link to Cookbook Countdown Specials : BAKE, click here
To link to Cookbook Countdown #9, click here


*************************************

I am not a fan of marshmallows but both my son and daughter likes it. I wanted to make this S'mores Brownies, and was looking for a particular brand of marshmallows which I sometimes buy, and great in bakes, but could not find it in the few supermarkets that I went to. So I grabbed a pack of those available, and use them to bake these brownies. 


The marshmallows barely melt and it was quite disappointing as they are looking forward to melting gooey marshmallows on top of the brownie. From now on, I'll just stick to the usual brand of marshmallows that I always buy.


Recipe calls for graham crackers which are lightly crushed to be added to the brownie batter, but I have omitted that and replaced with dried cranberries instead. And I have also reduced the amount of both the white and brown sugars.


The brownies are moist, very chocolaty and even though the marshmallows barely melt, they are quite soft, so that is not so bad after all!  I like the dried cranberries in the brownies. These brownies are best enjoyed with a glass of cold milk.


S'mores Brownies
(adapted from "Home Baked Comfort", by Kim Laidlaw)
makes 12 brownies
1 cup (8 oz/250gm) unsalted butter
10 oz (315gm) bittersweet chocolate, finely chopped
1 cup (8oz/250gm) granulated sugar (1/2 cup)
3/4 cup (6oz/185gm) firmly packed light brown sugar (scant 1/3 cup)
4 large eggs
2 tsp pure vanilla extract
1 tsp kosher salt
1-1/3 cups (5-1/2oz/170gm) cake flour
3 tbsp natural cocoa powder
about 6 graham crackers, roughly crushed with your hands (omitted)
about 12 jumbo marshmallows

Position a rack in the middle of the oven and preheat to 350F (180C). Generously butter a 9-by-13-inch (23-by-33-cm) baking dish.
In a saucepan, melt the butter and chocolate over low heat, stirring often, about 4 minutes. Remove from the heat and whisk in the sugars. Whisk in the eggs one at a time, beating well after each addition. Whisk in the vanilla and salt.
Sift the flour and cocoa over the chocolate mixture and, using a rubber spatula, stir in until just blended. Stir in the graham crackers. Pour into the prepared dish and spread evenly. Top evenly with the marshmallows.
Bake until a toothpick inserted into the centre comes out almost completely clean, 30-35 minutes. Let cool in the dish on a wire rack, then cut into big, gooey squares.

Cookbook Countdown

Tuesday, August 30, 2016

Butterscotch Custards

Made a sweet and creamy custard dessert, with butterscotch flavour and added whisky. The whisky is optional, and of course, I could not let it be without! I've used bourbon.

This dessert is really pretty easy and simple to make. First of all, you would need to make the butterscotch by melting the butter over low heat and adding in the brown sugar, cook until the sugar starts to bubble, then the cream is added in. Stir until the mixture is smooth and slightly thickened, then pour in the milk. Stirring constantly, slowly pour in the lightly beaten egg yolks. Add in the vanilla extract, whisky and salt. Pour the custard mixture through a fine-mesh strainer into a pitcher.

Divide the mixture evenly among the custard cups, place in a baking tray, and fill the tray with hot water to reach halfway up the sides of the custard cups. Bake for 25-30 minutes, until the custard is set and will still jiggle slightly when the cups are lightly shaken. Let the custard cool slightly, remove the cups from the water bath, let cool on wire rack for about 20 minutes. Cover the top of each custard by pressing a piece of plastic directly on top of the custard to prevent a skin from forming. Chill the custards for a minimum of 4 hours or overnight. 


I chilled the custard overnight.


These custards are supposed to be served with dollops of whipped cream over the top. But I have served it plain!


Delightful custards. It is a little on the sweet side, but very creamy and smooth. I like the butterscotch flavour with a hint of the whisky. Very, very, nice!


Butterscotch Custards
(adapted from "Home Baked Comfort" by Kim Laidlaw)
Makes 6 custards
3 tbsp unsalted butter
3/4 cup (6oz/185gm) lightly packed dark brown sugar
1-1/2 cups (12fl oz/375ml) heavy cream
3/4 cup (6 fl oz/180ml) whole milk
5 large egg yolks, lightly beaten
1 tsp pure vanilla extract
1 tbsp whisky, preferably a sweet Scotch (optional)
1/4 tsp kosher salt
Whipped Cream for serving

Position a rack in the middle of the oven and preheat to 300F (150C). Have ready six 1/2-cup (4 fl oz/125ml) custard cups or ramekins and a shallow baking pan large enough to hold all the cups.
In a medium saucepan, melt the butter over medium-low heat. Add the brown sugar and, using a heatproof rubber spatula, stir to combine with the butter and cook until the sugar starts bubbling like molten lava, about 3 minutes. Stir in the cream, and let it bubble away, stirring with a big whisk until the mixture is smooth and slightly thickened, about 5 minutes. Stir in the milk.
Whisking constantly, slowly pour the egg yolks into the hot cream mixture. Stir in the vanilla, whisky, if using, and salt. Pour the custard through a fine-mesh sieve into a pitcher.
Divide the custard evenly among the custard cups. Place the cups in the baking pan and carefully pour hot water into the pan to reach halfway up the sides of the cups (I add the water once I place the pan on the oven rack). Bake until the custards are set but still jiggle slightly when shaken, 25-30 minutes.
Carefully transfer the baking pan to a wire rack and let the custards cool slightly, then carefully lift the cups out of the water bath. Let the custards cool on the wire rack for 20 minutes. Cover with plastic wrap pressed directly onto the surface of the custards to prevent a skin from forming. Refrigerate until the custards are well chilled, about 4 hours or up to overnight.
Serve cold with dollops of whipped cream.


Wednesday, August 17, 2016

Lemon Cream Scones

Cookbook Countdown Specials : Bake is a baking event, which I'm co-hosting with Emily's Cooking (Makan2) Foray.  This is a "spin-off" from our on-going monthly Cookbook Countdown. Cookbook Countdown Specials : Bake is for baking desserts ; pastries, cakes, cookies, pies, tarts, breads. While the monthly Cookbook Countdown is to use from one selected cookbook each month, for CC Specials : Bake, you may use any baking cookbooks of your choice, either from one single cookbook or from numerous books. The link is open from July to end September. You may link your post here. Do join us, everyone is welcome!


To link to Cookbook Countdown Specials : BAKE, click here
To link to Cookbook Countdown #8, click here


*************************************


Made these buttery scones for afternoon tea time snack. Lovely scones! Buttery, tender, lemony and wonderful with a cup of warm tea.


I did not make the glaze which is optional, to be drizzled or brush over the scones before serving. 


Tender Lemon Cream Scones with my homemade Orange Cardamom Jelly and a cup of warm Earl Grey tea. 


Lemon Cream Scones
(adapted from Home Baked Comfort, Kim Laidlaw)
makes 8 scones
3 tbsp granulated sugar
grated zest and juice of 2 lemons
2 cups (10oz/315gm) all-purpose flour
2 tsp baking powder
1/4 tsp kosher salt
1/2 cup (4oz/125gm) cold unsalted butter, cut into small chunks
3/4 cup (6 floz/180ml) heavy cream, plus extra for brushing
1/4 cup (1oz/30gm) confectioners' sugar, sifted
Raspberry jam or your favourite jam, for serving (optional)

Position a rack in the middle of the oven and preheat to 400F (200C). Line a baking sheet with parchment paper.
In the bowl of a mixer, stir together the granulated sugar and lemon zest. Sift the flour, baking powder, and salt into the bowl and stir together. Scatter the butter over the top. Using the paddle attachment, mix on low speed until the butter is about the size of small peas, about 3 minutes.
Strain the lemon juice into a small bowl and measure out 1/4 cup (2 fl oz/60ml), reserving the rest. Add the 1/4 cup lemon juice and 3/4 cup cream to the bowl and mix just until the dough comes together. The dough will be thick but moist.
Dump the dough onto a floured work surface and gently press into a disk about 3/4 inch (2cm) thick. Cut into 8 equal wedges (or cut into circles using a 2-inch/5-cm biscuit cutter). Place the wedges on the prepared baking sheet, spacing them apart. Brush with cream. Bake until the scones are golden brown, 15-17 minutes. Remove from the pan and set on a wire rack to cool slightly.
While the scones are cooling, in a small bowl, stir together the confectioners' sugar and 2 teaspoons of the reserved lemon juice. Brush or drizzle the glaze over the scones. Serve warm with jam, if desired.


Cookbook Countdown


Tuesday, July 19, 2016

Cinnamon-Oatmeal Cookies

Cookbook Countdown Specials : Bake is a baking event, which I'm co-hosting with Emily's Cooking (Makan2) Foray.  This is a "spin-off" from our on-going monthly Cookbook Countdown. Cookbook Countdown Specials : Bake is for baking desserts ; pastries, cakes, cookies, pies, tarts, breads. While the monthly Cookbook Countdown is to use from one selected cookbook each month, for CC Specials : Bake, you may use any baking cookbooks of your choice, either from one single cookbook or from numerous books. The link is open from July to end September. You may link your post here. Do join us, everyone is welcome!


To link to Cookbook Countdown Specials : BAKE, click here
To link to Cookbook Countdown #7, click here


*************************************

Another keeper recipe from this awesome book, Williams-Sonoma : Home Baked Comfort, by Kim Laidlaw. A personal project of mine to bake through this book, one recipe at a time.

If you like chewy oatmeal cookies, then you would probably love this. There's a few variations as to the add-ons, like raisins, dried currants, or chocolate chips. While the author love hers with chocolate chips, I like my oatmeal cookies with raisins.


As usual, I've reduced the amount of both the brown and granulated sugars, by half, which for us, the sweetness was just right. I've baked the cookies 3 minutes longer than the recipe indicated. When eating them just barely warm, the sides are a little crisp and the centre soft and chewy. The next day, these cookes are chewy throughout, which is really very nice.


Fragrance with the cinnamon, sweetness from the raisins and chewiness of the oats, makes these cookies a great snack to nibble on anytime of the day. And even as a midnight snack! 

One thing to take note is that, while the recipe states that it yields about 2-1/2 dozen cookies, I got exactly 4-1/2 dozens! And I did follow the required cookie size by following the instructions of  "drop heaping teaspoonfuls of dough onto the prepared pans" !


Cinnamon-Oatmeal Cookies
(adapted from "Williams-Sonoma : Home Baked Comfort", Kim Laidlaw)
makes about 2-1/2 dozen cookies
1-1/2 cups (7-1/2oz/235gm) all-purpose flour
1 tsp baking soda (I use 1/2 tsp each baking soda and baking powder)
2 tsp ground cinnamon
1/2 tsp kosher salt (omitted the salt, use salted butter)
3/4 cup (6oz/185gm) unsalted butter, at room temperature (use salted butter)
1 cup (7oz/220gm) firmly packed light brown sugar (I use 1/2 cup loosely packed)
1/2 cup (4oz/125gm) granulated sugar (I use scan 1/4 cup)
2 large eggs
2 tsp pure vanilla extract
2-1/4 cups (7oz/220gm) old-fashioned rolled oats
1 cup (6oz/185gm) dried currants, raisins, or chocolate chips (optional)

Space 2 racks evenly in the oven and preheat to 350F (180C). Line 2 baking sheets with parchment paper.

In a bowl, sift together the flour, baking soda, cinnamon, and salt. In the bowl of a mixer fitted with the paddle attachment, beat the butter and sugars on medium-high speed until combined. Add the eggs and vanilla and beat until well blended. Add the dry ingredients and oats and beat on low speed until incorporated. Stir in the currants, if using.

Drop heaping teaspoonfuls of dough onto the prepared pans, spacing them slightly apart. Bake until the cookies are golden brown, about 15 minutes, rotating the pans halfway through. Let the cookies cool on the pans for 5 minutes, then transfer to wire racks to cool completely.


Cookbook Countdown

Tuesday, July 12, 2016

Blueberry-Almond Crisp

Cookbook Countdown Specials : Bake is a baking event, which I'm co-hosting with Emily's Cooking (Makan2) Foray.  This is a "spin-off" from our on-going monthly Cookbook Countdown. Cookbook Countdown Specials : Bake is for baking desserts ; pastries, cakes, cookies, pies, tarts, breads. While the monthly Cookbook Countdown is to use from one selected cookbook each month, for CC Specials : Bake, you may use any baking cookbooks of your choice, either from one single cookbook or from numerous books. The link is open from July to end September. You may link your post here. Do join us, everyone is welcome!


To link to Cookbook Countdown Specials : BAKE, click here
To link to Cookbook Countdown #7, click here


*************************************

Made this delicious Blueberry-Almond Crisp, and I thought that this sounds like a crumble to me. When I googled from the internet, I am even more confused! LOL! Some articles mentioned that topping for crisp contains oats, butter and flour and a crumble usually do have use any oats. And some articles mentioned that the topping for crumbles usually have oats, butter and flour, occasionally some nuts are added. Whatever it is called, both are served with scoops of ice cream! At least everyone agrees on this! 


The recipes uses blueberries, but I do not have enough of blueberries, so I have added some chopped ripe mangoes. Toss the fruits together with some sugar and flour. I've made half a recipe to serve 4.


The topping is a mixture of granulated sugar, brown sugar, flour, butter, oats and flaked almonds, Sprinkle the mixture over the fruits and bake in the oven for 35-40 minutes until the topping is golden brown and the fruits are bubbling. Let it cool slightly before serving.


Serve the Blueberry and Mango-Almond Crisp while still warm, with a scoop (or two!) of ice cream. We had this with my homemade Vanilla Ice Cream. What can I say, this is one delicious dessert! So good!


Blueberry-Almond Crisp
(adapted from "Williams-Sonoma : Home Baked Comfort" by Kim Laidlaw)
makes about 8 servings
about 6 cups (1-1/2lb/750gm) fresh blueberries
3 tbsp granulated sugar plus 1/4 cup (2oz/60gm)
1 tbsp all-purpose flour, plus 3/4 cup (4oz/125gm)
1/2 cup (1-1/2oz/45gm) rolled oats
1/3 cup (2-1/2oz/75gm) firmly packed golden brown sugar
1/4 tsp kosher salt
1/2 cup (4oz/125gm) unsalted butter, at room temperature, cut into chunks
1/2 cup (2oz/60gm) sliced almonds, lightly toasted
Vanilla ice cream, for serving

Position a rack in the middle of the oven and preheat to 375F (190C). Have ready a 9-inch (23-cm) square or 2-1/2-quart (2.5lt) baking dish.
In the baking dish, toss together the blueberries, the 3 tablespoons granulated sugar, and the 1 tablespoon flour.
In a bowl, stir together the 1/4 cup granulated sugar, the 3/4 cup flour, the oats, brown sugar, and salt until well blended. Sprinkle the butter over the dry ingredients and use a pastry cutter or 2 kitchen knives to cut in the butter until the mixture looks like coarse crumbs. Stir in the almonds. Sprinkle the topping in an even layer over the blueberries.
Bake until the blueberries are tender when tested with a toothpick, the juices are bubbling, and the topping is golden brown, 35-40 minutes. Transfer to a wire rack and let cook for 10 minutes. Serve warm with scoops of ice cream.


Cookbook Countdown