Showing posts with label Malaysian Snacks and Desserts. Show all posts

Friday, March 20, 2015

Goreng Kodok (Mashed Banana Fritters)

Most of us are going bananas this month! Why? Because this month's Little Thumbs Up Event is Banana! And you may have seen many Kuih Kodok (Mashed Banana Fritters) going round the blogs. I was planning to make these banana fritters months ago for LTU, well, here it is.

Most of us have memories of eating these fritters during our growing up years. As for me, my mother used to make these fritters all the time. We have banana trees growing by the side of our house, and when the fruits are ready to be harvested, there are a lot of bananas! A whole stem of bananas have many, many tiers, and each tier has many bananas! More than we can eat! So my mother would share some of the bananas with our neighbours and used some to make these delicious all time favourite! Though in our house, we call these banana fritters as Goreng Kodok. 

These banana fritters are really common in Malaysia and can be found in most stalls that sells fried banana and other snacks. I however, do not really like the ones that these stalls are selling, as the fritters would be rather compact on the inside and sometimes dry, and of course, there are always not enough of bananas in the batter!

I supposed the best ones are still homemade, and my favourite are the ones that my mother used to make, puffy and light, lightly crisp on the outside, and soft, chewy, moist with chunks of bananas on the inside. You would not stop at just one!


How I make Goreng Kodok

Firstly, sift some plain flour with baking powder and salt into a large bowl. Add some water and sugar and stir well. The consistency of the batter should be moderately thick, a large spoonful of the batter should be able to drop in dollops easily. Next, mash the ripe bananas, leaving them a little chunky. Add the bananas to the batter till evenly combined, and keep aside for 15-20 minutes. 


Heat some oil for frying over moderate heat. Drop heaped tablespoons of the batter into the hot oil, the batter will puff. Fry both sides, turning them now and then to brown them evenly, this would take about 3-4 minutes to cook, When the fritters have turned golden brown all over, remove them with a slotted spoon and drain them on paper towels.


Serve these Goreng Kodok while still warm with a cup of tea, sit back, take a break and start snacking!! 


Love these puffy Goreng Kodok! When eaten while still warm, the outside is lightly crisp, and the insides are moist, soft, chewy with delightful bites of the banana chunks. You would not stop at just one! 


Goreng Kodok (Mashed Banana Fritters)
(by Kitchen Flavours)
(makes about 36 fritters)
2 cups plain flour
2 tsp baking powder
1/2 tsp salt
2 tbsp sugar (to taste, depending on the sweetness of the bananas)
1 cup water
4 ripe bananas (mashed with chunks visible, about 1-1/2 cups)

  1. Sift plain flour, baking powder and salt into a large mixing bowl. 
  2. Add sugar and water, stir well to combine. Batter should be moderately thick, dollops of batter should be able to drop off from the spoon in dollops. If batter is too thick, add an additional tablespoon of water at at time. 
  3. Mash the bananas, leaving some of it chunky. Add the bananas to the batter and mix till evenly combine. Keep aside for 15-20 minutes.
  4. Heat some oil over moderate heat. Drop heaped tablespoons of batter into hot oil. (Tip: fry one fritter first to check on the saltiness and sweetness, add a little more salt or sugar to the batter if necessary, before frying the rest of the batter).
  5. Once batter has puffed and starting to change colour to light brown, turn fritter and fry both sides till golden brown, which takes about 3-4 minutes. Use a slotted spoon to remove fritters and drain on paper towels. Serve warm.


This post is linked to Little Thumbs Up (March 2015 - BANANA) event organised by Zoe of Bake For Happy Kids and Doreen of My Little Favourite D.I.Y and hosted by Faeez of Bitter Sweet Spicy.


and

 Best Recipes For Everyone March 2015 Event : My Favourite Traditional Kueh by Fion of XuanHom's Mom and co-host by Joceline of Butter, Flour & Me


Monday, September 9, 2013

Pandan Jelly

Pandan Jelly, a lovely refreshing cold snack that is great anytime of the day!  Jellies like this are ever so popular here in Malaysia and Singapore. Usually whenever there's a party, you would most likely find these popular jellies in various flavours at the dessert corner. Since I have not made jellies like this in ages, it is the perfect choice to select Pandan as the flavour for Little Thumbs Up event, where the selected ingredient for this month is Pandan.


Fresh Pandan leaves are used for the flavour. The leaves are cut to small pieces and process in the blender with some water, strain and extract out the juice. Flavours and the green colour of these jellies are all from the juice of the Pandan leaves.


Other ingredients are agar-agar powder, sugar and coconut milk, I have added a pinch of salt to the coconut milk. And did not use the optional egg which is listed in the recipe. Instead of setting the Jelly in a round mould, I have used a jelly mould instead.


Refrigerate overnight and enjoy it cold from the fridge. 


Pandan Jelly, want one?  :)

Pandan Jelly
(adapted from "Malaysian Cakes and Desserts")
500ml (2 cups water)
3 teaspoons agar powder
150gm (1/2 cup + 2 tablespoons) white sugar
100ml (1/2 cup less 5 teaspoons) pandan juice** (refer below)
120ml (1/2 cup) thick coconut milk (I used 200ml)
pinch of salt
1 egg, beaten (optional)

Makes : one round 16-cm (6-1/2 in) jelly
  1. Combine water, agar-agar powder and sugar in a roomy pan and heat to boiling. Reduce heat and simmer until agar granules completely dissolves, about 15 to 20 minutes.
  2. In a bowl, combine the pandan juice, coconut milk and egg (if using, the egg gives a richer jelly but does not affect the taste), beating with a fork to ensure they are well mixed.
  3. Pour this into the simmering jelly, stirring occasionally and then wait for the mixture to come back to the boil. Once it reaches a rolling boil, take the pan off the heat immediately and pour contents into a shallow glass dish or cake tin measuring approximately 16cm (6-1/2 in) across. Set aside to cool thoroughly before chilling in the refrigerator. Cut as desired.

**To make Pandan Juice :
(makes 1/2 cup)
6-8 large pandan leaves
150ml (2/3 cup water)
  1. Rinse pandan leaves and, using kitchen scissors or a sharp knife, cut leaves into 2-cm (3/4-in) lengths.
  2. Place leaves and water in the jug of an electric blender or chopper and process until pulverized. Pour through a fine strainer and discard solids. Measure out the required amount of juice as specified in the recipe.
#90/100


I'm linking this post to Little Thumbs Up : Pandan, hosted by Joceline from Butter, Flour & Me and organized by Zoe from Bake For Happy Kids and Doreen from my little favourite D.I.Y.

Photobucket


I'm sharing this with :

 photo 77951578-1914-4b72-8eda-9e40a91183ac_zps331eb4b4.jpg


Monday, July 22, 2013

Sweet Green Bean Dessert With Durian

Durian is known as The King Of Fruits! I can understand why. It is truly a unique fruit which either you love or totally loathe!  As far as my family is concerned, we love durians! Mention durian, and the eyes would light up with excitement and anticipation! LOL! I guess only the durian-loving fans would understand these "gila durian" (durian craziness! LOL!). For those of us who love durians would welcome the "fragrant" smell from these fruits, you could practically smell it before you could even see the fruit. And for those who are not a fan of durians, either you are so used to the smell and don't mind it at all, or you would run as fast as your legs could carry you! There are so many different grades and varieties of durian, with prices ranging from cheap to very expensive. I love eating bitter durians than the sweeter ones, which we would usually reserve for the kids! Though now that some of my nieces and nephews are older, they are learning to like the bitter ones too! 


 Durians, the King Of Fruits. 


The fruit inside, creamy and delicious! 


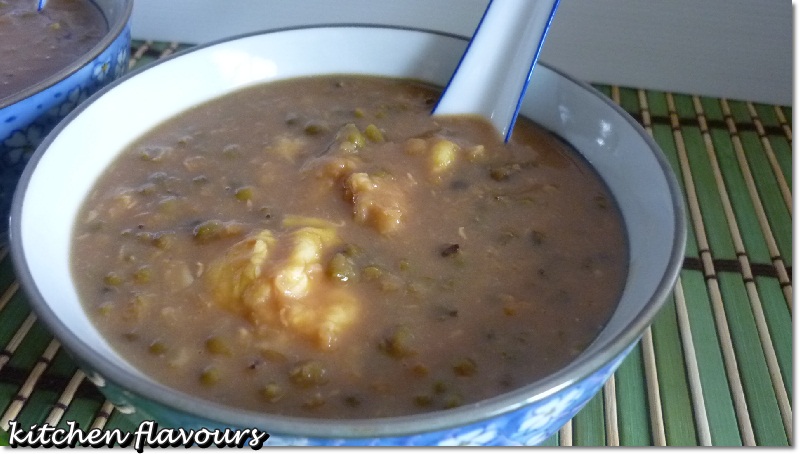
I made some Malaysian sweet green bean dessert and added in some durian flesh. This sweet dessert is great eaten with the family on a lazy weekend afternoon, and it can be eaten either hot or chilled.


Dried green beans are washed in several changes of water, put into a deep pot and cover it with some water, boil till the beans are tender, about 30 minutes. Palm sugar, granulated sugar and salt are added in to taste. Two pieces of pandan leaves are added for that pandan fragrance. Durian flesh are then added in. I have remove the seeds from the durian, using only the flesh. Let it come to a boil for 2-3 minutes, and the thick coconut milk is added in last. Let it come to a simmer and turn off heat. Do not let it boil too long once the thick coconut milk is added.


Enjoy it warm or cold.


This recipe is just a guide, adjust the water amount to the consistency desired and sweetness to your own liking.
Green Bean with Durian
1 cup green beans
8 cups water
2 pieces meaty durian, discard seeds
50gm gula melaka (palm sugar)
1/4 cup granulated sugar, or to taste
pinch of salt
100ml thick coconut milk
2 pandan leaves

Wash green beans in several changes of water. Place in a pot with 8 cups water. Let it come to a boil, then simmer for 30 minutes or until beans are tender. Add in pandan leaves, both sugars and salt to taste. Simmer until sugar are completely dissolved. If consistency is too thick, add 1/4 cup, or more, of water.  Add in durian flesh, let it simmer for 2-3 minutes, add in thick coconut milk. Let it come to a simmer, turn off heat. Either eat it warm or chilled.


Thursday, October 25, 2012

Bronok (Kuih Sagu)

Kuih Sago is a common kueh that can be found throughout Malaysia. It is made of pearl sago and sugar, boiled till translucent and cooked, cooled in a tray, then cut to desired pieces and rolled in salted fresh grated coconut, preferably served chilled. For flavour and colour, a little rose essence is added in and some red food colouring is added during the cooking process. I have not eaten this in years, and really am unaware that this kuih is called "Bronok" and is a traditional sweet kuih of Terengganu. I have always known it as "Kuih Sagu" and never did thought much about it, except that it is a popular Malay kuih. Since I have a packet of sago pearls in my pantry which have been sitting there for months which was meant for some other dessert, and never got round to make my intended dessert, "Bronok" is a perfect way of using it up, besides, I do not think that my kids have ever eaten this sago kuih. So this is just perfect to introduce to them a little more about our local kuih and dessert.


You got to be patient while cooking this. It takes about 40-45 minutes for the all  the sago pearls to turn translucent. I used up another cup of hot water, I kept on adding hot water to it, a couple of spoons at a time, as it is getting very thick, with lots of white sago still visible. The final texture of this kuih when the cooking is done is, it should be thick, almost a gummy paste, but still able to drop from a spoon without being too thick. I like it slightly soft, if you want a thicker set, let it cook a little longer until very thick, stirring constantly to prevent burning. Scoop the sago mixture to a tray (I use a 8" cake pan),  level it and leave it to set. The recipe does not call for rose essence, but I added that in, as I have always eaten this kuih with the fragrance of rose essence.


I've read that another method of making bronok is by soaking the sago pearls for about 2 hours, then mix with all the other ingredients, followed by steaming until the white sago are translucent and cooked. The sago pearls can be cooked by steaming instead of constantly stirring over low heat for 45 minutes! Well, I only knew this after I have cooked it! 


Once the sago has set, it is cut to desired size and roll each piece in salted grated fresh coconut. Place the rolled sago pieces in a container, keep covered and chill in the refrigerator, until serving time. This is a nice sweet dessert to have, preferably eaten chilled.
Mine is a little on the soft set, so I just use a teaspoon to scoop into pieces and drop it in the grated coconut. 


The family loves it!  It is a nice cooling dessert to have after a meal, where everyone just laze around and enjoy!


I'm submitting this post to "Malaysian Food Fest, Terengganu month hosted by Lena of Frozen Wings"

I'm sharing this too with :
Recipe Box hosted by Bizzy Bakes
Full Plate Thursday hosted by Miz Helen's Country Cottage
See Ya In The Gumbo hosted by Ms. enPlace


Bronok (Kuih Sagu)
(adapted from "Popular Cakes & Kuih" with some slight changes)
1 cup pearl sago
4 cups water (or more, as needed)
170gm sugar (or to taste)
few drops of red food colouring
1 tsp rose essence
grated coconut from 1 coconut
pinch of salt

  1. Put the sugar and water in a saucepan. Stir over a slow fire until all the sugar has dissolved.
  2. Bring to the boil and add sago, rose essence and red food colouring. Stir constantly for about 40 minutes, until sago is transparent. 
  3. Pour sago into a 8" square baking pan and allow to cool.
  4. Meanwhile, mix the grated coconut with a pinch of salt to taste. Keep covered in refrigerator until serving time.
  5. When sago has completely cooled, cut up into neat pieces and roll each piece in the grated coconut until completely covered.
  6. Chill in the refrigerator before serving.


Monday, October 15, 2012

Almond Milk Jelly with Mandarin Orange

Almond milk jelly is one dessert that is usually served in Chinese restaurants, usually at the end of a wedding dinner, as a sweet ending to a wonderful meal. The almond jelly are served cold, in iced watery sweetened syrup, sometimes with canned lychees or longans, and is really cold and refreshing. Almond extract are used for the flavour, if you are a fan of anything almonds, than you would like this. You may substitute the almond extract with vanilla extract if you prefer.


I made this over the weekend for our dessert. This version is served with mandarin oranges, but of course, since the season for mandarin oranges is not for a couple of months yet, I used the canned mandarin oranges.  You may use fresh sweet oranges if you prefer. Some freshly squeezed orange juice is drizzled over before serving.


The first thing you need to do is to cook the almond milk jelly. Water, fresh cream, sugar, agar-agar powder are boiled for about 8 minutes until the sugar dissoves. Here, I have reduced the sugar from the original 1 cup to 1/2 cup plus 3 tablespoons, which for me, is just right. You may adjust accordingly to your taste. Once the sugar has dissolved, I poured the contents into a 8" square baking pan, remove any bubbles that may appear on top. Leave to cool until it sets, cover and place the tray in the refrigerator for a couple of hours to chill. I placed the mandarin oranges and the orange juice in the refrigerator to chill so that everything is cold and nice when it is time to serve.


To serve, cut the almond milk jelly to cubes and portion to individual serving bowl. Top with some slices of mandarin oranges and drizzle some fresh orange juice over. You may add a teaspoon or two of the syrup from the canned mandarin oranges. 


Serve and enjoy! Cold and refreshing!


I'm sharing this with :


Almond Milk Jelly with Mandarin Orange
(Tropical Desserts, Devagi Sanmugam)
3-1/4 cups (800 ml) water
3/4 cup (185 ml) fresh cream
250gm (1 cup) caster sugar (I use 1/2 cup plus 3 tablespoons)
2 tablespoons agar-agar powder
1/2 teaspoon almond essence
3 mandarin oranges, peeled and segmented (I use canned mandarin oranges)
1 cup (250 ml) chilled orange juice (I use freshly squeezed orange juice)

  1. Place the water, fresh cream, caster sugar and agar-agar powder in a pan and bring to a boil for 8 minutes, stirring constantly until the sugar completely dissolves. Then remove from the heat, add the almond essence and stir to mix well.
  2. Pour the mixture into a 2-cm (3/4-in) high tray and leave it to set. Then slice into small cubes and chill in the refrigerator until ready to serve.
  3. To serve, portion the almond cubes and orange segments into individual serving bowls. Drizzle a little orange juice over and serve.


Tuesday, October 9, 2012

Tepung Bunga

My baking buddy, Lena from Frozen Wings is hosting this month's Malaysian Food Fest, Terengganu Month. I have never been to Terengganu before and am not familiar about their speciality cuisine at all. So my search for famous Terengganu food begins. While searching from various websites for details on Terengganu and it's famous cuisines, I suddenly remembered that I have a magazine stashed somewhere from years ago that has a section on Terengganu food. Of course, I "ransacked" my cupboard and lo and behold, I still have that copy! And it was a Bahasa Malaysia (Malay) magazine, back in October 1997, gosh, exactly 15 fifteen years ago! Found the section on "Sajian Terengganu Kekal Asli" and a few nice recipes for me to try! Bingo!!


Jelita Sajian magazine, issue October 1997


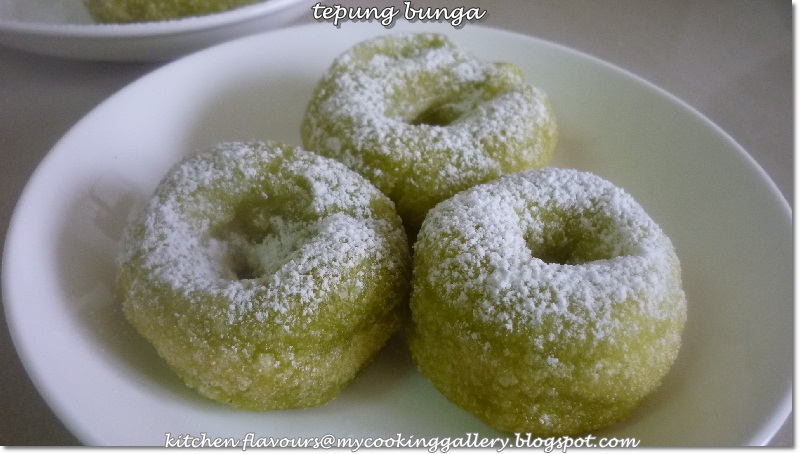
These are called Tepung Bunga, one of the many traditional kuihs of Terengganu. I am curious why this is called "Tepung Bunga", when translated, Tepung is Flour, and Bunga is Flower. It is made from glutinous rice flour and coconut milk. I have seen some other version that is slightly different from this from various websites. But I like that this version uses pandan leaves, which are pounded and the juice are extracted for the natural colour, aroma and taste of the pandan leaves. 


Let's make some Tepung Bunga: 

  1. Pandan leaves from my garden. Wash, clean, and snip to small pieces. 
  2. I blend the leaves with some of the coconut milk in a blender.
  3. Strain the juice, press out the pulp that remains on strainer to collect as much pandan juice as possible.
  4. Add some salt to taste, I added in about 1/2 teaspoon, add the rest of the coconut milk, stir to dissolve the salt.
  5. Pour the coconut milk mixture into the bowl of glutinous rice flour.
  6. Knead to a soft dough, add a little water if appears dry.
  7. Divide dough into small balls.
  8. Shape each ball like a doughnut and drop in hot oil over medium-low heat. Do not let them touch each other as they will stick. Fry both sides until golden brown and cooked. Remove and drain on paper towel to absorb excess oil. Serve with caster sugar or icing sugar scattered over.


Tepung Bunga is ready! That's the page where this recipe was taken.


They puffed up when fried. Advisable to fry over low heat, as the first few cracked when I fried them over medium heat, so I reduced the heat to medium-low, and they fried up really nice. However once left to cool, they would shrink and would not look puffy anymore. According to other versions that I've read, these kueh would puff up when fried and would "deflate" minutes when taken out of the hot oil, guess this is the characteristics of this kueh!


Serve these Tepung Bunga with some fine sugar, here I have used icing sugar, scattered over. The texture of these kuih are chewy and soft, it reminds me of eating  Tang Yuen (Chinese sweet glutinous rice dessert), as both these desserts uses glutinous rice flour as the main ingredient,  but this has a slightly salty taste with the aroma and taste of the pandan leaves. These are very nice, eaten with lots of icing sugar scattered over, as the sweetness of the icing sugar goes well with the slightly salty kueh. Once they are cold and flat, they became more chewy, eat them while they are still warm.


I'm submitting this post to "Malaysian Food Fest, Terengganu month hosted by Lena of Frozen Wings"


The following recipe was adapted from Jelita Sajian Magazine, issue October 1997, I have translated the original Malay version to English Language.
Tepung Bunga
5 pandan leaves
1 cup coconut milk
300gm glutinuos rice flour
pinch of salt (I use 1/2 tsp, just right)
oil for deep frying
caster sugar for dusting

  1. Pound the pandan leaves to a paste and mix with coconut milk. Strain and squeeze out juice from the pandan paste. (I chose to blend the leaves with some of the coconut milk, strain and press out the juice using the back of a spoon, as pictured above).
  2. Mix the coconut milk mixture with the glutinous rice flour and knead to form a soft dough. 
  3. Divide dough into small rounds and shape like a doughnut. Repeat with the rest of the dough. Fry in hot oil until cooked and golden brown. Remove and scatter with caster sugar before serving.


Tuesday, October 25, 2011

Pulut Serikaya

Pulut Serikaya is a popular Nyonya kuih mainly found in Malacca. It is a two-layer kuih, bottom being the  glutinous rice steamed with coconut milk and the top is a yellow custard base with a mixture of thick coconut milk, eggs, sugar and some flour, usually some yellow colouring is added to enhance the colour of kaya, (a popular egg jam similar to the topping, hence the name). Though, the more common ones are known as Pulut Serimuka, it has the same rice glutinous base, and gets the  flavour and colour from the green pandan leaves, sometimes some green colouring may be added to enhance the colour of the pandan leaves. Pulut Serimuka can be easily found sold in most stalls that sells kuihs.

My mom told us that the difference between these two kuihs, is, Pulut Serimuka, the one with the green topping, is common among the Malays and can be found throughout Malaysia whereby Pulut Serikaya, the other with the yellow kaya topping, definitely belongs to the Nyonyas of Malacca, even though they are considered the same by many who are not aware of  the difference between these two kuihs. 


I have not seen Pulut Serikaya being sold here, where I live. The only time that I get to eat this delicious kuih is when I'm back in my hometown, Malacca, or when I made my own, which I have not done so in such a long time. Since Aspiring Bakers, theme for October is "Traditional Kuih", now seems a good time to make this again. Though I enjoy eating Pulut Serimuka, my preference has always been Pulut Serikaya. 


This recipe was passed down from my mother.  My Mom did not have any exact measurement, as everything that she made was by the "feel" and self-estimation. So when she passed on the recipe to us, it was just the ingredients with an estimation in quantity. Just like my Mom, I have made this in the past based on the '"feel" and self-estimation, but for this time, I have measured precisely what I have used. The Nyonyas love to use the Bunga Telang (clitoria ternatea or blue pea flower), where they are pounded to a mash, and squeezed out the beautiful indigo colour that is used as a natural dye for the rice. I did not use this, as I could not find my packet of dried bunga telang! If using dried Bunga Telang, they need to be soaked in warm water first.

Many of the traditional kuihs in Malaysia uses coconut milk. We are lucky that to buy freshly squeezed coconut milk is so convenient. They are sold in markets and even most grocery stores sell freshly squeezed coconut milk as and when you need them.


Let's make some Pulut Serikaya !

Glutinous Rice is washed clean and soaked in cool water for at least 4 hours. Rinse and drain. Place rice in a shallow steaming tray. Randomly place the pieces of pandan leaves embedded in the rice, cover rice with the salted coconut milk.


Place the tray on a steamer rack.


Cover and steam over high heat for about 30 minutes. This precious steamer set was given to me by my Mom, where she has cooked and steamed hundreds of kuihs in.


After 30 minutes, fluff up rice with fork, discard pandan leaves.


Press down rice on pan, making sure it is compact and firm. You may use the same tray or transfer to two smaller trays. Place the pan back in the steamer and steam for another 15 minutes.


To make the custard : Eggs are beaten lightly, mix in the sugar and coconut milk. Whisk until sugar has completely dissolved. Add in the flours, whisk to combine until there are no lumps.


Strain the custard mixture to remove any lumps.


Pour custard mixture over the rice in the pan and steam for a further 30 minutes over medium-low heat until cooked and set.


 Leave the kuih to cool completely in pan, preferably overnight, or at least 5-6 hours.


 Pulut Serikaya is traditionally served cut in daimond shaped slices. You many cut it in squares or rectangles, whichever you prefer.


 Miniature diamond shaped slices, with a toothpick inserted in each piece, great for a party or a get-together.


This is truly delicious! The custard has the perfect balance, the texture is not too hard or soft, with the right amount of sweetness. The rice is tasty with the salty coconut milk, not too dry or soft, just the right texture. One of my very favourite kuih!


I'm submitting this to "Aspiring Bakers #12 : Traditional Kuih (October 2011) hosted by Small Small Baker.


Pulut Serikaya
(by kitchen flavours)
makes two 8" pans
For the Bottom Layer
600gm glutinous rice
200ml thick coconut milk, add some water to equal 650ml
3/4 tsp salt
2 pandan leaves, cut to three sections each

Wash glutinous rice until water runs clear. Soak rice in cool water at least 4 hours or overnight.
Get the steamer ready with rapidly boiling water. Rinse and drain the glutinous rice. Place in a big round shallow tray, about 12" diameter. In a medium mixing bowl or measuring cup, mix the thick coconut milk, adding some water to equals 650ml. Add in the salt and stir until dissolved. Cut the pandan leaves into three sections and randomly place the leaves, embedded in the glutinous rice in the tray. Pour the coconut milk mixture over the glutinous rice. It should just cover the rice, barely visible. Place the tray carefully in the steamer, cover and steam over high heat for about 30 minutes. Top up water at steamer base if necessary.

At the end of 30 minutes, remove tray from steamer, be careful, do not position your hand anywhere directly over the steamer where the steam is, to avoid scalding your hands over the hot steam from the steamer base. Fluff up rice with a fork, discard all the pandan leaves, turning rice all over. Press down rice firmly using a rice spatula (or with a piece of banana leaf or a piece of aluminium foil which works as well). Make sure the rice is pressed down firmly and compact. Place the steamer rack with the tray back on, and steam for a further 15 minutes. Remove the steamer rack  from heat and pour the topping over, bubbles may appear on the topping, which is normal. Just use a spoon to burst the bubbles or scoope them out. Place steam rack back on again, reduce the heat to medium low and top up the steamer base with water if necessary. Cover and steam for about 30 minutes until custard is completely cooked and set. Remove and leave to cool at room temperature, preferably overnight or at least 5-6 hours. Cut and slice to the traditional diamond shapes and serve. Enjoy!

For the Custard Layer
2 eggs
400ml thick coconut milk plus 250ml water
300gm granulated sugar
130gm plain all-purpose flour
80gm custard powder
pinch of yellow food colouring (optional)

In a large mixing bowl, beat the eggs lightly. Add in coconut milk mixture and sugar. Whisk with a hand-whisk until sugar has completely dissolved. Add in flour, custard powder and pinch of yellow food colouring. Whisk to combine until there are no more lumps. Strain mixture to another bowl. Pour over the cooked glutinous rice as directed above.

(notes: I steamed the rice in a big 12" diameter shallow pan, and separate them into two 8" square pans after fluffing up the rice. Press down rice until compact and steam again for about 15 minutes. Pour half the custard in each pan and steam again for about 25-30 minutes until custard is cooked and set).


********************************


I WOULD LIKE TO WISH ALL MY HINDU FRIENDS, HAPPY DIWALI !