Monday, July 30, 2012

Jamie's Tomato and Coriander Omelete

What's for lunch today? Jamie Oliver's Tomato and Coriander Omelete. Well, the original recipe uses basil leaves, and since I do not have any basil leaves (my plant died!! so sad!), but I do have a big bunch of coriander leaves which I bought from the market this morning, so I used that instead. What can I say when it comes to omelete, an absolute favourite in my house.  In fact, as I'm writing this post, my son is happily enjoying his meal right now.

Thinking of what to prepare for lunch can be a headache sometimes! Since I have some 2 packs of cherry tomatoes in my fridge, and a packet of cheddar cheese, JO's omelete is just perfect! No basil, no problem, just replace with coriander leaves instead.


I love cherry tomatoes, popped several into the mouth as I was cutting them. They are juicy and sweet and love the "burst!" when you bite into a whole tomato! The cherry tomatoes are stir-fried in a saucepan or skillet  for a minute with a little bit of  oil, Jamie uses a mixture of butter and oil, I omit the butter. Pour in the beaten eggs. And since the beaten eggs are already seasoned with salt and pepper, I omitted the salt in the tomatoes too. Cook until egg is set, but still slightly raw on the top, scatter some cheddar cheese and the coriander leaves over. Cook further for a short while till the eggs are set and the cheese melts, then slide the cooked omelete onto a serving plate.


There, a simple lunch of Tomato and Coriander Omelete, some cheese sausages, toasted bread and some greens is ready. This simple lunch puts a happy smile on my son's face.


That's not all.....


Cut a piece of the yummy omelete and place it on the toasted bread, spread with a generous serving of chimichurri (pesto), delicious! Post on the chimichurri coming up soon!


I'm linking this with "Cook Like A Star", an event organized by my baking buddy, Zoe from Bake For Happy Kids where the featured chef for this month of July, is Jamie Oliver. Head on over to Zoe's to see the delicious Jamie Oliver's yummies that everyone has made.


I'm sharing this too, with :
Recipe Box hosted by Bizzy Bakes


Tomato and Coriander Omelete
(Jamie's Food Revolution, by Jamie Oliver)
Serves 1
2-3 large eggs
sea salt and freshly ground black pepper
a pat of butter
a small handful of grated Cheddar cheese
a handful of basil (or coriander leaves)
a handful of cherry tomatoes

Crack the eggs into a mixing bowl with a pinch of salt and pepper. Beat well with a fork.
Pick the leaves off 2 or 3 sprigs of fresh basil (or coriander leaves) and roughly tear them. Cut a handful of cherry tomatoes in half and add to a hot frying pan with a small pat of butter, a drizzle of olive oil, and a pinch of salt and pepper. Fry and toss around for about 1 minute, then turn the heat down to medium. Add your eggs and move the pan around to spread them out evenly. When the omelete begins to cook and firm up, but still has a little raw egg on top, sprinkle over the Cheddar and the basil leaves. Using a spatula, ease around the edges of the omelete. When it starts to turn golden brown underneath, remove the pan from the heat and slide the omelete on to a plate.


Saturday, July 28, 2012

Light Wheat Bread

When Bake Your Own Bread (BYOB) featured Bread Experience as the featured blog for the month of July, I wasted no time in selecting a bread recipe from Bread Experience's website. I had wheat bread in mind when I was browsing thru Bread Experience and when I found this recipe, I could not wait to give it a try. There are different types of bread recipes at Bread Experience, from wheat bread, white bread, flatbreads, bread machine breads, quick breads, gluten-free breads, no-knead breads and many, many, more! The person behind this awesome website is Cathy and she has step-by-step instructions on bread making which can be found on her blog.


Just as Cathy says, this is a delicious bread! Cathy adapted this recipe from the Peter Reinhart's, Bread Baker's Apprentice, a book on my wishlist!


This recipe uses the stand mixer to knead the dough,  but I decided to let my bread machine do the work for me! Haha! The dough is a pleasure to work with, it is not sticky and it rises rather quick. Perhaps the hot weather here and the high temperature plays a big role in cutting the rising time to almost half! The only changes I did was instead of using the full amount of water, which is 1-1/4 cups, I used slightly less than 1-1/8 cup, as I noticed that in our hot and humid weather, most times I got to add in more flour if the full amount of liquid is used. And I have reduced the salt amount from 1-1/2 teaspoons to 1 scant teaspoon, which I find is just the right amount of saltiness for me.


It bakes up beautifully.


This recipes makes a small loaf which is just the right size for me. And it is so simple and quick to make. One advantage in my hot kitchen, the rising time is cut almost by half for most of the breads that I've made, so time saving is a definite plus!


It has a soft crumb and a light dense interior but with a soft texture, that I really like. Since it uses only about a third of wheat flour and two thirds of bread flour, it makes a light wheat bread, without being too heavy. It stays soft too on the second and third day, my kinda bread! 


I really like this bread! Definitely one of my favourites now!  :)


I like it best, when spread with a generous serving of butter, with a cup of hot black coffee!


I have provided the recipe and the changes I've made using the bread machine, below. If you would like to make this bread using the stand mixer, please refer to the instructions that can be found from Cathy's post at Bread Experience.
Thanks to Cathy for the introduction to this lovely loaf of bread that I'll be making again in my kitchen!


I'm linking this with to :
Bake Your Own Bread (BYOB), hosted by Girlichef
Recipe Box hosted by Bizzy Bakes


Light Wheat Bread
(source from Bread Baker's Apprentice, Peter Reinhart, via Bread Experience)
2-1/2 cups unbleached bread flour
1-1/2 cups whole wheat flour
1-1/2 tablespoons granulated sugar or honey
1-1/2 teaspoons salt (I use 1 teaspoon)
3 tablespoons powdered milk
1-1/2 teaspoons instant yeast
2 tablespoons shortening or unsalted butter, at room temperature
1-1/4 cups water, at room temperature (I use slightly less than 1-1/8 cups)

  1. Add water, butter and honey (or sugar) into the bread pan. Spoon both flours over, covering the liquid completely. In one corner of the bread pan, add the powdered milk, and the salt at the opposite corner. Make a small indent in the center of the flour. Add in the yeast. Select Basic Dough setting, press Start. This setting will knead the dough right up to the first rising stage, which takes about 1 hour 35 minutes. Different bread machine varies, so select accordingly to the specifications on your bread machine.
  2. At the end of the Cycle, remove dough and roll into a 3/4 thick, 6 inches wide by 9 inches long rectangle. Roll it up and pinch the seams at both ends to seal. Place in a greased 8-1/2" x 4-1/2" bread pan, with the seams facing down. Cover loosely with greased cling wrap. Leave to rise for about 90 minutes, or until the dough crests above the top of the pan. Mine took about 50-55 minutes.
  3. Preheat the oven to 350F and place the oven rack on the middle shelf. Place the loaf pan on a baking sheet and bake for 45 to 60 minutes, rotating the pan 180 degrees at 25 minutes into baking time. Continue baking until bread is golden brown and sound hollow when tapped at the bottom.
  4. Remove it from the baking pan immediately and leave it to cool on a wire rack. Wait for at least 1 hour before slicing. Enjoy!

Thursday, July 26, 2012

Chicken Pie : Free and Easy Bake-Along #29

It's time for another Bake-Along! For this week's theme, I have chosen Chicken Pie to bake together with Lena from Frozen Wings, Zoe from Bake For Happy Kids and all our baking friends! The last time that I've made Chicken Pie using homemade puff pastry was years ago, before I started my blog. Now it is about time that I make this again, using the same recipe that I used years ago, by our local pastry chef, Alex Goh.

The recipe below is for a big pie baked in a pie dish, but I chose to bake mine in aluminium pie foils, size about 4" diameter for individual serving, that way, everyone has their own chicken pie to bite into!


Let's get started on the puff pastry :

(A)
Mix the flour, salt, butter and water into a dough. Cover and left to rest for 15 minutes.
Roll out dough into a cross shape with the centre slightly thicker than the sides.
Place the pastry margarine in the center of the rolled dough. If the pastry margarine is hard solid after taking out from the refrigerator, let it thaw for about 10 to 15 minutes to soften it a little before using.


(B)
Fold the two sides over to the center.
Fold the bottom and top over to the center. 
Roll the dough to a thickness of 10mm.


(C)  
** Fold the bottom, one third over.
** Fold the top over.
** Cover and let rest 15 minutes.
Turn dough 90 degrees, roll out to 10mm thickness and repeat these steps ** four more times. (yes, you got to be patient!)


Roll out dough to 3mm thickness. I use the cover of my small tea kettle to cut the rounds, as this size fits the aluminium pie foil that I used.
Line the pie foil with the cut-out rounds. 
Fill with some chicken pie filling. 


Cut a smaller round of dough and place on top of filling, pinching the edges of the two dough to seal.
Neaten the sides with your hands.
Use a fork to make markings at the sides by pressing down gently.


Brush the top of pie with beaten egg wash. 
Make some holes with a fork for the steam to escape during baking.
I got seven pies (size about 4" diameter). Balance of scrapes from the dough, I made one shaped like a currypuff (empanada).


 Bake at 200C for 40-45 minutes until golden brown.


The filling :

Refer to the recipe and instructions below on how to cook the filling. I bought a can of button mushroom and I have forgotten to add that in! I love button mushrooms in my chicken pie, must remember to add them the next time!


My family could not wait to try these as soon as these are baked! The four of us shared one pie and the one that shaped like a currypuff (empanada) and kept the balance for breakfast, since it was already 10.30pm at night.


The next morning, I reheated the pies in the oven for 10 minutes. My kids was very happy that they each had two, one for breakfast and one to bring to school!  I'm left with one for myself to enjoy later with a cup of coffee.


Layers of crispy, crunchy, light and flaky crust. Season the filling well and you would have one delicious Chicken Pie! The best way to eat this and enjoy the crunch at each mouthful is to hold this in your hands and bite, munch munch!  bite, munch munch! Delightful! Homemade Chicken Pie, so good! Don't forget that cup of warm coffee or tea!


I'm looking forward to see Lena's, Zoe's and our baking friends' delicious Chicken Pies! Drop by their sites by clicking on the link below and join in by baking some Chicken Pie and submit your bake in our blog hop linky below.

For our next Bake-Along, we shall be baking Apple Cornmeal Upside-down Cake, from Bon Appetit Desserts Cookbook (pg 72) or you may use a similar recipe here and join us in our blog-hop which will start from 7th Aug until 13th Aug.


Photobucket

A friendly reminder when linking to our blog hop :
1. Please mention Bake-Along event in your own post linking direct to any of the hosts' post (JoyceLena or Zoe)
2. Please link only new and current post, related to the current bake or theme.
3. Feel free to display our Bake-Along badge in your post.


I'm sharing this with :
Recipe Box hosted by Bizzy Bakes
Full Plate Thursday hosted by Miz Helen's Country Cottage

Chicken Pie
(source from : Irresistible Pastry by Alex Goh)
Puff Pastry :
400gm flour
50gm butter
1/8 tsp salt
220gm water
300gm pastry margarine

  1. Mix flour, butter, salt and water to form a smooth dough. Let it rest for 15 minutes.
  2. Roll out dough into a cross shaped with the center thicker and the four sides thinner. Refer to my pictures above (A)
  3. Place the pastry margarine onto the center of the dough. Wrap it up. Refer to my pictures above (B)
  4. Roll out the dough into a 10mm thickness, and fold once, refer to my pictures above (C). Let it rest for 15 minutes.
  5. Turn the dough 90 degrees. Repeat step (4) four more times.
  6. Roll out the dough into a 3mm thickness and cut into the required size.

Filling :
(with some minor changes)
3 tbsp oil
1 medium onion, chopped
30gm flour
200gm frozen mixed vegetables (or more)
a can of button mushroom (sliced) 
400gm chicken meat 
2 tbsps Worcestershire sauce
1 tsp salt
1/4 tsp pepper
1 tsp chicken stock essence
200gm water

Heat the oil in a saucepan. Add in onions. Stir fry until fragrant. Add in the flour. Stir fry for 30 seconds. Then add in chicken and cook until chicken turns white. Add in Worcestershire sauce, salt, pepper, chicken stock essence and water. Stir and add in mixed vegetables. Cook until it boils and thickens. Check seasoning. Remove from pan and set aside to cool.


To assemble pie :
Roll out puff pastry to 3mm thickness and line a greased ovenproof pie dish with it. Put in the filling. Egg wash the sides. 
Top it with another piece of puff pastry and press the sides with a fork. Then brush with egg wash. Decorate with cut-out leaves. Egg wash the top and poke some holes with a fork.
Bake at 200C for 35 minutes.

To bake in 4" pie foils, follow my instructions and pictures above. 


Join our blog hop, click on the link to get the code :
get the InLinkz code


Tuesday, July 24, 2012

Sparkling Limeade : IHCC

It is "Nieves" time at I Heart Cooking Clubs (IHCC)! "Nieve" is a Spanish term for snow and this week, IHCC  theme is, any refreshing cold treats, of course it must be a Rick Bayless recipe, as we are currently cooking from his recipes until September. 

With our hot and humid weather, any icy cold treats would be welcome anytime of the day! I was looking for some iced treats with lime, and spotted this at Frontera. And I have always love limes in any form of cold refreshments! Most of the time, whenever I'm at any restaurant,  I would usually go for either Iced Lime or Iced Lemon Tea, or any spritzy lime drink!


This Sparkling Limeade is a simple mixture of Sparkling Water, Lime Juice and Sugar. 


Though the recipe states that to use 1-1/3 cup of freshly squeezed lime juice, I only use 1/3 cup and it is already sour. Balance it off with some sugar and add in the sparkling water, pour into a glass with a few pieces of ice cubes and a couple of thinly sliced lime for garnish. And you would want to drink that up right away!  Well, I did.... after taking the photos!


Gulp....... aahhh.... so refreshing! I finished this glass as soon as I turned off my camera! 


Rick Bayless @IHCC button rounded

To see what other "Nieves" that everyone at IHCC has made, hop over to have a look! 

I'm sharing this too, with 


Sparkling Limeade
(source : Frontera, Rick Bayless)
Makes about 5 cups, serving 5 to 6
1/2 to 2/3 cup granulated sugar or evaporated cane juice
1-1/3 cup freshly squeezed lime juice (about 8 to 10 limes)
1 quart sparkling water
ice cubes

  1. Mix 1/2 cup of the sugar with the lime juice in a glass pitcher and stir until sugar is dissolved.
  2. Add the sparkling water, stir and taste for sweetness; add more sugar if desired. Pour over ice and serve immediately.


Sunday, July 22, 2012

Braided Challah

Challah has been one of the bread that I have always wanted to make. When I've read that Breaking Bread Society has featured "Challah" as the bread for the month of July, I knew that this is the time for me to get my Challah in the oven!  I went through my bread baking books, and have about half a dozen different Challah recipes. It is not easy picking out which recipe when I have one too many! Finally, I settled for this easy bread machine recipe from my favourite bread machine baking book "The Artisan Bread Machine" by Judith Fertig.

Challah is an egg-enriched bread, sometimes with honey as one of its main ingredients. Most recipes that I've read calls for 2-3 number of eggs, but this recipe uses only 1 egg for 1 medium loaf. This recipe has the option of baking the bread in the full cycle of the bread machine or another option of mixing the dough in the bread machine, shapped into a braid or make into a round by hand and finished off the baking in the oven. Of course, as usual, I let the bread machine do all the mixing and kneading, take out the dough, braid it and bake it in the oven.


I use the Basic Dough setting in my bread machine, which takes 1 hour 35 minutes, right up to the first rise and "punched down" by the machine. I added in about 1/3 cup of bread flour at the first 10 minutes of kneading time, as I find that the dough is really wet.

At the end of the cycle, the dough is placed on a lightly floured working surface, divide into three and roll each piece into a 16" rope. The dough was a little sticky, I sprinkled with a light dusting of flour and it was easier to work with. Line the baking sheet with a piece of parchment paper. I then placed the three ropes on the parchment paper, next to each other, close but not touching. Most books including this, states that to braid the dough first, then transfer them to the baking sheet. From my experience, I find that it is easier to braid them directly on the lined baking sheet, as I always have problem transferring the braided loaf to the baking sheet, especially when the braided dough is quite huge. Back to my braids, I braided the ropes starting from the center, I find that by braiding them this way, the braid will be neater than when I start from one end to the other end. Second pic above, tuck one end under to seal.


Repeat with the other side, from the center. That is a lovely braid! Cover with a clean kitchen towel and left to rise for about 1 to 1-1/2 hours. I find that mine was rising rather quick. About 45 minutes into the rising time, I switched on the oven.


After about 1 hour and 10 minutes, it is ready to be placed in the oven. The braided dough rises really well, not so pretty braid anymore! Brush top of dough with egg wash and sprinkle some sesame seeds all over. Bake in the oven for 34-36 minutes, mine was done at 32 minutes.


Rich and golden crust. 


Nice Challah! The sweetness of the honey is really nice, without being overly sweet. I did reduced the salt slightly, and even then, I can taste the light saltiness, which works out well with the hint of sweetness from the honey. This bread has a soft crumb and soft interior, but I can tell that this is definitely not as egg-enriched as other Challah recipes, as it contains only 1 egg. I will be trying out other recipes from my other books.


This loaf of Challah is tasty enough to be eaten on its own or with a spread of butter and jam, and a cup of coffee. 


I'm linking this Braided Challah to :
Breaking Bread Society, hosted by Cake Duchess
Bake Your Own Bread (BYOB) hosted by Girlichef
Recipe Box hosted by Bizzy Bakes
Cookbook Sundays hosted by Couscous & Consciousness


Braided Challah
(The Artisan Bread Machine by Judith Fertig)
Makes 1 loaf of 750gm (1-1/2 pound)
1 tsp salt (I use slightly less than 1 tsp)
1 large egg, beaten
3/4 cup lukewarm water (between 86F and 95F)
1/3 cup liquid honey
1-1/2 tbsp vegetable oil
2-3/4 cups bread flour (I added about 1/3 cup more)
1-1/4 tsp instant or bread machine yeast

Topping :
1 large egg, beaten
sesame seeds or poppy seeds (optional)

  1. Add salt, egg, water, honey and oil to the bread pan. Spoon flour on top of liquid. Add yeast.
  2. Select the Dough cycle and press Start.
  3. Line a large baking sheet with parchment paper. When the cycle is finished, transfer dough to a floured surface and punch down gently.
  4. Divide dough into thirds. Roll each third into a 16-inch (40cm) long rope. Braid ropes together, tucking ends under. Place on prepared baking sheet. Cover with a clean towel and let rise in a warm, draft-free place for 1 to 1-1/2 hours or until doubled in bulk.
  5. Meanwhile, preheat oven to 350F (180C). Brush braid with beaten egg and sprinkle with sesame seeds, if desired, pressing the seeds into the dough. Bake until risen and golden pan an instant-read thermometer inserted in the center registers 190F (90C). Remove from pan and let cool on a wire rack.

Friday, July 20, 2012

THB : Mocha-Cappuccino Marbled Coffee Cake

It's our sixth bake over at The Home Bakers (THB)!  We have completed 10 per cent of the book today! To all my dear fellow bakers at THB, give yourselves a pat on the back! Great work, everyone! Yay, 6 down and 54 more to go! 

For this sixth bake, our fellow baker, Lena from Frozen Wings has chosen Mocha-Cappuccino Marbled Coffee Cake. Lena must be a coffee addict like me, why else would she choose a cake with coffee flavour! wink! wink!  Thanks Lena, for a great pick, this cake is wonderful.


Made the full recipe and once again, my Wilton bundt pan did not disappoint me, the cake unmold perfectly!


As usual, I've reduced the sugar, original calls for 1-1/2 cups (300gm) of sugar, I only use 180gm which works out great for me. Mich from Piece of Cake has hi-lighted on the light coffee flavour, so I have added about half a tablespoon more of instant coffee. It turns out really nice, with coffee flavour and wonderful aroma. The ingredient calls for sour cream, I substituted with my own homemade yoghurt. The  cake  batter is flavoured with instant coffee powder and a third of the batter is mixed with some melted chocolate. These two batters are then dropped in the bundt pan alternately by the spoonfuls, and lastly make one swirl with a knife before baking.  But to me, one swirl is not enough, I did a couple of swirls (maybe 3 or four) and then the last swirl of a zig-zag motion, by then I thought, I might have combined the two batters! Luckily, it worked out fine, with nice swirls.


The cake is baked at 375F for about 55-60 minutes, but mine was done at 50 minutes. It smells wonderful while baking! This cake is really moist, with soft tender crumbs, and the taste of the coffee is definitely there! 


This is one of the cakes that improves when left overnight. It gets more moist and the flavours of the coffee and chocolate are more pronounced the next day. I can really taste the two different flavours of the coffee and chocolate in each bite, really good! My hubby took some to his office and this cake has positive reviews from his co-workers. Overall, a delicious cake, perfect with a cup of coffee, one that I would not mind making again.


Please stop by Lena of Frozen Wings for the recipe and to see the others bake on this cake, please visit The Home Bakers (THB).


Welcome to The Home Bakers


THB is currently baking from Coffee Cakes by Lou Seibert Pappas, if you would like to join in, please hop over to THB for details on how to become a member. Everyone's welcome!


Tuesday, July 17, 2012

Oven-Barbecued Chicken Wings

These Oven-Barbecued Chicken Wings are delicious! I bought the book New York Times Chicken Cookbook more than a year ago and have only tried 2 recipes from it. This book is a compilation of chicken recipes with different methods of cooking chicken, which are categorized into different sections. The sections falls under "roast, baked, grill, fried, steaming and poaching, crispy and crunchy, slow cooked and a meal in itself".  There are no photos at all in this book, but tons of delicious recipes, all from contributing chefs, restaurateurs, cookbook authors and other fine cooks. If you love chicken, this is the book to have!


I have about 1-1/2 dozen of chicken wings in my freezer and was searching for some baked recipes. Found this recipe from that book and made for dinner last week, together with Tomato Soup and Cheddar Cheese Bread. The barbecue sauce is super easy to make, I'm sure all the ingredients can be found in your own pantry. I happen to have all the ingredients in my pantry, so it was super convenient! I just love it, when I have what I need, without having to make a trip to the store to get something I am short of! 


I baked 18 chicken wings, but made the full recipe for the sauce. All the more to baste the chicken during baking, yum! I did not follow the steps from the instructions 1 to 4 as per the recipe below. What I did was, I marinated the chicken wing with the salt, pepper, paprika and oil, mix them well, cover and refrigerate for about 2 hours. Next, I arrange them on a baking sheet lined with aluminium foil and proceed from Step 5. At the end of baking time, I turned on the top broil in my oven, move the tray up and broil for 4-5 minutes, turn the chicken, broil for another 4-5 minutes until browned. Delicious with some fresh crunchy cucumbers! 


Oven-Barbecued Chicken Wings
(adapted from : "The New York Times Chicken Cookbook", Edited by Linda Amster)
(Recipe Contributer : Craig Claiborne with Pierre Franey)
24 chicken wings, about 4 to 5 pounds
salt to taste, if desired
2 teaspoons medium-grind black pepper
3 teaspoons paprika
1/2 cup corn, peanut or vegetable oil
1 cup tomato ketchup
1/4 cup honey
3 tablespoons red wine vinegar
3 tablespoons white vinegar
2 tablespoons Worcestershire sauce
1 teaspoon Tabasco sauce
1 tablespoon imported mustard
1 tablespoon finely minced garlic
4 tablespoons butter
1 bay leaf
  1. Preheat oven to 400 degrees.
  2. Fold the small tips of the chicken wings under the main wing ones so that the wings remain flat.
  3. Arrange the wings  in one layer in a baking dish so that they bake comfortably close together without crowding.
  4. Sprinkle with salt, pepper and two teaspoons of the paprika. Pour half of the oil over all and turn the wings in the mixture so that they are evenly coated. Arrange them on one layer with the small-wing side down.
  5. Place in the oven and bake for 15 minutes.
  6. Meanwhile, combine the ketchup, remaining oil, honey, vinegars, Worcestershire sauce, Tabasco sauce, mustard, garlic, butter, bay leaf and remaining paprika. Bring to a boil.
  7. Brush the wings lightly with sauce and turn them to the other side. Brush that side with sauce and continue baking 15 minutes.
  8. Brush the wings once more. Turn the pieces and brush this side once more. Continue baking 15 minutes.
  9. Continue turning, brushing and baking the chicken for 15 minutes longer or a total of about 1 hour.

Sunday, July 15, 2012

Jamie's Tomato Soup

"Cook Like A Star", an event organized by my baking buddy, Zoe from Bake For Happy Kids is a bi-monthly event where a celebrity chef will be featured for the whole month, and everyone is free to cook or bake from the chosen celebrity chef's recipes and join in the blog-hop fun! For this month of July, the featured chef is Jamie Oliver. I'm sure EVERYONE knows who Jamie Oliver is! 

Years ago when I first watched his cooking shows on TV, I find him a very "messy chef" LOL! There was one episode, when I watched him, opened his kitchen window, which is facing the busy street below, snipped off some herbs and straight into his cooking pot! He did not rinse them first, surely there must be some dust outside the kitchen window right above the busy street! And he mixes his minced meat with whatever ingredients or seasonings he added in, with his hands! And that's not all, he even toss a bowl of salad with his hands! At first, I was like, argh.... I would never use my hands to mix mince meat together! But then, he is Jamie Oliver, and that is his fuss-free style! And now, he is one of my favourite chefs today! *~*

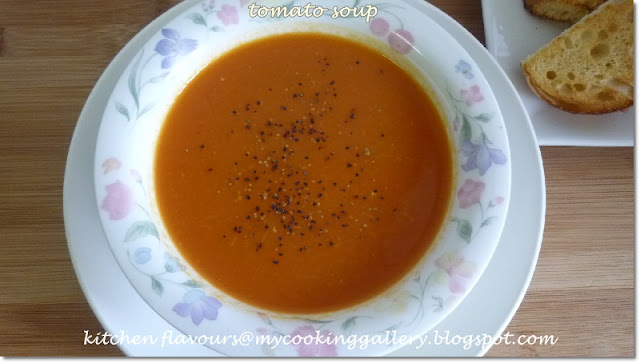
To join the blog-hop fun, I've made Jamie's tomato soup. This is a lovely soup, but then it is not as creamy and thick as the soups that I've eaten from western restaurants. I think those restaurants must have added some thickener to the soup. And I guess that the quality of the tomatoes definitely plays the top role in making a thick and creamy soup. I did not use plum tomatoes, since the store near my place do not have them and even if I do find them, it is very costly, Roma Tomatoes costs about more than RM30/kg, our local tomatoes are priced at RM2.90/kg, see the difference? So I used our local ripe tomatoes instead. Our local tomatoes are not as fleshy as the plum tomatoes, in fact they contain more juice, so that makes the soup not as thick. 


Nevertheless, with lots of seasoning of salt and pepper, as advised by Jamie, this makes a lovely soup. I used my homemade chicken stock, the last batch! Argh... I hate it when I use my last batch of homemade stock, that means that I have to make a fresh batch, and I do not like making stock, it takes a few hours to cook, cool, divide into containers, label and store! But once that's done, it is a relief to know that I have ready made stock at hand whenever I need! OK , back to my soup, we had the tomato soup with my homemade Cheddar Cheese Bread which I toasted till crispy, which is wonderful with the soup. This recipe makes quite a lot, we had this again with toasted bread the next day for lunch, and my kids was looking forward to the leftovers! The soup gets a little thicker and tastier the next day too!


I'm submitting this to :


I'm sharing this too with :
Cookbook Sundays hosted by Couscous & Consciousness
Recipe Box hosted by Bizzy Bakes

Tomato Soup
(adapted from "Jamie's Food Revolution" by Jamie Oliver)
Serves 6-8
2 carrots
2 celery stalks
2 medium onions
2 cloves of garlic
1-3/4 quarts chicken or vegetable broth
olive oil
2x14-ounce cans of plum tomatoes
6 large ripe tomatoes
a small bunch of fresh basil
sea salt
freshly ground black pepper

To make your soup :
Peel and roughly slice the carrots. Slice the celery. Peel and roughly chop the onions. Peel and slice the garlic.
Put the broth in a saucepan and heat until boiling.
Put a large saucepan on a medium heat and add 2 tablepsoons of olive oil. Add all your chopped and sliced ingredients and mix together with a wooden spoon. Cook for around 10 to 15 minutes with the lid askew, until the carrots have softened but are still holding their shape, and the onion is lightly golden.
Add the boiling broth to the pan with your canned and fresh whole tomatoes, including the green stalks that may still be attached to some of them (these give an amazing flavour-trust me!)
Give it a good stir and bring to a boil. Reduce the heat and simmer for 10 minutes with the lid on. Meanwhile, pick your basil leaves.

To serve your soup :
Remove the pan from the heat. Season with salt and pepper and add the basil leaves. Using an immersion blender or liquidizer, pulse the soup until smooth. Season again before dividing between your serving bowls.


Friday, July 13, 2012

Cheddar Cheese Bread : IHCC

This week, over at I Heart Cooking Clubs (IHCC), the theme is "Soups and Sides", where we are currently cooking from Rick Bayless's recipes. I was looking for a recipe for sides and found this at Frontera's Test Kitchen - Sides. This recipe was adapted from Carol Field's "The Italian Baker". Frontera's Test Kitchen version of this bread has some serrano chillies added in, but since I am serving this for my family, I left that out. The Test Kitchen recommends this bread to be served with tomato soup.


A lovely bread!


I used my bread machine to do the kneading, chose the cycle, Basic Dough. I find that the dough was rather wet, so I added in about 1/3 cup of bread flour. After the cycle has  completed, take out the dough and proceed as above, divide into half, shape them, cover with a kitchen towel and left to rise for about 1 -1/2 hours.


The dough is brushed over with some egg yolk wash, slashed over the top with 3 slashes, and bake in the oven for about 25 minutes until brown and golden.


 The lovely brown and golden loaves. They smell incredibly nice while baking, from the cheddar cheese! 


 When I bake this again, I would make one half with serrano chiles added in, for myself. This would make a great sandwich bread!


 This is a lovely bread, it has a soft crust and soft interior.  


We had slices of this bread toasted as a side with some homemade tomato soup.


Rick Bayless @IHCC button rounded


To see what the others are making, head on over to IHCC. If you are interested to join in, read all about this cooking club over at IHCC.

I'm sharing this with :
Bake Your Own Bread (BYOB), hosted by Girlichef
Recipe Box hosted by Bizzy Bakes


Cheddar Cheese Bread with Serrano Chiles
(source from : Frontera, Recipe from the Test Kitchen-Sides, Rick Bayless)
Ingredients
1 package dry active yeast (2-1/4 tsp)
1 cup warm water (between 105 to 115 degrees)
1/4 teaspoon sugar
2 large eggs plus 1 egg yolk for the egg wash
3 tablespoons olive oil (divided use)
3-3/4 cups all purpose flour plus extra bench flour (I use bread flour, plus an additional 1/3 cup as the dough was wet and sticky)
2 teaspoons salt (I use 1 tsp)
1-1/2 cups (5 ounces) shredded sharp cheese (I use 1 cup)
2 to 3 serrano chiles, stemmed and finely diced (I omitted this)

Directions :
Place the yeast in a small bowl, then add the warm water and sugar. Stir untill all the yeast has dissolved. Let sit for 10 minutes until the yeast becomes creamy. Pour into the bowl of your mixer with the dough hook attached. Mix in the 2 eggs and 2 tablespoons olive oil. Stop the mixer and scoop in the flour, salt, shredded cheese and serranos. Start the mixer slowly to incorporate the flour, then raise the speed to medium low and knead the dough for 3 to 4 minutes or until all the ingredients are evenly mixed and the bread has pulled away from the sides of the bowl.

Sprinkle your work surface with flour. Scrape the dough onto the surface and finish kneading until its smooth and elastic. Place the dough in a lightly oil bowl (the remaining 1 tablespoon), cover with plastic wrap and let rise until doubled, about 2 hours.

Turn the dough out onto the floured work surface. Cut the dough in half and shape each piece into a loaf. Fold the edges under the bottom to create a smooth top and sides. Place on baking sheet lined with parchment paper and repeat with the other half. Cover with a towel and let rise until doubled, about 1 hour.

Preheat your oven about 30 minutes into the second rise to 425 degrees. Just before baking, beat the remaining egg yolk with 1 tablespoon of water and brush this egg wash over the tops and sides of each loaf. Slash each loaf on the top with 3 parallel cuts using either a very sharp knife, a razor or a bread lame. This allows the steam to escape.

Bake for 25 to 30 minutes or until golden brown. Cool completely on a rack.