Monday, January 31, 2011

Stylish Blogger Award & Happy Chinese New Year Wishes

This special award has been forwarded to kitchen flavours by the lovely Melynda of Mom's Sunday Cafe.


In accepting this award, the following applies:

  1. Post linking back to the person that gave you the award.
  2. Share 7 random things about yourself.
  3. Award 15 recently discovered bloggers
  4. Drop them a note, and tell them about it!

Here goes :

Thank you, Melynda of Mom's Sunday Cafe, for this lovely award and your sweet words. Some of you may know Melynda, and some maybe not, if you have not been to Mom's Sunday Cafe, then drop by her lovely site, you will be glad you did. Melynda has a way with words, she has a style of writing that will leave a smile or two, and sometimes it will linger in your mind even long after you're read it!  Her stories and anecdotes about her family and those around her are a joy to read. And of course, she has a tremendous talent in the kitchen! Drop by her blog and see all the delicious food and treats that her family enjoys. Thank you, Melynda. 

Seven things about myself !
  1. I have a habit of reducing sugar in most dessert or cakes recipes which I think that some of you may noticed! I do not like stuffs that are overly sweet!
  2. I always wished that cheeses are more affordable here! 
  3. I try to restraint myself from buying more cookbooks! But sometimes, when I'm at the bookstore, I can't help it! Perhaps I should attend a "Cookbookshopoholic Anonymous"! He! He! I'm not that bad actually! But then, "Baking With Julia...by Dorie Greenspan" is on sale now, at a very low price... hmmm.... !!!!
  4. I'm still waiting for Book 4 on the Eragon series, though, by the time when they do publish it, I've got to start all over from Book 1! Memory is not as good as it used to be! Signs of getting old? Nah.......!
  5. Love to visit all your fantastic sites! There are many recipes that I have bookmarked, goodness knows when I'll be able to make these. Time and ingredients are mostly the main "obstacles"! 
  6. Love spicy food, the spicier the yummier! I eat chili almost everyday, either in a spicy dish or as an accompaniment! 
  7. I failed miserably at growing my own chili plants! They never survived after the first flowers! Perhaps they saw a 'hungry chili eater' who is always "staring" at them, and that gave them a scare! But I'm still trying!


The 15 recently discovered bloggers are as follow, most of them are recent, some not, they are all lovely blogs: 

Please drop by and say hello to these lovely blogs. Each of them have something different and special to offer,  with mouth-watering delicious yummies and beautiful photos.  Thank you!


******************************************************
I would like to wish all my Chinese foodie friends, family and readers,  

GONG XI FA CAI


Chinese New Year comments


May this year of the RABBIT brings you good health, great happiness,  wonderful love, joyful laughter,  sweet contentment, lots, lots, lots of prosperity, and all the good things that life can offer! 


Will be away for a week, see you when I get back!


**********************


Saturday, January 29, 2011

Milk Chocolate Ice Cream

Another creamy ice cream from David Lebovitz. This ice cream uses milk chocolate and I added in the chocolate chips, which is an option. Well, with kids in the house, this is not an option but a MUST! ^..^


This ice cream is really creamy and the taste of the chocolate is rather mild, as expected with milk chocolate, so if you intend to make this, do not skip the chocolate chips, they make this rather mild ice cream more chocolaty. The next time when I make this again, I'm going to try with bitter chocolate. 


I'm sharing this lovely dessert with :
Full Plate Thursday over at Miz Helen's Country Cottage
Sweets For A Saturday over at Sweet As Sugar Cookies
Recipe Swap Thursday over at Prairie Story


Milk Chocolate Ice Cream
(adapted from "The Perfect Scoop" by David Lebovitz)
Ingredients :
8 ounces (230gm) milk chocolate with at least 30 percent cocoa solids, finely chopped
1-1/2 cups (375ml) heavy cream
1-1/2 cups (375ml) whole milk
3/4 cup (150gm) sugar (I use 1/4 cup, which is actually quite sweet!)
Big pinch of salt
4 large egg yolks
2 teaspoons Cognac
3/4 cup (120gm) cocoa nibs or semisweet or bittersweet chocolate chips (optional)

Combine the milk chocolate and cream in a large, heatproof bowl set over a saucepan of simmering water. Stir until the chocolate is melted, then remove the bowl from the saucepan. Set it aside with a mesh strainer over the top.
Warm the milk, sugar, and salt in a medium saucepan. In a separate medium bowl, whisk together the egg yolks. Slowly pour the warm milk mixture into the egg yolks, whisking constantly, then scrape the warmed egg yolks back into the saucepan.
Stir the mixture constantly over medium heat with a heatproof spatula, scrapping the bottom as you stir, until the mixture thickens and coats the spatula. Pour the custard through the strainer into the milk chocolate mixture, add the Cognac, and mix together. Stir until cool over an ice bath.
Chill the mixture thoroughly in the refrigerator, then freeze it in your ice cream maker according to the manufacturer's instructions. During the last few minutes of churning, add the cocoa nibs, if using.

Thursday, January 27, 2011

Croissant Tuna Sandwich

On some days when I'm really lazy and needed a 'short' break from cooking, well, just to re-charge, simple meals that does not involve the stove is the answer! What could be more simpler than this? Bakery-bought croissant, a can of tuna, some veggie and we're done! The kids' are happy, I get to re-charge, works both ways!


This simple tuna croissant sandwich is great for lunch. My kids had this with a glass of cold drink, the weather right now is extremely hot!


After mixing the tuna, keep it cold in the refrigerator until needed. I prefer the tuna cold, instead of at room temperature. When spread on warm croissant, it is an absolute delight to eat!


Want to give this a try? Let me know when you do. Enjoy!

Tuna Croissant Sandwich
5 croissants
1 small can (about 200gm) tuna chunks in oil, drained
2-3 tbsp mayonnaise
2-3 tbsp thousand island dressing
1 small onion, finely chopped
salt to taste
black pepper to taste
lettuce
sliced tomato
sliced cucumber


  1. Drain tuna, discard oil. Lightly mash tuna chunks in medium bowl.
  2. Stir in the chopped onions, mayonnaise, thousand island dressing, salt and black pepper to taste. Cover and keep cool in the refrigerator until needed. It tastes better when eaten cold.
  3. To assemble croissant sandwich : Using a sharp knife, make a slit along the centre of the croissant to make a pocket. Do not cut through both ends. Place a piece of lettuce in the pocket extending over the sides. Place two slices tomatoes on one side and fill the pocket with tuna filling. You can sprinkle more black pepper over the top if you want! Enjoy! Great with a tall glass of cold orange juice!

Wednesday, January 26, 2011

Black Pepper Salmon with Baby Gai Lan (Chinese Broccoli)

I almost never cook salmon at home. We would usually have our salmons at restaurants and I especially love the ones served in Japanese restaurants where they are grilled to perfection! For one thing, salmon is very expensive, though now it is not as costly as several years ago. Secondly, this fish is always frozen as they are all imported. This fillet block that I bought from Tesco is the closest that I can find. Anymore fresher than this, I got to visit certain morning market, even then, it is not always available. 


I cooked this salmon fillet in a Chinese black pepper sauce stir-fry. It is really good eaten while it is still hot. I guess, any fish tastes good when eaten hot! Fish tends to be fishy when the dish gets cold.


This is a really easy dish to prepare. You may use any vegetables, if you do not like Gai Lan. Substitute with red, yellow and green pepper together with some red onions and some strips of fresh red chili. Gai Lan has a slight bitter vegetable taste to it, so it may not appeal to some of us. 


I'm submitting this salmon dish to "Culinary Smackdown January 2011 - Battle Salmon" over at Brenda's Canadian Kitchen, who is hosting this month's challenge. 


Black Pepper Salmon with Baby Gai Lan (Chinese Broccoli)
300gm salmon fillet, cut to cubes
300gm baby gai lan
1 small carrot, cut to julienne strips
2 cloves garlic, minced
3 slices ginger, cut to julienne strips
coarse black pepper
2 tbsp black pepper sauce
salt
cooking oil
1-2 tbsp water
1 tbsp chinese cooking wine


  1. Marinate salmon fillet with some salt and a generous sprinkling of coarse black pepper. Keep aside for about 15-20 minutes.
  2. Heat some oil and fry salmon until light brown and cooked. Dish out and keep aside.
  3. In a clean wok or saucepan, heat about 1 tbsp oil. Saute minced garlic and ginger strips until light brown and fragrant. Add in the black pepper sauce, stirring for about a minute over medium-low heat. Add in 1 tablespoon water. 
  4. Turn heat to high and stir in the baby gai lan and carrots together. Add a pinch of salt to taste. Keep on stirring until gai lan is wilted and almost done.
  5. Add in the salmon and stir to combine. Drizzle the Chinese cooking wine and dish out to a serving plate, serve while still hot. Enjoy!

Sunday, January 23, 2011

Fresh Tomato and Basil Loaf

My son loves this bread. He had this both for breakfast and lunch on Sunday! If you are looking for a great sandwich bread, this would be it! This bread is great as a simple sandwich for breakfast, with slices of ham and cheese. Delicious for lunch as well, simply add some lettuce, slices of tomatoes, cucumbers and a thick slice of ham or a patty burger, top with some of your favourite sauce, and you will have a very satisfying lunch, with a glass of cold orange juice! 

This is a lovely loaf of bread. I was looking for a sandwich bread and found this recipe from Jennie Shapter's "Bread Machine", this book belongs to my sis, I borrowed it to try out a few recipes, and I picked the right one! Fresh tomato and garden fresh basil leaves with the addition of ground black pepper makes this a really flavorful savoury bread. I reduced the salt from  1-1/2 teaspoons to just a little over 1 teaspoon, which I think is just about right, if you intend to serve this with ham or other savoury filling. If you are serving this to young children, I would advise to go easy on the black pepper. The taste of the black pepper is wonderful, my son did not complain, but the peppery taste is definitely there, and you can feel it with each bite. Perfect for me!


Simple sandwich of homemade bread with slices of ham and cheese makes a satisfying Sunday breakfast!


Good on its own, dipped in soups too!


Fresh basil leaves from the garden!


After twice folded, roll into a log and shape into an "S". Leave in oiled baking pan to rise.


After about an hour, it has risen above the top level of the baking pan. Brush with egg glaze and goes straight into the oven!


Wonderful aroma!


Really tasty!


Enjoy it spread with plain butter and a cup of hot black coffee!

I'm linking this lovely bread with
Full Plate Thursday at Miz Helen's Country Cottage.
Potluck Sunday at Mommy's Kitchen


Fresh Tomato and Basil Loaf
(adapted from "Bread Machine" by Jennie Shapter)
Makes : 1 loaf
15ml/1 tbsp extra virgin olive oil
1 small onion, chopped
3 plum tomatoes, about 200gm/7oz, peeled, seeded and chopped
500gm/1lb 2oz/4-1/2 cups unbleached white bread flour
2.5ml/1/2 tsp freshly ground black pepper
7.5ml/1-1/2 tsp salt (I use about 1-1/8 tsp, just right)
10ml/2 tsp granulated sugar
5m/1 tsp easy-blend dried yeast
15ml/1 tbsp chopped fresh basil

For the Glaze :
1 egg yolk
15ml/1 tbsp water

  1. Heat the extra virgin oil in a small frying pan or saucepan. Add the chopped onion and fry over a moderate heat for 3-4 minutes, until the onion is light golden in colour.
  2. Add the plum tomatoes and cook for 2-3 minutes, until slightly softened. Drain through a sieve placed over a measuring jug or bowl, pressing the mixture gently with the back of a spoon to extract the juices.
  3. Set the tomato and onion mixture aside. Make the cooking juices up to 280ml/10fl oz/1-1/4 cups with water (but see Variation). Set aside. When the liquid is cold, pour it into the bread machine pan. If the instructions for your machine specify that the yeast is to be placed first in the pan, reverse the order in which you add the liquid and dry ingredients.
  4. Sprinkle over the flour, ensuring that it covers the tomato and onion liquid. Add the ground black pepper, then place the salt and sugar in separate corners of the bread machine pan.
  5. Make a small dent in the centre of the flour (but not down as far as the liquid) and add the yeast.
  6. Set the bread machine to the dough setting, use basic dough setting (if available). Press Start. Then lightly oil a 23x13cm/9x5in bread tin.
  7. When the dough cycle has finished, remove the dough from the bread machine and place it on a lightly floured surface. Knock it back gently.
  8. Knead in the preserved tomato and onion mixture and the chopped fresh basil. You may need to add a little extra flour if the dough becomes too moist when you have incorporated the vegetable mixture.
  9. Flatten the dough and shape it into a 2.5cm/1in thick rectangle. Fold the sides to the middle and press down the edge to seal. Make a hollow along the centre and fold in half again. Gently roll it into a loaf about 40cm/16in long.
  10. Shape into an "S" shape and place in the prepared tin. Cover with oiled clear film and leave in a warm place to rise for 30-45 minutes. Meanwhile preheat the oven to 200C/400F/Gas 6.
  11. Make the glaze by mixing the egg yolk and water together. Remove the clear film and brush the glaze over the bread. Bake in the preheated oven for 35-40 minutes, or until golden.
VARIATION :
To intensify the tomato flavour of the loaf, substitute 15ml/1 tbsp sun-dried tomato puree for 15ml/1 tbsp of water when you are topping up the cooking juices in step 3.


Saturday, January 22, 2011

Apple Upside-Down Cake

This is a moist, delicious apple cake. The caramelized apples really goes well with the moist and tender butter cake. I toasted the walnuts but did not scatter them on the apples as it was suggested.  The cake taste really great even without the walnuts. I did reduce the sugar from 150gm to 100gm, and it turned out just right. Rose suggested to eat this cake with some dollops of bourbon cream on the side. I did not bother with the bourbon cream, two reasons, first, I do not have any and have never tried bourbon before, and secondly, I always prefer to eat my cakes without any accompaniment.  

The caramel is a little pale, I should have boiled the caramel a little longer to get a darker colour, the one in Rose's book, is a beautiful dark caramel. I'm afraid of burning the caramel and have to start over if I did! Well, the next time when I make this caramel, I'm gonna be more daring instead of playing it safe! Overall, this is a lovely cake to have with a cup of hot tea. The cake is moist, tender and the caramelized apples have just the right balance of sweetness. 


Apple Upside-Down Cake
(adapted from "Rose's Heavenly Cakes" by Rose Levy Beranbaum)
Apple and Walnut Topping
3-1/4 cups (1 pound/454 grams) 1-1/4 pounds of apples (about 2 large), peeled, cored and sliced 1/4 inch thick
1 teaspoon lemon juice
1/3 cup (2.5 ounces/72 grams) firmly packed, divided, light brown sugar, preferably Muscovado
4 tablespoons (1/2 stick/2 ounces/57 grams) divided, unsalted butter
2/3 cup (2.2 ounces/66 grams) walnut halves

SPECIAL EQUIPMENT : One 9 by 2-inch round cake pan, encircled with a cake strip, bottom coated with shortening, topped with a parchment round / Baking stone (optional)

PREHEAT THE OVEN : Twenty minutes or more before baking, set an oven rack in the lower third of the oven, set a baking stone, if using, on the rack and preheat the oven to 350F/175C.

MAKE THE APPLE TOPPING  : In a medium bowl, toss together the apples, lemon juice, and 2 tablespoons of the brown sugar. Allow the mixture to sit for at least 30 minutes or up to 1-1/2 hours. Drain the apples, reserving their liquid.
In a small saucepan, preferably nonstick, melt the butter. Use about 1 tablespoon to coat the parchment-lined bottom and the sides of the cake pan.
Add the remaining brown sugar and the reserved liquid that has drained from the apples to the butter remaining in the saucepan. Bring to a boil, stirring constantly with a light-coloured silicone spatula, then stop stirring, but leave the spatula in place to judge the colour, and simmer for about 3 minutes, until bubbling thickly and deep amber in colour.
Pour this mixture (do not scrape) into the prepared cake pan, tilting to coat the entire bottom. Don't worry if the mixture hardens; it will melt during baking. Place the apple slices, overlapping slightly, on the bottom and around the sides of the pan. Set aside.

TOAST THE WALNUTS : Spread the walnuts evenly on a baking sheet and bake for about 7 minutes to enhance their flavor. Stir once or twice to ensure even toasting and avoid over-browning. Cool completely. Chop coarsely and set aside.

Batter :
3 large egg yolks, at room temperature (2 ounces/56 grams)
1/2 cup (4.2 ounces/121 grams), divided, sour cream
1-1/4 teaspoons pure vanilla extract
1-1/2 cups cake flour (150 grams)  (or 1-1/3 cups bleached all-purpose flour),  sifted into the cup, leveled off
3/4 cup (5.3 ounces/150 grams) superfine sugar (I use 100gm)
3/4 teaspoon baking powder
1/4 teaspoon baking soda
1/4 teaspoon salt
9 tablespoons (1 stick plus 1 tablespoon) (4.5 ounces/128 grams) unsalted butter

MIX THE LIQUID INGREDIENTS : In a medium bowl, whisk the yolks, 2 tablespoons of the sour cream, and the vanilla just until combined.

MAKE THE BATTER : In the bowl of a stand mixer fitted with the flat beater, mix the flour, sugar, baking powder, baking soda, and salt on low speed for 30 seconds. Add the butter and the remaining sour cream. Mix on low speed until the dry ingredients are moistened. Raise the speed to medium and beat for 1-1/2 minutes. Scrape down the sides of the bowl.
Starting on medium-low speed, gradually add the egg mixture to the batter in two parts, beating on medium speed for 30 seconds after each addition to incorporate the ingredients and strengthen the structure. Scrape down the sides of the bowl. Using a silicone spatula, drop the batter in big blobs on top of the apples. Then smooth the surface evenly with a small offset spatula while keeping the apples in an attractive pattern.

BAKE THE CAKE : Place the pan in the oven on the stone, if using it. Bake for 35 to 45 minutes, or until golden brown, a wire cake tester inserted in the center comes out clean, and the cake springs back when pressed lightly in the center.

UNMOLD AND COOL THE CAKE : Run a small metal spatula between the sides of the pan and the cake, pressing firmly against the pan, and invert the cake at once onto a serving plate. Leave the pan in place for 1 to 2 minutes before lifting it off. If any apple slices have stuck to the pan, use a small metal spatula to place them back on the cake. Scatter the toasted walnuts on top. Serve warm or room temperature. If warm, serve the bourbon whipped cream, if using, on the side instead of on top of the apples.

Bourbon Whipped Cream
Makes : 1-1/3 cups/4 ounces/116 grams
1/2 cup (4 fluid ounces) (4 ounces/116 grams) heavy cream, cold
1 tablespoon (0.5 ounce/14 grams) bourbon, such as Maker's Mark

MAKE THE BOURBON WHIPPED CREAM : In a mixing bowl, combine the cream and bourbon and refrigerate for at least 15 minutes. (Chill the mixer's beaters alongside the bowl). Whip the mixture, starting on low speed, gradually raising the speed to medium-high as it thickens, until the cream mounds softly when dropped from a spoon. If not serving it at once, cover and refrigerate for up to 6 hours.

Friday, January 21, 2011

Minced Meat with Potatoes and Canned Green Peas

I have a can of green peas in my pantry and wanted to use it up. I immediately thought of this dish. This is a dish that brings back childhood memories. My mother used to cook this for us when we were little. We love eating this with plain white rice. We were poor back then and a big can of green peas with some minced meat or a can of luncheon meat and lots of potatoes could feed all of us with a full, satisfied tummy. And we love it! Now my kids love this!


This dish is extremely easy, quick and delicious eaten with bread too! Give this a try and enjoy!

I'm sharing this simple, satisfying dish with :
Full Plate Thursday at Miz Helen's Country Cottage
Recipe Swap Thursday at Prairie Story


Minced Meat with Potatoes and Canned Green Peas
Ingredients :
200gm minced pork or chicken
3 medium potatoes
1 small can green peas
1 medium onion, sliced to 8 wedges
2 tbsp oyster sauce
1/2 tsp chicken powder seasoning (optional)
2 tsp black soy sauce
1 tbsp light soy sauce
white pepper to taste
1/2 cup water
some cooking oil

Method :
  1. Marinate minced pork or chicken with oyster sauce and set aside.
  2. Peel potatoes, cut to quarters lengthwise and slice to about 5mm thickness across. Heat some oil and fry potatoes, until light brown and cooked. Dish out and drain. Keep aside.
  3. In remaining oil (about 2 tablespoons) remove some oil if excess, fry onions till fragrant, about 2 minutes. Add in minced meat and stir until meat is no longer pink.
  4. Add in potatoes, whole can of green peas including brine, water, black soy sauce, white soy sauce and pepper to taste.
  5. Simmer for about 5 minutes. Adjust taste accordingly. Serve hot. Enjoy with plain white rice.

Wednesday, January 19, 2011

Kadhai Murgh

This delicious Indian dish is really good. A word of caution, if you are serving this with plain white rice, make sure you cook plenty of rice. You would want to have a second helping!


I love spicy Indian food. I bought some spices from an Indian store, and couldn't wait to try out more Indian curries from a few of my books. The store that I went to, is fantastic, they have all the spices which I have been looking for ages that I could not find anywhere else. It is like walking into a goldmine!  There will definitely be a lot of curry recipes coming! 


I found out about this store from one of my Indian cooking books, right at the top right of the last page. I did a search from the web, and was really excited that they have all the spices that I was looking for! Bingo!  Felt like I have hit the jackpot (not that I have before!). Felt so silly, as did not notice this all along, instead, went everywhere to look for the spices!


This dish is a little sour, salty and hot. I omitted the pounded red chili as I'm afraid it might be too hot for my kids. One of the ingredients is pounded black pepper, which I added half a teaspoon more. The flavours from the black pepper is really wonderful. If you do not like a spicy curry, you can omit the chili. Or if you are like me, who loves fiery hot stuff, then, by all means, add the chili!  According to the chef, this dish is popular in Lahore, Pakistan.


The name of Kadhai Murgh sounds really nice. Kadhai means 'wok' or 'vessel', and Murgh means 'chicken'. 
I couldn't wait to try other Murgh recipes and other curries like legumes and vegetables! Give this a try, you'll love it!


"Passage Thru' India" is a well-know Indian restaurant in Kuala Lumpur, that has won numerous awards. This book is a collection of some of the best Indian dishes served at the restaurant. Chef PS Kadam, who has been in this restaurant since 1996, has simplified the methods for use in home-cooking.

I'm linking this post with Copycat Club at Buttercream Barbie

Kadhai Murgh
(adapted from "Passage Thru' India" by Chef PS Kadam)
Serves : 4
Preparation Time : 35 minutes
Cooking Time : 30 minutes

Ingredients :
500gm chicken
2 tbsp ginger garlic paste
1 pinch turmeric powder
salt to taste
100 ml cooking oil
1 pinch / 5 gm cumin (jeera) seeds
20gm / 2 tsp ginger and garlic, chopped
10gm / 2 green chilles, chopped
400gm / 4 tomatoes, chopped
1 cup water
1 tbsp / 1 red chilli, pounded
1 tsp / 5gm black pepper, pounded
1 tbsp / 10gm coriander seeds, pounded
50 gm / 1 capsicum, cut lengthwise
1 pinch garam masala powder
1 tsp kasoori methi (dried fenugreek leaves)
2 tbsp coriander leaves

Method :

  1. Clean chicken and remove the skin. Cut into cubes of equal size and marinate with 1 tbsp ginger garlic paste, 1 pinch tumeric powder and salt for 30 minutes.
  2. Heat oil in a kadhai (wok). Saute cumin, chopped ginger, garlic and green chillies for 10 seconds.
  3. Stir in 1 tbsp ginger garlic paste and saute for 30 seconds.
  4. Put in chopped tomatoes and keep stirring till tomatoes are mashed.
  5. Add chicken cubes and stir occasionally. Pour in some water and simmer on low flame.
  6. When the chicken is almost done, add the pounded spices and capsicum, masala powder, kasoori methi, coriander leaves and salt.
  7. Cook till chicken becomes tender and gravy thick. Sprinkle water and stir. Adjust the seasoning. The gravy should be thick, the taste hot and sour, and the colour orange red.
  8. Remove from heat and put in a serving dish. Garnish with green coriander, ginger and tomato slices. Serve with chapatti, naan, roti or biryani rice.

Monday, January 17, 2011

Steamed Stuffed Winter Melon Rolls

Did you know that winter melon can grow as large as 80cm in length! That's really huge! The one I saw in the market is really big, I bought just a slice, about 5" wide and it already weighs almost 1 kg! Winter melon is popular among the Chinese. It can be used in stir-fries, soups and can be preserved into candied winter melon, which are used to prepare sweet desserts as well as in savoury cooking. For soups, the flesh is usually boiled with either chicken or pork together with a few other Chinese herbs. 

For dinner the other night, I steamed it, stuffed with minced meat. The dish is really tasty. I found this lovely recipe from a book on Chinese Steaming recipes. I doubled the recipe, which yields about 18 rolls. I have however made mine with some changes. Have you tried winter melon before? How do you cook this melon? 


Just a thick slice of this melon is enough for a dish!  


 Place about a tablespoon of the filling in the centre of the melon slice, which has been boiled in water to soften. Roll it up and place on steaming plate.


A plate of rolled stuffed melon ready to be steamed.


 The sauce is thickened and poured over the stuffed melon.


  Enjoy !


Enjoy !

I'm sharing this with :
Potluck Sunday at Mommy's Kitchen
Full Plate Thursday at Miz Helen's Country Cottage
Fun w/food Friday at Paisley Passions

Steamed Stuffed Winter Melon Rolls
(with some changes, original source from :"Steamed Cuisine")
Ingredients A :
200gm winter melon
some shredded spring onion
cornstarch solution, for thickening

Ingredients B :
100g fish paste
100gm minced pork
100gm prawn paste
1 tbsp chopped carrot
1 tbsp chopped spring onions
1 tbsp choppped water chestnuts

Seasoning :
1/2 tsp salt
1/2 tsp pepper
1/2 tsp sesame oil
1/2 tsp corn flour

Sauce :
1 tsp sesame oil
1/2 tbsp light soy sauce
1 tbsp "Shaoxing" wine (Chinese cooking wine)
stock - use the stock collected during steaming

Method :

  1. Cut winter melon into thin slices, blanch in the boiling water until soften. Remove, rinse under running cool water, drain well and keep aside.
  2. To make filling, mix entire ingredients (B) and seasoning, stir until sticky.
  3. Spoon in some filling onto each winter melon  slice, roll it up. Arrange on a heatproof plate. Steam in a preheated steamer, over medium high heat for 10 minutes until cooked.
  4. After steaming, remove rolls carefully to a serving plate. There will be some stock collected during the steaming. This stock is really tasty. Pour this stock into a small saucepan. Add in the sesame oil, light soy sauce or salt  to taste, Chinese cooking wine and allow to boil for a few minutes. Thicken with some cornstarch solution and pour thickened gravy onto the stuffed rolls. Garnish with spring onions and serve hot. Enjoy!   
The extra bits and pieces of the melon flesh, after slicing for the rolls, can be used for soups or stir-fries)


Saturday, January 15, 2011

Chicken Burgers with Garlic-Rosemary Mayonnaise

This chicken burger is delicious. Why shouldn't it be? Because this recipe is from the famous, Giada De Laurentiis, taken from www.foodnetwork.com. Rosemary, garlic and mayonnaise work out great together, both in the burger as well as on the buns. The addition of this mixture in the burger makes it really moist, tender and absolutely delicious! Even though the recipes calls for the burger to be grilled, I fry it in very little oil in a non-stick pan. Drain on paper towel, then toast the burger buns a minute or two in the pan, and it's ready to be enjoyed.


This is so simple and so easy that it takes only minutes to prepare, and really delicious! My kids are already asking me to make this again!


This is the first Giada's recipe that I tried. Check out the great reviews from foodnetwork on this burger recipe.  Now I'm really looking forward to her other recipes.  No idea what to prepare for your weekend lunch? Try this!


Chicken Burgers with Garlic-Rosemary Mayonnaise
(source from : www.foodnetwork.com courtesy Giada De Laurentiis)
Prep. Time : 20 min
Cook Time : 15 min
Serves : 4 servings (I got 5 good-sized burgers)

Ingredients :
Mayonnaise :
1 cup mayonnaise
1/4 cup chopped fresh rosemary leaves
1 clove garlic, minced

Burgers :
1 pound ground chicken
1/2 teaspoon kosher salt
1/4 teaspoon freshly ground black pepper
4 sandwich rolls or burger buns
1/4 cup olive oil
1 cup arugula, divided

Directions :
For the mayonnaise: In a small bowl, mix together mayonnaise, garlic and rosemary. Set aside.

For the burgers : Preheat a gas or charcoal grill or place a grill pan over medium-high heat. In a large bowl, add the ground chicken, 1/2 teaspoon salt, 1/4 teaspoon pepper, and 1/2 of the mayonnaise mixture. Using clean hands, gently combine the ingredients and form the chicken mixture into 4 patties. Place the burgers on the grill and cook for about 7 minutes on each side. Transfer to paper towels and let rest for a few minutes.

Brush the cut side of each roll with the olive oil and 1 teaspoon of the mayonnaise mixture. Grill for 1 to 2 minutes until slightly golden.

To assemble the burgers : Spread a dollop of the remaining mayonnaise mixture on the tops and bottoms of the toasted buns. Place the chicken burgers on the bottom halves of the buns. Top each with 1/4 cup of arugula and finish with the top half of the buns.

Thursday, January 13, 2011

Stir-Fry Celery with Fresh Squid

Celery is rich with vitamin C, a vitamin that helps to support the immune system. Celery belongs to the same member family as carrots, parsley, fennel and dill. Here are some tips that I've found from the web, you might be interested to know how to select, store and prepare this wonderful veggie.


How to select :
  • Choose celery that looks crisp and snaps easily when pulled apart. It should be relatively tight and compact and not have stalks that splay out.
  • The leaves should be pale to bright green in colour and free from yellow or brown patches. Sometimes celery can have a condition called "blackheart", which is caused by insects. To check for damage, separate the stalks and look for brown or black discoloration.
  • In addition, evaluate the celery to ensure that it does not have a seedstem - the presence of a round stem in the place of the smaller tender stalks that should reside in the center of the celery. Celery with seedstems are often more bitter in flavour.


How to store :

  • To store celery, place it in a sealed container or wrap it in a plastic bag or damp cloth and store it in the refrigerator. If you are storing cut or peeled celery, ensure that is is dry and free from water residue, as this can drain some of its nutrients.
  • Freezing will make celery wilt and should be avoided unless you will be using it in a future cooked recipe.


How to prepare :

  • To clean celery, cut off the base and leaves, then wash the leaves and stalks under running water.
  • Cut the stalks into pieces of desired length. If the outside of the celery stalk has fibrous strings, remove them by making a thin cut into one end of the stalk and peeling away the fibers.
  • Be sure to use the leaves - they contain the most vitamin C, calcium and potassium - but use them within a day or two as they do not store very well.
  • Celery should not be kept at room temperature for too long since, because of its high water content, it has a tendency to wilt quickly. If you have celery that has wilted, sprinkle it with a little water and place it in the refrigerator for several hours where it will regain its crispness.


Celery is really a versatile veggie, suitable in stir-fries, soups, stews and absolutely delicious eaten raw in salads and dips. A stalk or two of celery in a pot of soup, stock or stew, really makes a big difference. It is extremely full of flavour, not to mention it's nice fragrant aroma. 

This is another Chinese stir-fry dish that I really enjoy. The celery and the squids are cooked separately and then combined in the final stir-fry, as the squids will get tough when overcooked.  If you are like me, as I love stir-fry vegetables where they remain crisp and fresh, then try this dish. 


Stir-Fry Celery with Fresh Squids
3 medium squids, cleaned and cut into rings
3 stalks of celery, sliced to about 3mm thickness on the diagonal
1 small carrot, cut to half lengthwise and sliced to 3mm thickness on the diagonal
3 cloves garlic, minced
1/4 cup water
2 tbsp cooking oil
salt to taste
dash of white pepper
1/2 tsp chicken powder seasoning

  1. Heat about 1 tbsp oil and saute half of the minced garlic till light brown and fragrant. Add in the celery and carrots, about 2 tbsp water, stir, cover and cook for about 5 minutes, until vegetable is cooked but still remain crunchy. Dish out and keep aside.
  2. Heat remaining 1 tbsp oil and saute remaining minced garlic till light brown and fragrant. Add in the squids, stir for about a minute and add in the celery and carrots, water, salt, chicken powder seasoning and pepper to taste. 
  3. Keep on stirring for about 3 more minutes until squid is cooked and tender. Do not overcook squid. Dish out and enjoy with plain white rice.

Tuesday, January 11, 2011

Cardamom-Scented Green Tea with Saffron

Saffron has always been on my list of spices to try out "one day". As with many other herbs, spices, vegetables and other ingredients that are not an everyday or a common thing that can be found in my kitchen, it has always been put on hold again and again. Mainly because, these ingredients are not easily available and even if they are, some of them can be very costly! When Sue from Couscous & Consciouness started the event "Make It With ..... Mondays", with a different ingredient each week, saffron being the first on the list, I knew it that I must really find a way of getting some saffron, otherwise it will be just something on my list! 


There are a few other spices and herbs that I have been looking for so long, as the shops and supermarkets around my area do not sell these ingredients. I finally found an Indian store that supplies most spices which they import from India. Went to the store together with my sisters (who also love baking and cooking, and we all love Indian spicy food!), and came back very happy, because I found the spices and herbs that I could not find anywhere else, saffron being one of them. 


This cardamom-scented tea with saffron is taken from one of my cooking books "660 Curries" by Raghaven Iyer. According to him, this is a Kahsmiris brew which is usually served for the esteemed guests at weddings, family gatherings, and special meals, especially after a rich curry dinner.  I was very curious to know the taste of the blanched ground almonds in the tea. The tea has a lovely aroma from the spices and at first, I add only about half teaspoon of the ground almonds to the cup, as I wasn't sure whether I'll like it or not. When I took a sip, I can't actually taste the almonds, and increased a little bit more until I can get the nutty taste of the almonds. This is not so bad, it is quite nice actually. As I took a sip and the next, I find that it grows on you. It is a really pleasant tea with the aroma from the spices and the nutty taste from the almonds.  I wouldn't mind having this tea again. Have you tried having tea with saffron and ground almonds in it? If you have not, then give it a try.


There will be more recipes with saffron which I intend to try. This is only the first of the many that I have in mind! Thank you Sue, for the inspiration, and I am very happy indeed, that at least one of the many ingredients in my to-try-list has been crossed out!

I'm sharing this lovely tea with of course, "Make It With ..... Mondays" over at Couscous & Consciousness. Hop over to Sue's blog and find out what it is all about, and hope to see you there!

Cardamom-Scented Green Tea with Saffron
(adapted from "660 Curries" by Raghavan Iyer)
1/4 cup loose green tea leaves
1/4 teaspoon saffron threads
4 to 6 green or white cardamom pods
1 to 2 cinnamon sticks (each 3 inches long)
4 teaspoons white granulated sugar
1/4 cup silvered blanched almonds, ground


  1. Bring 5 cups of water to a rolling boil in a medium-size saucepan over medium-high heat. Add the tea leaves, saffron, cardamom pods and cinnamon sticks. Stir once or twice.
  2. Allow the water to come to a boil again, uncovered, and cook, stirring occasionally, until the leaves release their flavor and the spices perfume the tea (not to mention the air), about 5 minutes.
  3. Stir in the sugar and remove the pan from the heat.
  4. Spoon 1 tablespoon of the ground almonds into each mug. Setting a tea strainer, over each mug, strain the tea into the mugs. Serve immediately, and pass around teaspoons to let the folks stir the tea before they sip it.

Sunday, January 9, 2011

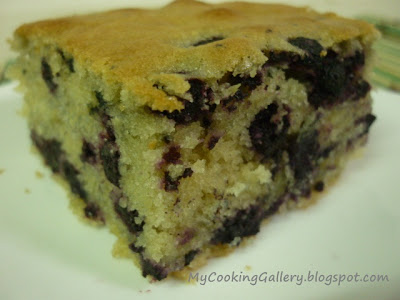
Blueberry-Brown Sugar Plain Cake

If you have this book of Dorie's BFMHTY, go make this cake, if you do not own one, you can still make this! This cake is exactly the kind of cake I love. It is so tender, buttery, soft, moist and bursting with blueberry. Downright yummy! Dorie recommended the baking pan size of 11x7 inch, which I think is too big. I use a 8x8" pan and it turned out perfect. I only use 3/4 cup brown sugar, but I think that the original of 1 cup would be OK too, it is not overly sweet, and absolutely delicious! I omit the cinnamon and add 1 teaspoon vanilla extract instead. Another winning recipe from Dorie!


I'm linking this to :
Potluck Sunday at Mommy's Kitchen
Full Plate Thursday at Miz Helen's Country Cottage

Blueberry-Brown Sugar Plain Cake
(adapted from "Baking From My Home To Yours" by Dorie Greenspan)
This "plain cake" - no crumbs, streusel, nuts, icing or filling - is just plain appealing. It's got a soft crumb, a strong streak of caramel brown sugar flavor and the here-and-there surprise of sweet and tart berries. It's a perfect "daylight" cake, good for breakfast, brunch or lunch, and it can easily be a picnic cake, because it's eminently packable.
Ingredients :
1-1/3 cups all-purpose flour
2 teasponns baking powder
1/2 teaspoon ground cinnamon (optional) (I omit this, and add 1 tsp vanilla extract)
1/8 teaspoon plus a pinch of salt
2 large eggs, separated
1 stick (8 tablespoons) unsalted butter, at room temperature
1 cup (packed) light brown sugar
1/2 cup whole milk
1 pint blueberries - fresh, preferably, or frozen (not thawed)
confectioners sugar, for dusting

Getting Ready :
Center a rack in the oven and preheat the oven to 375 degrees F. Generously butter an 11x7 inch baking pan (a Pyrex pan is great) and place it on a baking sheet.

Whisk together the flour, baking powder, cinnamon, if you're using it, and the 1/8 teaspoon salt.

Working with a stand mixer fitted with the whisk attachement or with a hand mixer in a large bowl, beat the egg whites with the pinch of salt until they form firm, glossy peaks. Gently scrape the whites into a clean bowl if using a stand mixer. Fit the mixer with the paddle attachment, if you have one. (There's no need to clean the mixer bowl). Put the butter and sugar in the mixer bowl, or in another large bowl if using a hand mixer, and beat on medium speed until creamy. Add the egg yolks and beat 2 minutes more. Reduce the mixer speed to low and add half the dry ingredients, then all of the milk and then the remainder of the dry ingredients, adding each new batch as soon as the previous batch has been incorporated.

Switch to a large rubber spatula and lighten the batter by stirring in about one quarter of the stiffly beaten egg whites. Fold in the rest of the whites, working as gently as you can. Since the cake batter is heavy, it's only natural you'll deflate the whites a little - don't be concerned. Still working with as light a hand as possible, fold in the blueberries, and scrape the batter into the prepared pan.

Bake the cake for 35 to 40 minutes, or until it is golden and a thin knife inserted into the center comes out clean. Transfer the cake to a cooling rack and cool in the pan for about 30 minutes before dusting the top with confectioners' sugar and serving warm.

Serving : Once the cake is cool enough to cut, it's cool enough to eat. Give the top another dusting of confectioners' sugar if the first one has settled into the cake, and cut the cake into squares about 2 inches on a side. I like the cake plain, but if you're looking for an accompaniment, look at blueberry jam or a bowl of lightly sweetened sour cream or creme fraiche.

Storing : Well covered, the cake will keep at room temperature for about 3 days. You can wrap the cake airtight and freeze it for up to 2 months, but it really is best fresh.

Friday, January 7, 2011

Rosemary Ciabatta Rolls

Now that the new school term has started, it is back to our dear old routine daily life! December has been a very busy and hectic month. January will be busy too, with some planning and preparation for the coming Chinese New Year which falls on 3rd February. I am actually looking forward for some quiet time when all the festivities excitement is over!


Baked this lovely Rosemary Ciabatta Rolls for my kids' after school snack. This is great dipped in hot mushroom soup. The crust is crispy and the inside is dense, soft and moist, with the lovely fragrance of rosemary! Best eaten on the day it is baked, it is not as soft the next day, but really good too dipped in hot soup. This recipe is from the book by Anne Sheasby, a Christmas present from my sister.  Already tried two recipes from this book, and I like them both. Looks like there will be more baking from this book!


I'm sharing this with these lovely sites :
Recipe Swap Thursday at Prairie Story
Cookbook Sunday at Brenda's Canadian Kitchen
Full Plate Thursday at Miz Helen's Country Cottage


Rosemary Ciabatta Rolls
(adapted from "The Big Book of Bread" by Anne Sheasby)
Preparation Time : 20 minutes, plus mixing and kneading time in breadmaker, plus rising
Cooking Time : 20 minutes
Makes : about 10 good-sized rolls

1-1/2 cups water
2 tablespoons olive oil
3-2/3 cups strong white flour, plus extra for dusting
1 teaspoon salt
1 teaspoon granulated sugar
1 teaspoon fast-action dried yeast
1 tablespoon finely chopped fresh rosemary
milk, for glazing


  1. Please note, bread machines vary, so add the ingredients to the bread pan in the order specified in your instruction booklet (if this differs from the instructions given here).
  2. Pour the water into the bread machine pan, then add the oil. Sprinkle over the flour, covering the water completely. Add the salt and sugar, placing them in separate corners of the bread pan. Make a small indent in the center of the flour and add the yeast. Close the lid, set the machine to the Dough setting, then press Start.
  3. Meanwhile, grease or flour 2 cookie sheets and set aside. When the dough cycle has finished, remove the dough from the machine, punch it down on a lightly floured worktop, then knead the chopped rosemary evenly into the dough.
  4. Divide the dough into about 10 equal portions. Roll and shape each piece into a round or oval, then flatten slightly. Place on the cookie sheets, spacing them well apart. Cover and let rise it a warm place for about 30 minutes, or until doubled in size.
  5. Preheat the oven to 200C/400F/gas mark 6. Brush the top of the rolls with milk and dust with flour. Bake in the oven for about 20 minutes, or until they are golden brown and sound hollow when tapped underneath. Transfer to a wire rack to cool. Serve warm.